When we parted on Friday, I was getting ready to launch into a “quick” embroidery project with a deadline – this embroidered book cover for a prayer book for Adele’s First Communion, which happened to be yesterday.
As usual, I underestimated the time necessary to finish the embroidery and the book cover. I don’t know why I always underestimate the time it will take to do these things, but alas, I’m a Super Underestimator, when it comes to time and stitching!
Today, I’ll take you through the embroidery for the book cover, show you the mistakes and foibles that I certainly didn’t correct, and discuss some changes that could easily be made to simplify the design. And tomorrow, I’ll show you how I finished the book cover.
I’m using this cross, grapes and wheat embroidery pattern for the cover of the book.
The ground fabric is linen cambric, which is backed with a high quality white cotton muslin (Southern Belle muslin).
I’m using these DMC threads, which I showed you on Friday. The book cover will most likely need to be washed a couple times, and I wanted threads that could easily handle a good washing.
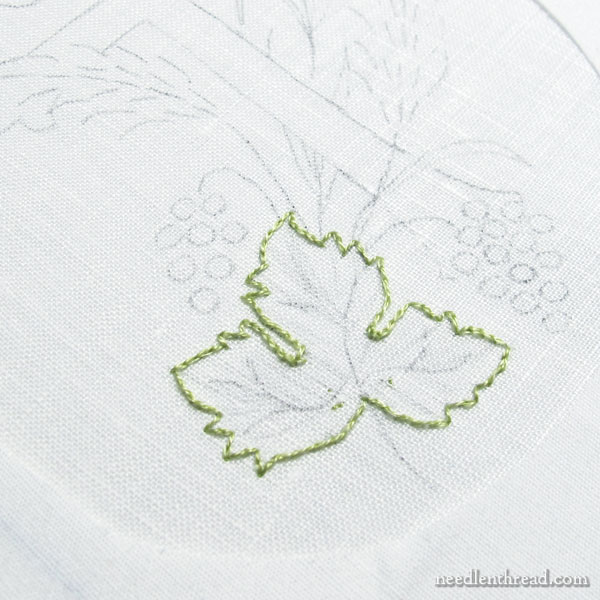
So, using one strand of DMC floss in the lightest green, I started with a split stitch line around the grape leaf, as a foundation for the long and short stitch.
When I work the long and short stitch, I generally set in long stitches that mark the direction I want the stitches to move in, and on a leaf, the direction of growth is usually the common approach. Everything on this type of leaf angles towards the growth point where the stem meets the leaf and from the center spine that grows out of that point.
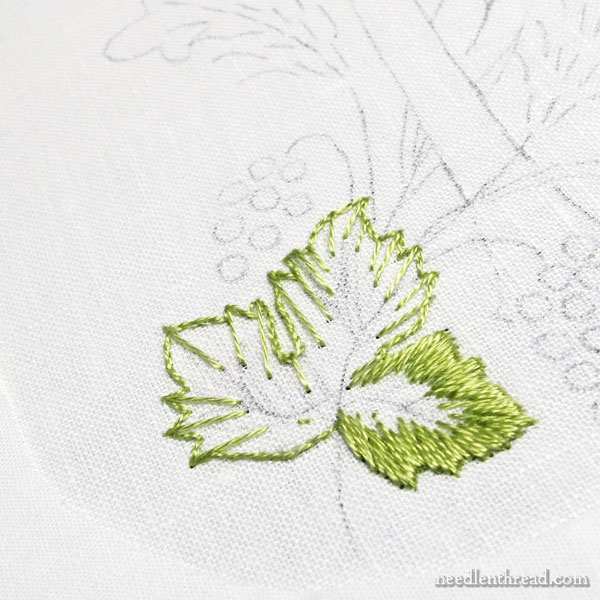
After the longer directional stitches are in, I go back and fill in between them, working longer and shorter stitches randomly.
So there’s the first layer of long and short stitch. There were a few places that would have benefitted from an adjustment at this point, but ….
Time, you know!
So I slogged on!
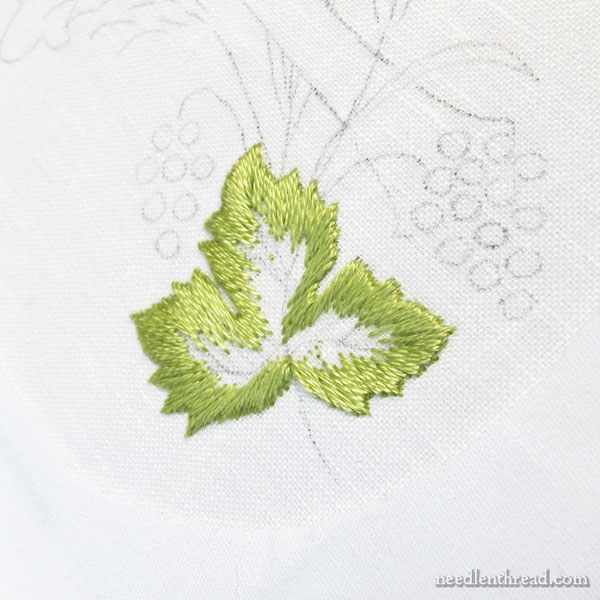
And here’s the leaf, finished. There are four shades of green in that leaf – three for the long and short stitch and a darker green for the stem and veins.
If I had been working at a more leisurely pace, I would have especially adjusted the lower left side of the leaf. I wasn’t really happy with that area, but…
Time, you know!
And so I slogged on!
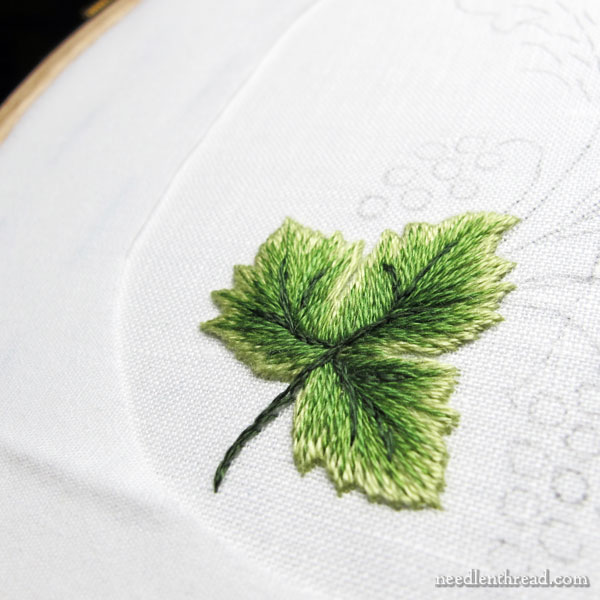
Long and short stitch takes forever compared to other stitches, so if you’re in a hurry, it’s probably not the best choice for the leaf on this pattern. You could easily substitute a stem stitch filling, a chain stitch filling, or even just outline the leaf and its veins. The effect wouldn’t be the same, but it would still look nice.
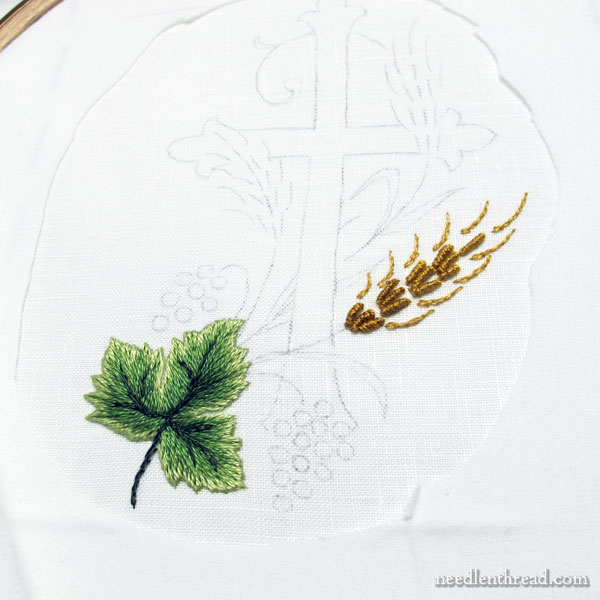
The heads of the wheat worked up pretty quickly – they’re just a series of bullion knots for the kernels with little stem stitch hairy lines for the beard.
I used two strands for the bullion knots and one strand for the stem stitch lines for the beard.
With the bullion kernels, I mixed the colors. I used one strand of a medium brownish and one strand of a yellow gold for the lower kernels on the head of wheat, and about half way up, I switched to a lighter brown and a light yellow gold in the needle.
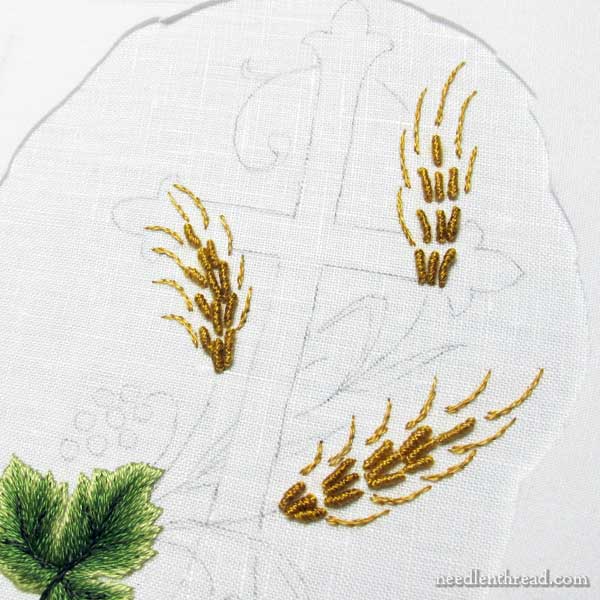
The heads of wheat look really weird, isolated and floating on the fabric…

…so I finalyl stitched in the cross, using stem stitch.
I probably should have done that first, since it’s behind the other elements, but this worked out ok.
I chose a medium corally-pink for the cross (I think it’s DMC 352), because I wanted it to be in color, but I didn’t want a dark or primary color.
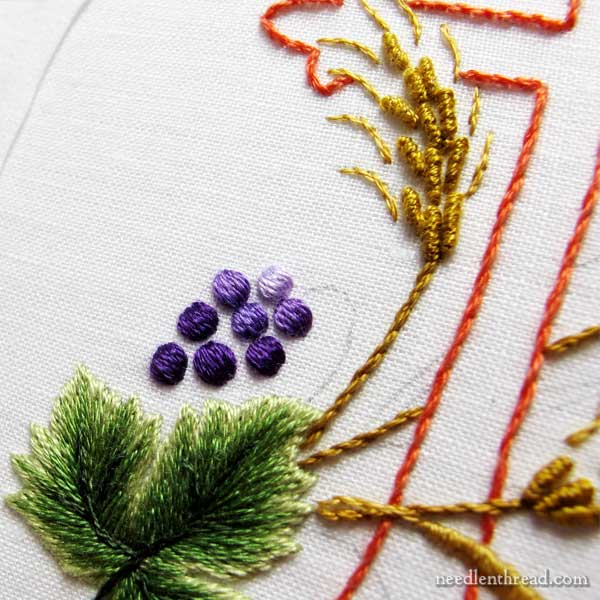
Then it was time to work the grapes.
The grapes are padded satin stitch, which, in retrospect, was probably rather silly. They’re so very small, that padding them isn’t really essential, even though I like them better padded – it gives some lift to the embroider.
If you’re trying to save time, you can skip the padding altogether. Another option for the grapes instead of satin stitch could be Rhodes stitch dots.
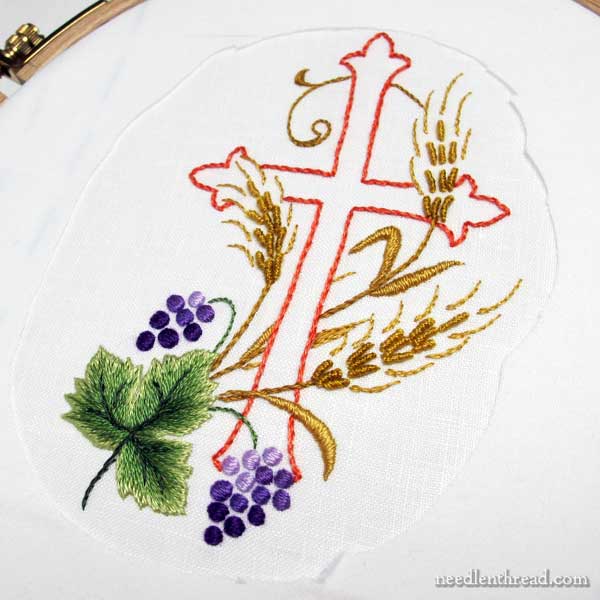
And here’s the finished embroidery.
The stems on the wheat are stem stitch in two strands of floss towards the base of the design, but working up to the swirl around the top, I used one strand of floss.
The leaves on the wheat are padded satin stitch, except for the leaf behind the cross, which is stem stitch filling, to keep it flat.
To speed up the process on that area, you could always skip the padded stitch on the wheat leaves and do them all in stem stitch filling.
The grapes on the large bunch down below ….well! A could of them ended up seriously wonky! I probably should have taken them out, but…
Time, you know!
Total stitching time: 8.5 hours.
Shortcuts for future reference: skip long and short stitch on the main leaf, don’t pad the satin stitch grapes (try Rhodes stitch for the grapes), and use stem stitch filling on the wheat leaves.
Those short cuts would shave quite a bit of time off the embroidery.
Tomorrow, I’ll show you how I finished this into a book cover, using a very quick and simple approach.
Questions? Comments? Suggestions? Feel free to have your say below!

