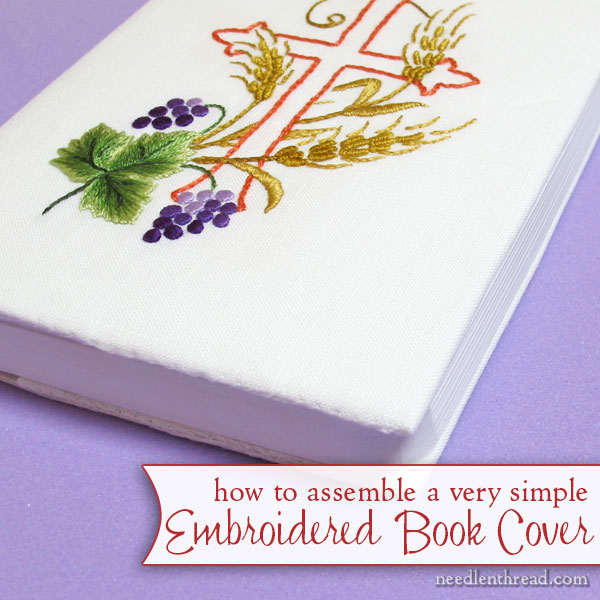
Yesterday, I shared the embroidery process for this embroidered book cover with you, and today, I’ll show you the really (and I mean really) simple way I put it together.
There are certainly more complicated ways to go about making an embroidered book cover, but this way is fast and very easy. It isn’t perhaps the most “finished” of finished book covers, but it is finished enough to serve for a long time.
Here’s how I did it!
This assembly process for an embroidered book cover can be applied to any type of book, really. Notebooks, journals, bibles, prayer books, sketch books – you name it, you can cover any of them with this method!
You can certainly get more elaborate, too, in the finishing. With more time, for example, I would have added a decorative edge to the cover, using the Palestrina stitch worked on the edge.
So whether you go simple or decide to dress it up a bit, if you’re looking for a way to cover a book and you want to keep it simple, try this method!
Prior Proper Planning
You might remember that, in the set-up process for this embroidery project, I mentioned that I basted in the layout of the book cover. This isn’t absolutely necessary – you could skip this step altogether, as long as you’re a good judge of space – but I find it helps to baste the cover layout, to ensure a good fit for the cover and to guarantee the embroidery is centered.
What lines did I baste in, precisely?
A diagram might be helpful:
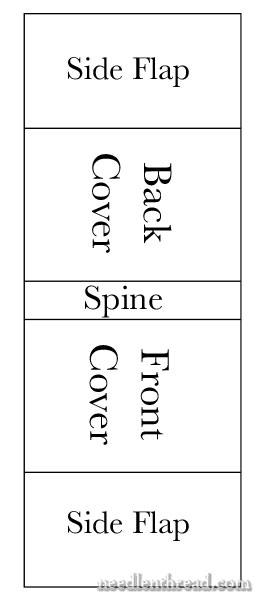
I basted the spine, the front and back cover, and then two side flaps on each side of the cover that are at least half the width of the cover. In this case, since my book has a flexible cover, I made those two side flaps even wider, so that they were just about an inch short of the width of the cover.
To determine the layout for your particular book, all you need to do is measure your book parts.
I find it useful trace the parts of the book on a piece of graph paper (8 squares / inch). This way, you can get a very accurate layout, squared up, and measure the parts of the book from there.
Or you can just trace the graph paper layout onto your fabric, using a very light pencil on the wrong side of the fabric. Then you can baste right over those pencil lines.
And if you want to test the book cover fit first, you can cut out your paper pattern and fit it to the book, to see how well the fabric version will work.
Making Up the Book Cover from the Embroidered Fabric
Once the embroidery for the front cover was finished, I washed the piece and damp stretched it to dry.
Especially when you’ve been working in a hoop, thoroughly soaking the piece and then damp stretching it will guarantee that the hoop wrinkles disappear and that your fabric is flawlessly flat. Of course, make sure your embroidery threads are colorfast, or you could end up with a serious disaster!
When the fabric is dry (or at least dry enough – in this case, it wasn’t perfectly dry, but the little ironing I did took care of that), head to the ironing board, and take a good pair of fabric scissors with you.
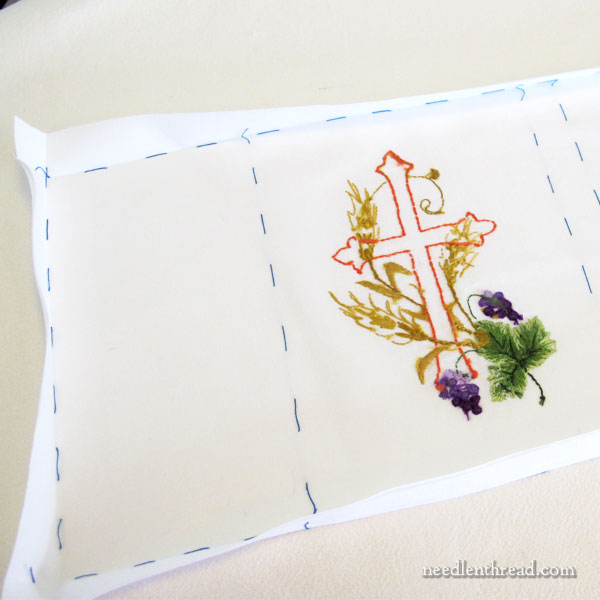
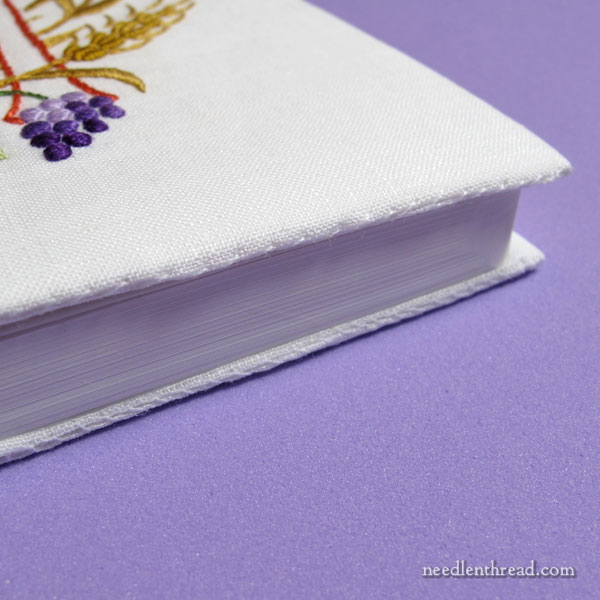
Trim the excess fabric within half an inch of the outside basting lines, all around the cover.
Then, with your embroidery face down on a padded cover (you might want to read this article on ironing embroidery and the padded cover I use), fold and iron along the outside basting lines, all around the cover.
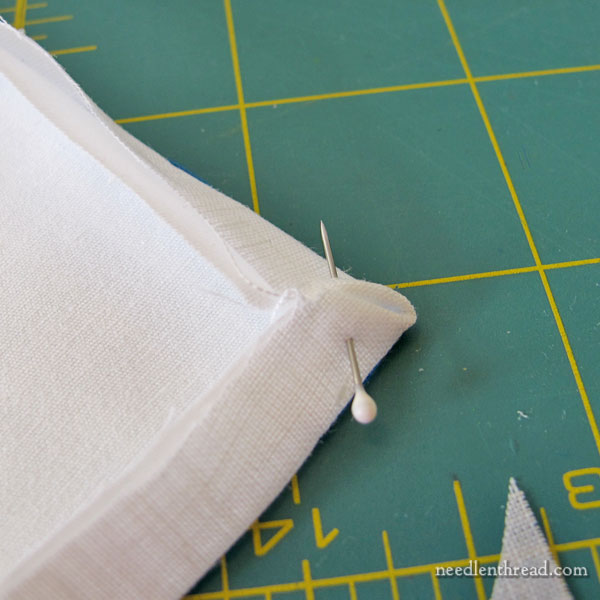
Then, it’s time to miter the corners. If you’ve never mitered a corner, it’s really easy! Here’s my article on how to miter a corner – it’ll take you step by step through mitering corners.
I’m working with two layers of fabric on this particular book cover, but that doesn’t really matter. Treat them as one layer. They’re still basted together, so it’s easy to work with both pieces at once.
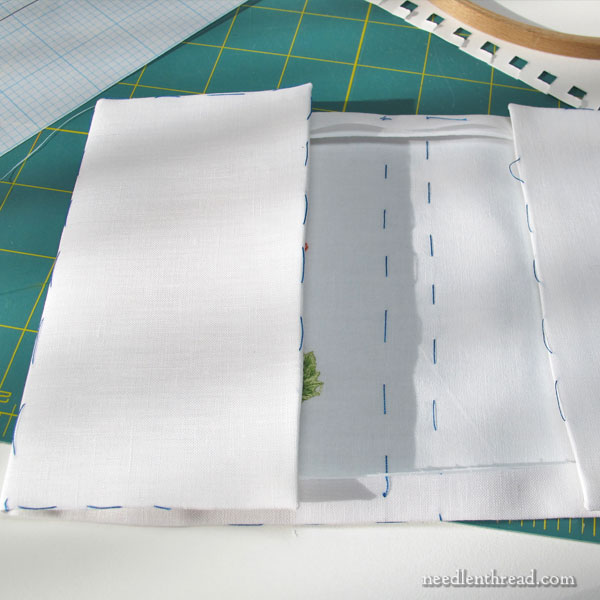
With the corners mitered, head back to the ironing board, and iron in the side flaps, so that you have a nice crisp fold where the side flaps fold in.
When you look at the cover so far, face down, it should look more or less like the photo above.
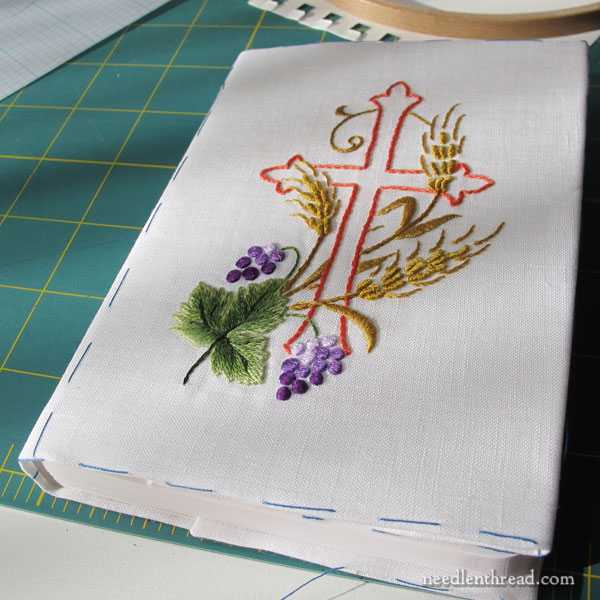
At this point, test your layout. Put the cover on the book, with the crisply folded flaps hugging over each cover. It should fit, if your basting was spot on!
In this case, it fit quite well, so…forward!
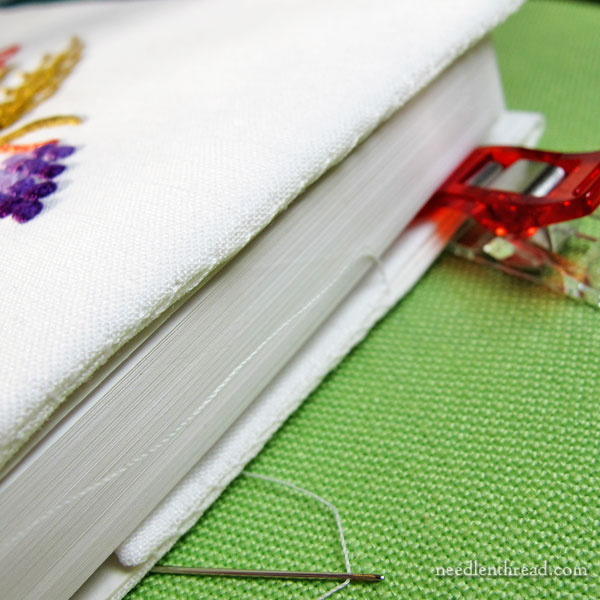
The next step – which I forgot to completely photograph, was to remove the basting stitches.
Definitely remove the basting threads before you sew up the cover!
Then I used these handy-dandy mini wonder clips by Clover to hold the cover completely in place while sewing.
Then, I simply whip stitched the cover onto the book, using a white sewing thread. I find it’s best to whip stitch with the cover on the book, so that you can make any little adjustments as you sew, to ensure a perfect fit.
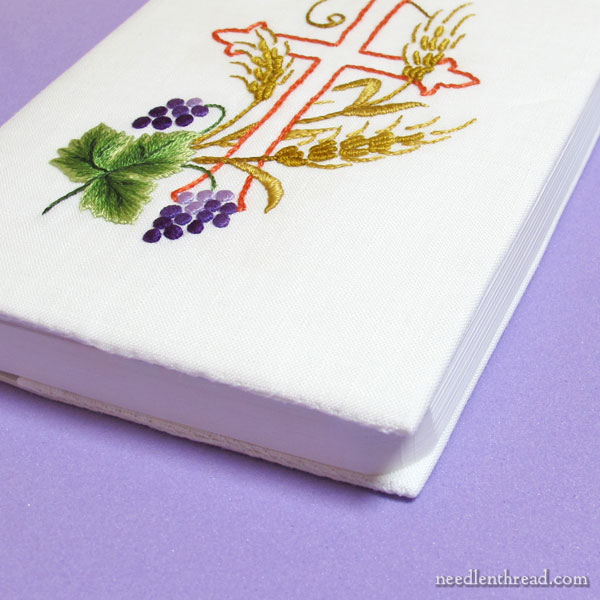
And here it is, all sewn on! Very, very simple way to finish a piece of embroidery into a book cover!
The whip stitching is practically invisible, but you could cover it further with decorative stitching along the edges, if you wanted to.
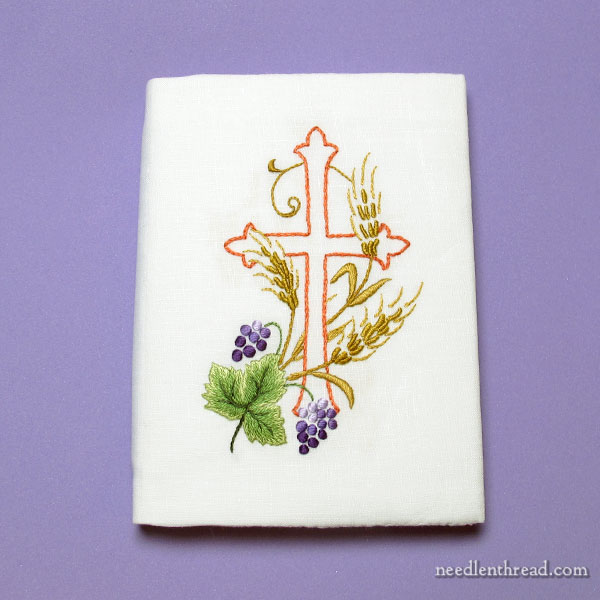
And there’s the finished cover from above.
Incidentally, if I were re-doing this, I’d only use two colors of purple on the grapes. The light purple gets a little lost.
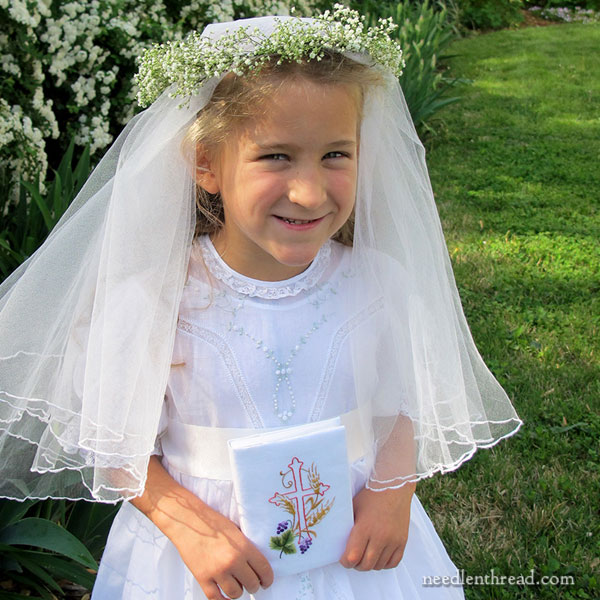
And did she like it? She did indeed!
And thus ends The Adventure of the Super-Quick Book Cover.
And now, back to our regular programming…
Book Cover Articles
You can find all the previous articles relating to making this book cover through the following links:
The cross, grapes, and wheat embroidery pattern
Setting up the project and choosing colors
The embroidery on the book cover
Finishing and assembling the book cover (this article)

