Split stitch gets a bad rap.
It’s a great little stitch – one of the basic hand embroidery stitches – but every time I bring it up on Needle ‘n Thread, I get an influx of anti-split-stitch commentary.
Some people just don’t like the poor little split stitch!
When I wrote about this monogram worked in split stitch with floche, at least a dozen people commented or wrote in about their dislike of the stitch in general.
So today, I thought I’d write in defense of split stitch, using a small sample project I’m working on to illustrate. I’ll share with you some tips that might make you like split stitch better, and that might encourage you to give this versatile, easy stitch a second chance!
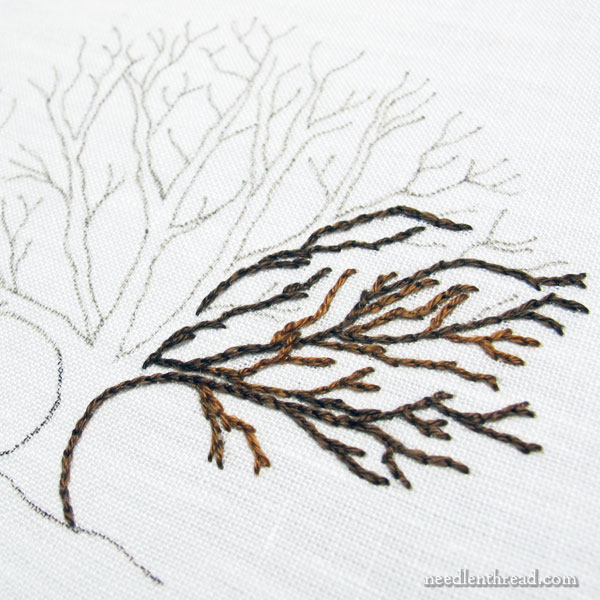
One of the projects on my table right now is this wee little tree. The trunk, branches and twigs of this little project will be worked entirely in split stitch. On the trunk, I’ll work in some combinations to give it a little bark-like texture.
Why did I pick split stitch?
Well, split stitch, especially when you’re working with a non-divisible thread (here, I’m using coton a broder 25), makes a nice, clean line. But it also gives you the easy option of making a nice dirty line, too!
Now, by dirty, I simply mean a “not so neat” line. It’s easy to stitch up nice, neat, straight, fine lines with split stitch. But it’s equally as easy to work up lines that are a little jagged, a little bumpy, and this works out really well for tree branches and twigs.
Working up the branches of this particular little tree, I can vary my split stitches to thick or thin, simply by choosing where I want to split the stitch.
If I work a line of split stitches with each previous stitch split towards its origin, the line will be a little thick and quite smooth.
If I split the previous stitches in the center, the line will still be quite smooth, but not quite as thick.
If I split the previous stitches towards their end, the stitches are drawn out, a little longer, thinner, and they end up with a little break right on the end that gives the stitch a bit of a twiggy look.
If I want a jagged twiggy line with little poking bits here and there, I just need to split the stitches in the middle and go slightly off my line with the present stitch, so that the previous stitch sticks out from the line a little bit.
Split stitch, in short, makes terrific twiggy trees.
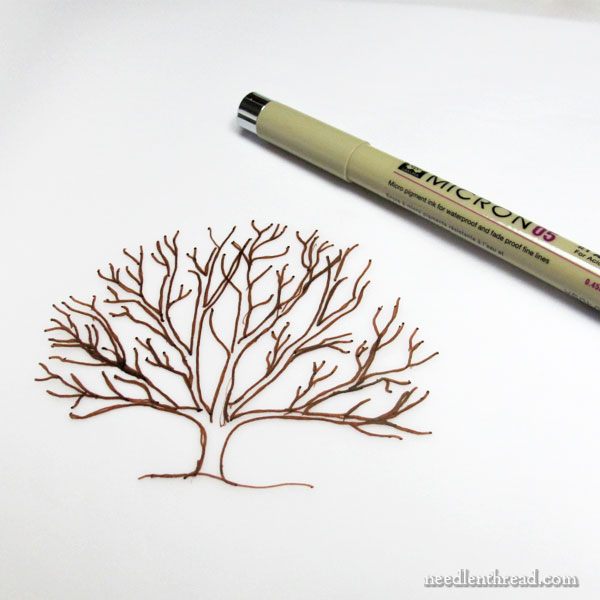
This, incidentally, is what I originally sketched up for the tree, and you can see the micron pen there, to give you an idea of scale. It’s a little tree, and cotton a broder is a good weight of thread for achieving the look I want with this particular tree.
Thread weight, single strands, and split stitch
If, however, I wanted a much lighter structure to my tree – where the branches were a bit more spidery – I’d use a single strand of cotton floss with the split stitch.
If I wanted a much heavier structure – where the tree looked cumbersome and thick – I’d use a heavier thread, like a pearl cotton.
(Although, that being said, split stitch doesn’t look as good in pearl cotton. Pearl cotton has a pretty tight twist to it, and it doesn’t receive the splitting stitch as well.)
If I wanted a bit of a wooly tree, I’d use one strand of crewel wool for a tree this size.
The point here is that I’d use only one strand of whatever embroidery thread I was going to use. Split stitch is much easier to work successfully, if you’re working with a non-divisible thread that can’t be broken down into usable parts.
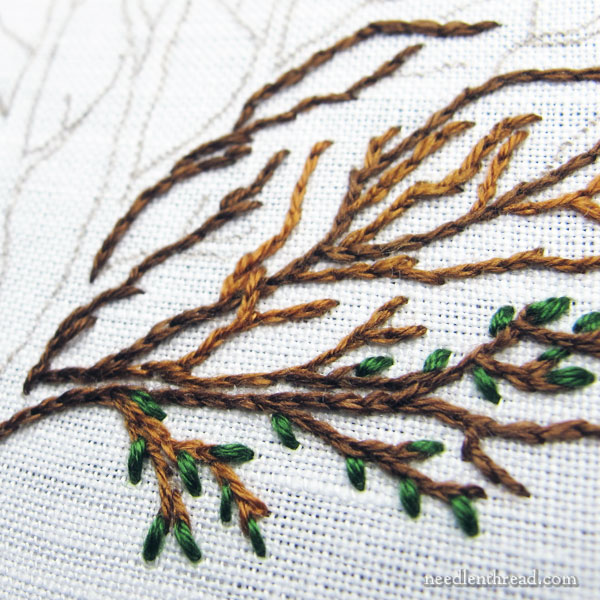
Ah. It’s starting to bloom!
How can you use split stitch?
As mentioned above, split stitch can be used to create smooth lines or jagged lines. It’s a nice stitch for creating delicate lines, and it takes curves – loose or tight – very well.
It can also be used to fill areas (like on this R monogram), with a filling that’s smoother than chain stitch, but not as smooth as long & short stitch or satin stitch.
Split stitch is also regularly used for padding under satin stitch and long and short stitch.
Getting comfortable with split stitch
The key to getting comfortable with split stitch is the same with any other stitch – practice with it! Put it to work for you and see what it can do!
When you practice, use one strand of whatever thread you want to use.
Soft cottons like floche and coton a broder work great with split stitch. Crewel wool works great with split stitch. One strand of stranded silk works great with split stitch. One strand of cotton floss works great with split stitch.
Just make sure you’re using one strand of whatever thread. The stitch will behave much better for you.
Then, practice the whole splitting thing, splitting the stitch from below in different areas of the previous stitch, to see where it splits best and most comfortably for you, and where it gives you the results you want.
If you’re having a hard time splitting the stitch, perhaps it’s because you can’t see it well. This can easily be the case when working with one tiny strand of floss. Consider better lighting or magnification.
Technically, for uniform results, the previous stitch is usually split in the front third, towards the new stitch – so, not right on the end, but not right at the middle, either. But you can achieve varied results by splitting in different parts of the stitch. Experiment!
Finally, you can mix up split stitch a bit. Think of working split stitch filling with a variety of textured threads. Or consider how you can turn split stitch into a composite stitch, by whipping it or lacing it.
Don’t confuse two different stitches!
Split stitch and split backstitch are not the same stitch. Here’s a detailed explanation of the two stitches side-by-side and a demonstration on how they are different.
Split backstitch is split from the top down, while true split stitch is split from the bottom up.
You can find a video tutorial for split stitch here, if you’d like to see it worked out.
What about you?
I just love split stitch, and I hope you can learn to like it, too. But even if you can’t, I’ll still stand by it. It’s a good stitch!
Any questions about split stitch or suggestions that might help others learn to like it, too? Feel free to leave a comment below!

