The last time we visited Late Harvest, an embroidery kit that I’m working on that was designed by Hazel Blompkamp and featured in her book, Crewel Intentions, we discussed different approaches to the long & short stitch when filling a leaf.
I’m still struggling with those differences. But I keep trying! You know how they say it’s hard to teach an old dog new tricks? Well, the same concept applies for stitchers.
Not that we’re dogs, mind you!
I did make some progress on the project last weekend – not a lot, but if you’ve been reading Needle ‘n Thread for a while, you know one of my recurring themes: some progress is always better than no progress!
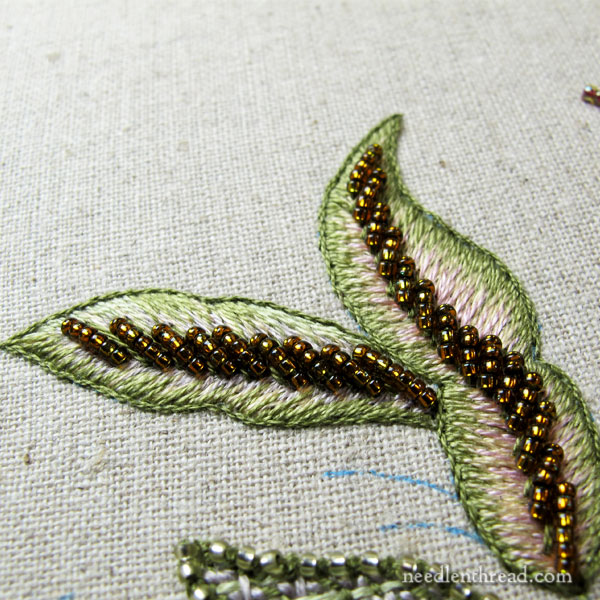
These are two leaves located at the top of the pomegranate in Late Harvest. They’re worked in long & short stitch, and they feature a thick spine worked with tiny beads and a very fine stem stitch outline.
You know, there’s a lot to be said for outlining a leaf like this with stem stitch! Outlines hide a multitude of sins.
The edges on the second leaf I worked, which is the one on the left in the photo above, were not as smooth as the edges on the first leaf (the one on the right). The other difference? The center colors of the one on the right are more pronounced.
The leaf on the right was worked from the outside outline of the leaf, inwards, with the beaded spine added after all the long and short stitch was finished. The leaf on the left was worked just the opposite: the beaded spine was worked first followed by the long and short stitch, from the center of the leaf (along the beaded spine) out to the edge. The last element on both leaves was the outline.
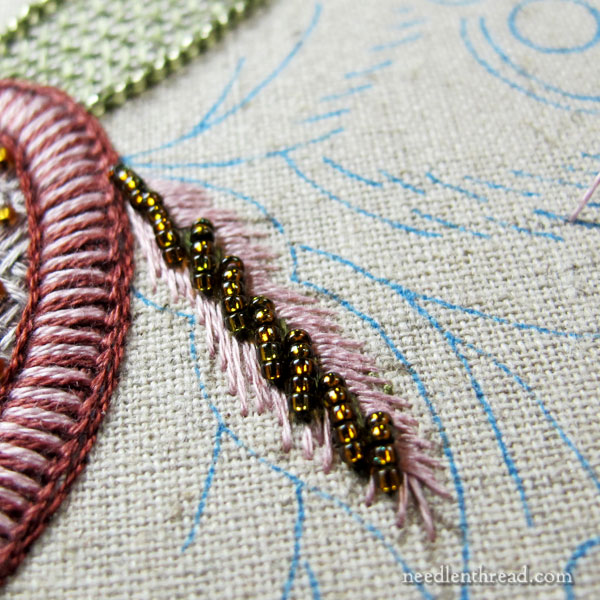
This weekend, I managed the third leaf in this trio. It pops out of the right side of the pomegranate, which you can see on the left in the photo above.
Determined to follow Hazel’s directions to the letter, I decided to work this leaf just as it was written (like I did with the second leaf in the first photo).
But golly! Keep in mind, I haven’t touched this project for a while – well over a month – and I found it really difficult to work backwards (from the inside to the outer edge, rather than from the outer edge to the inside). I almost quit and picked it all out at this point.
But then…. two things prevented me: my absolutely laziness when it comes to picking things out lately, and my curiosity. I wanted to know if I could pull off a decent looking leaf, even though I felt as if I were off to a really bad start with it.
This is The Thing about long and short stitch, though. It comes across, at first glance, as a very advanced technique, difficult to master. After all, you can achieve some pretty intricate shading and realistic stitching with long and short stitch!
But in fact, long and short stitch is a Super Forgiving technique. You can mess it up a little bit here and there, and still pull off a pretty good finish. You can hide errors in it fairly easily. If you’ve ever been intimidated by long and short stitch, don’t be! It’s your friend. If you haven’t done so yet, give it a try!
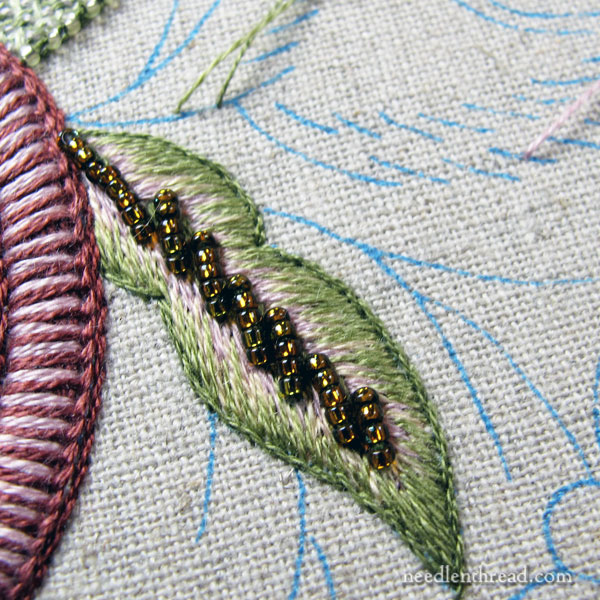
The leaf came out pretty well! In fact, I think it stitched up a lot faster in this inside-out method of working from the center to the outside edge than it would have, if I had worked from the outside in. I’m not sure why I think this. It just seemed to be finished before I realized it, and long before I got tired of stitching it.
I’m not exactly pleased as punch with my beady vein down the middle. It looks a bit haggard, but I didn’t do any poking and prodding before snapping photos. I suspect I can play with it a bit to neaten up the beads.
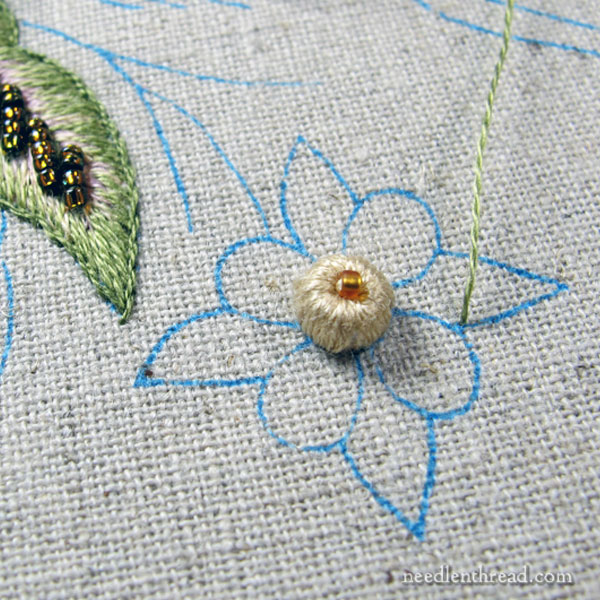
The next element to stitch in the piece is this little flower, and here again, I was surprised by the order of stitching! Normally, I’d add the center of the flower – which is a large bead wrapped with thread – last. But it was the first element to put in.
And you know, it was such fun to place and cover that bead. I like its chubbiness.
Unfortunately, that’s as far as I got in my last stitching session – one large leaf, and one bead flower center.
How much time did these two elements take? Two hours and twenty-five minutes! Remember: the Most Valuable Thing that you put into your needlework is your time. Hand embroidery is not a fast process!
I took out some of the stumpwork supplies for this kit and started fiddling with them. It would be totally out of the order of work to start any of the stumpwork elements now – they go onto the piece at the very end – but I just can’t help myself. I may have to jump out of sequence and play!
And that’s just it: I think we learn valuable lessons when we try different approaches to embroidery. There is never “Only One Way” with needlework. It’s nice to broaden the horizons. I think it gives a much more rounded approach to learning embroidery if you experiment with different approaches, with other people’s methods and order of work.
Heck, that’s half the fun of embroidery!
I’ll be putting in more quality time with Late Harvest over the next few weeks when I have the opportunity and wherewithal to make some progress. I’ll keep you posted on how it goes!

