Back to my adventures with Late Harvest, the embroidery kit by Hazel Blomkamp that I’ve been working on for quite a while now.
I don’t think I can emphasize too much how fun the embroidery on this design has been. Not only is there a ton of stitching variety in the piece, but there are elements and techniques that have proved relaxing, challenging, and exciting, all in one!
I’ve found myself anticipating the next step the whole time – always eager to stitch the next element, to try the next technique, to see the finished product. It’s like reading a really good book, where you can’t wait to get on to the next chapter!
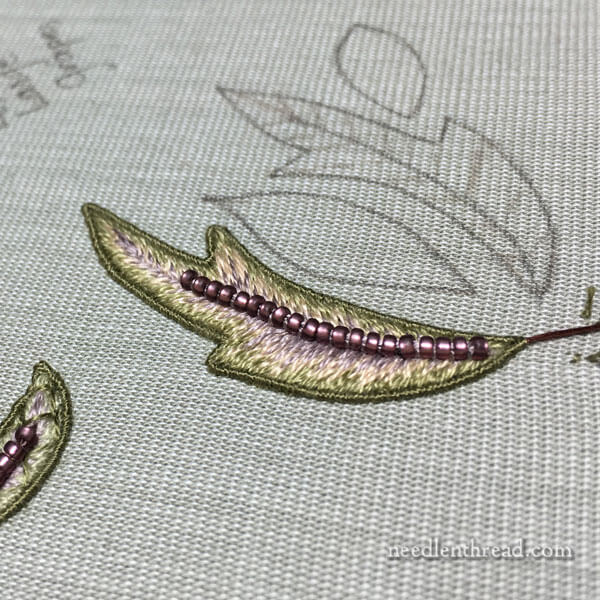
Lately, since I finished the right half of the main design, I’ve been concentrating on the stumpwork elements. These are set up on a separate, small frame that’s very easy to hold and work on in my lap.
I love working all these stumpwork leaves! I think my favorite part of each of them is the wired outline. Stitching the simple overcasting on the wire (which is just working a tiny satin stitch to cover the wire) is mesmerizing, and I love watching the wire cover up with each tiny stitch.
When working some of the smaller stumpwork leaves one day recently, it suddenly struck me that some of my leaves looked really small, proportionately, compared to the photos of the finished piece in Hazel’s book, Crewel Intentions. Once the thought struck, I grew a bit anxious. What if I transferred the designs at the Wrong Size?!?
So I went back through the book and scoured the instructions. While there is no mention of enlarging the stumpwork elements before they are traced, I noticed that the “actual size” dimensions were given under the line drawings in the book.
And as I contemplated those actual sizes, I realized that, indeed, they seemed larger than the designs I had transferred onto my fabric.
So I wrote to Hazel to ask if there might be a discrepancy, and she affirmed that the designs in the book were reduced from the original size submitted to the publishers, and that she had just discovered this point recently, too. In fact, she’ll be publishing a print out of the correctly sized images on her own blog soon.
So, to fix the problem on my end, I decided to see how much of a difference there is between the specified size and the drawing. I needed to determine whether or not I should definitely stitch any of the elements over, or just leave them as is.
I decided to scan the drawings in the book, import them into Inkscape (a vector drawing program), trace them at the size printed in the book, and then enlarge them to the dimensions given in the book.
Now, enlargements of embroidery designs in a book can be done on a photocopier. Normally, though, books will give you a percentage to enlarge a pattern, so that you can just input that number into the photocopy machine, which then spits out the right-sized image. Without a percentage to enlarge the photocopy, you have to photocopy the image, guessing at the percentage increase, and testing different print outs until you get close to the correct size.
I figured tracing the design in a vector program and enlarging it to the correct dimensions would be a little more efficient.
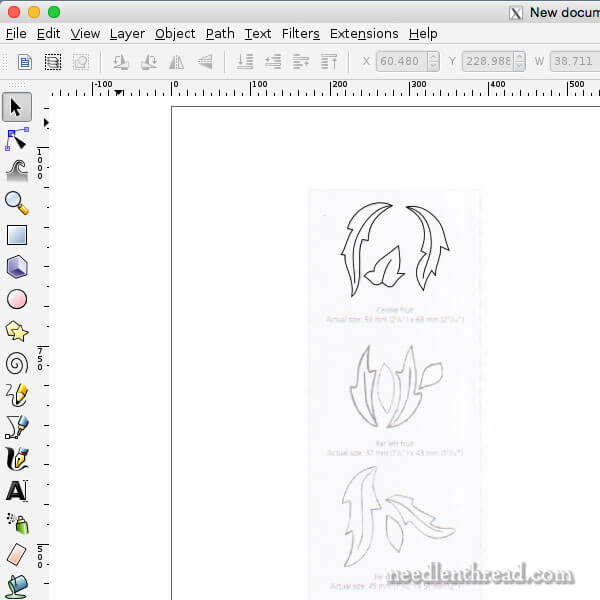
So, in the photo above, you can see a screen shot of the trace I made of the leaves that surround the central pomegranate in the main design of Late Harvest. The dark black lines on the top leaves are my tracing job. They’re traced right over the lines of the drawing in the book.
I grouped together the traced vector elements and locked the dimensions of the element so that, when enlarging, they would enlarge proportionately, length and width.
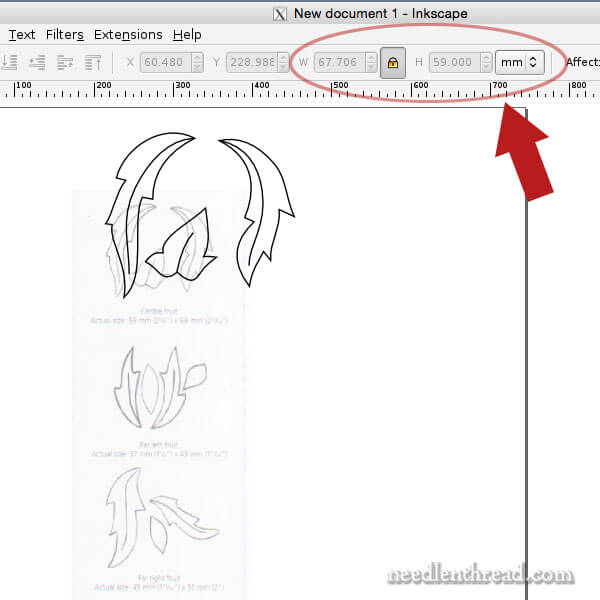
Then, I changed the height dimension to match the actual size indicated in the book. You can see hightlighted in the screen shot above where I changed the height to 59 mm. The element enlarged quite a bit – you can see the black vector lines very clearly in the photo, and behind them, you can see the original scan that I was tracing from.
Then I traced all the rest of the stumpwork design elements into vector drawings and enlarged them according to the actual size stated in the book.
I printed the elements out on a sheet of paper, making sure they printed at 100% so that there was no distortion in size
Then I cut out each element from the paper so that I could lay the cut pieces on my frame and compare the different sizes.
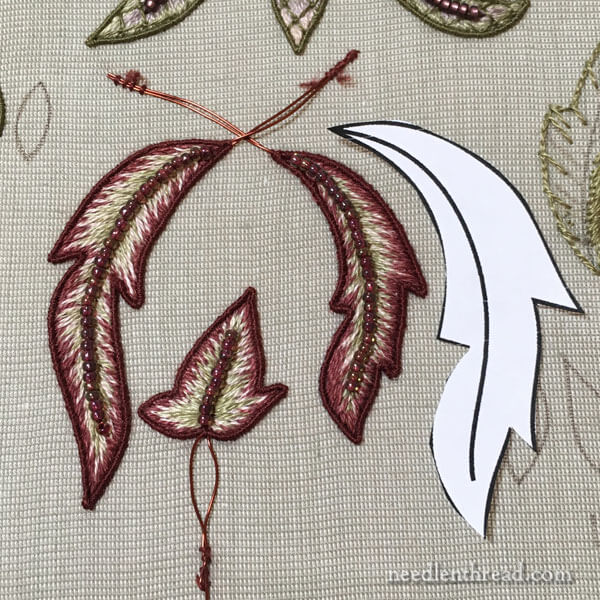
The biggest difference I found was in the leaves for the central pomegranate element. Printed at actual size, they are significantly larger than the leaves I originally traced and embroidered.
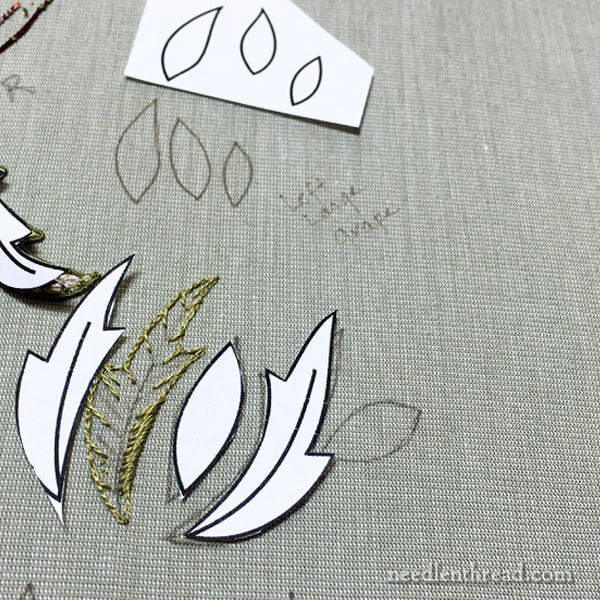
However, with all the other elements, there is only a marginal difference in size, and, in all cases, not enough of a difference to re-work the stumpwork elements I’ve already stitched.
But the leaves for the central pomegranate? They definitely need to be stitched again! And, in fact, I think that’s a good thing. I think those three leaves will look much better the second time around.
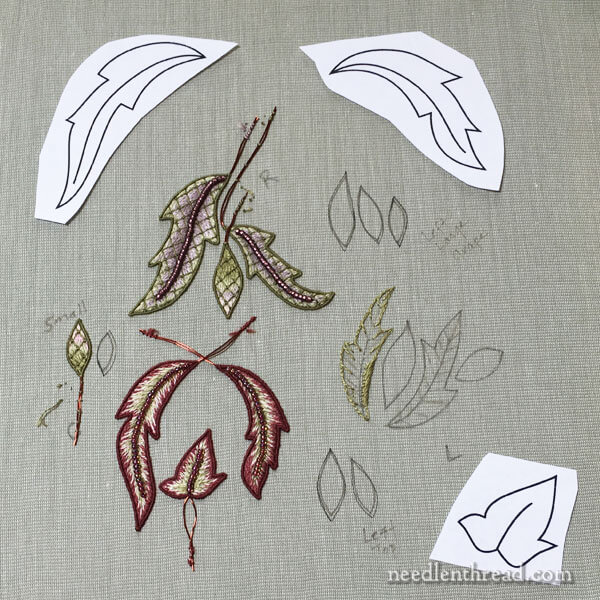
I was a little worried I wouldn’t have room on the original fabric for this group of elements, but by breaking the group up, I found they fit easily in blank spots on the original fabric.
I didn’t want to un-tack the fabric from the stretcher bar frames, so to trace the adjusted elements onto the fabric, this is what I did:
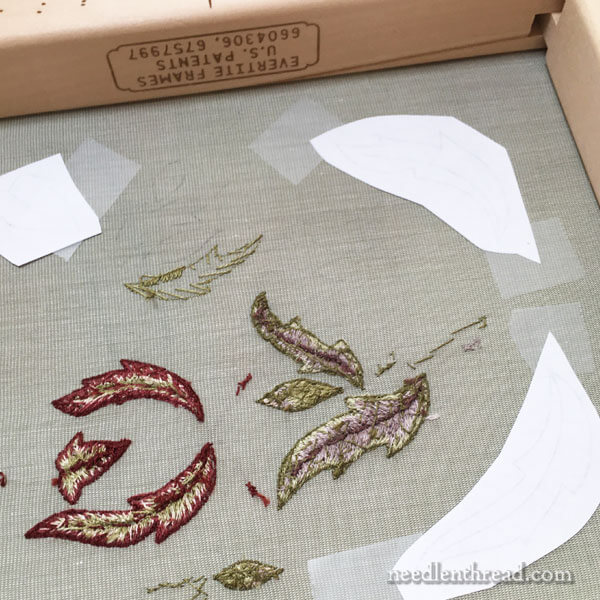
I turned the stretcher bar frame over and taped the pattern cut-outs to the back of the fabric.
Then I could hold the frame up to a light or a sunny window and trace the leaves easily.
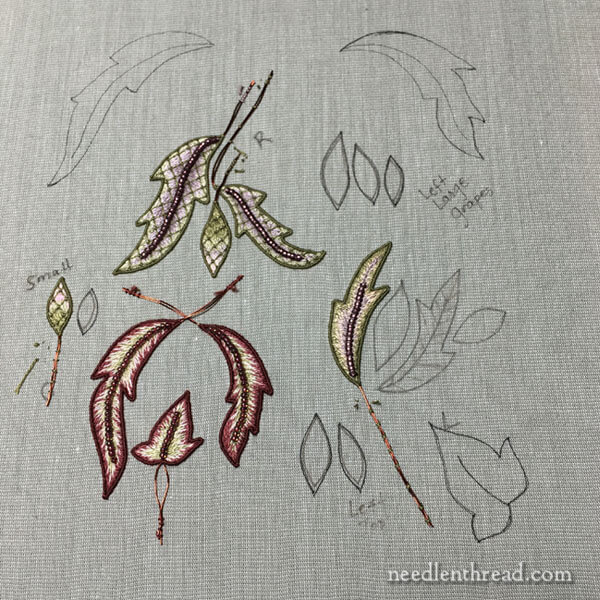
And here is my stumpwork fabric on the frame, with the adjusted elements traced on.
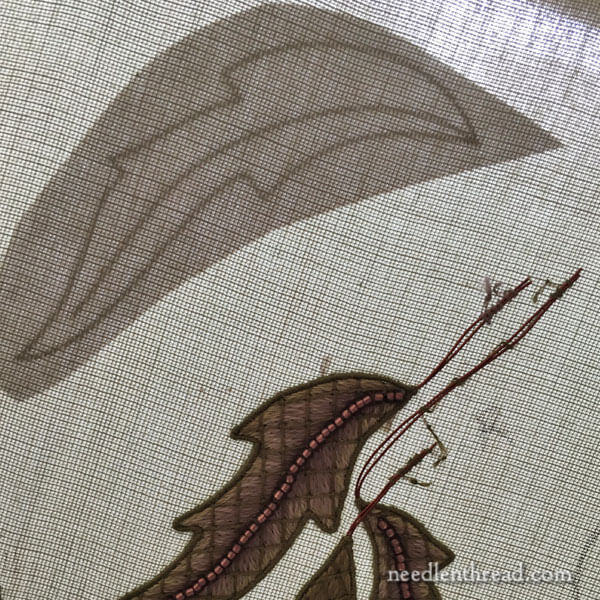
With the elements that are not stitched yet, I enlarged them slightly by just sketching outside the original lines with a micron pen.
Even though the design lines look a bit messy now, the embroidery will cover all those messy lines up just fine.
I’m excited to re-work the new, larger leaves. I think they’ll end up looking much better than my first attempt. Once all the stumpwork elements are finished, I’ll move on to the left half of Late Harvest!
SUCH a fun project!

