Not last week but the week before (no, I’m not going to jump rope for you while chanting ditties – remember that one?), I made quite a bit of progress on Late Harvest, the finish of which is Looming!
And then I made no more progress on it at all.
And I still haven’t.
I had this weirdly naive plan to crank out the rest of the project this past weekend – I was so sure I could do it! – and then… nada. Not one stitch.
Still, week before last, I made some fair progress and I “discovered” a way to speed up the larger long and short stitch leaves.
Trust me, it’s no Grand Discovery that’s going to change your embroidery life. But it did help on these leaves!
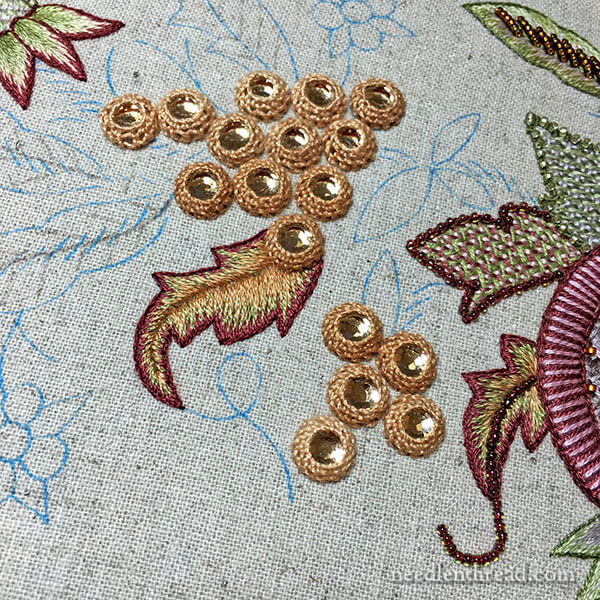
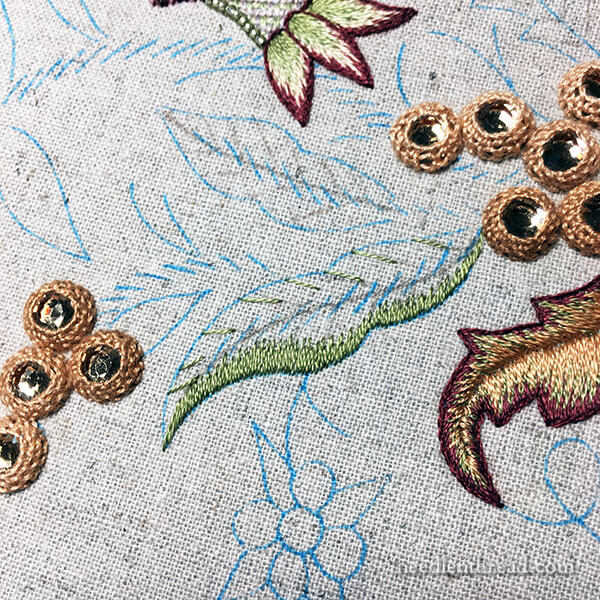
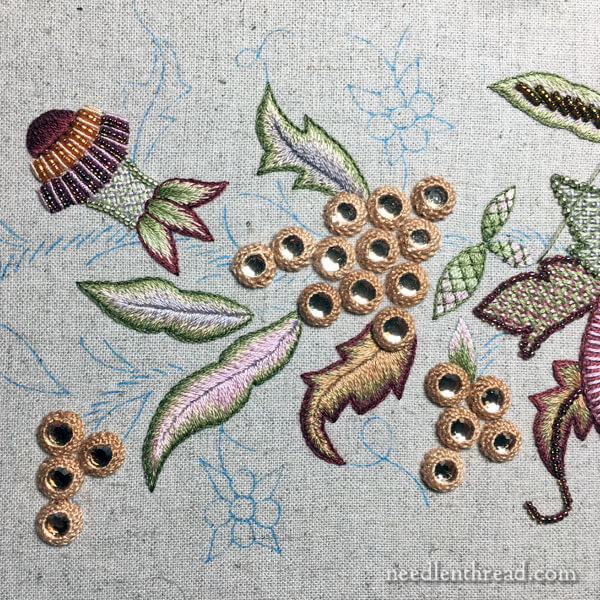
These are the types of leaves I’m talking about. They’ll eventually have a beaded vein down the middle, which will cover a multitude of little jiggly discrepancies in the center of the leaf. Of all the elements on Late Harvest, taken individually, these take the most time to stitch.
Way back at the beginning of the project (a gazillion years ago), we discussed the approach for stitching the long & short stitch leaves.
You can find the typical approach I follow with long & short stitch shading in this series of tutorials on long & short stitch. I’m an outside-in sort of gal, when it comes to long & short stitch. That is, I stitch from the outside of the motif to the inside. But the instructions for these leaves tell us to stitch from the inside to the outside.
It really doesn’t make much of a difference, as you can see from this article, where I worked one leaf one way and one leaf the other.
My other habit when working long & short stitch filling is to split stitch the outlines first, and then stitch over the split stitch outline with the first layer of long & short stitch.
I contend that stitching over a split stitch outline (just as you would with a satin stitch filling) is your best bet for achieving a nice, smooth edge on long & short stitch or satin stitch or any similar filling.
But on these particular leaves, after they’ve been filled with long & short stitch, there’s an additional stem stitch outline stitched all around each leaf in a darker shade of the dominant colors in the leaf.
And this stem stitch outline goes a heck of a long way towards covering up any little jiggly discrepancies on the outside of the leaf.
And so, being super determined to move through these leaves as quickly as possible, I made an executive decision: I totally skipped the split stitch outline.
Not only did it save me a good little bit of stitching time, but it made absolutely no difference in the finished leaves.
My next step: the beady veins down the middle of all those leaves, so that all the flaws are duly covered. I’m pretty sure that’s exactly the purpose of those beaded veins: to cover flaws!
The foremost leaf in the photo above (with the pinkish center) is a bit wonky down the middle, but that leaf sports a very wide beaded vein, so I decided to leave it rather than correct it. I love cover-up jobs.
And that, my friends, is exactly where I am on Late Harvest. I’d like to devote a hunk of time to it this weekend and get right to the finishing point. My goal for this project, remember, is to have it finished by mid-June.
But I’ll be superlatively happy if I finish it sooner!
Wish me luck!
Following Late Harvest
If you’d like to follow along with the progress on Late Harvest from beginning to end, you can find all the articles relating to this project listed in chronological order on the Late Harvest Project Index Page.

