In the upcoming weeks here on Needle ‘n Thread, I’ll be sharing some simple, effective, and fun ways to embroider monograms.
Today, we’ll look at a very basic “voided” monogram and chat about how to stitch it up.
If you love monograms and you’re looking for something very easy and relaxing to stitch, this will fit the bill!
It’s perfect for what I call “mindless stitching” – great for those times when you want to do something with your hands, but you don’t want to put a lot of brain power into it. Think: road tripping, commuting, lounging by the lake, sitting in a waiting room, visiting with friends, listening to a favorite book or watching a movie…
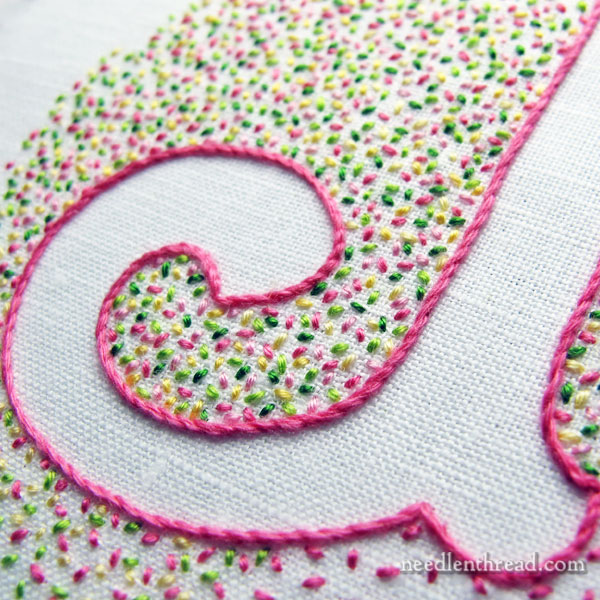
When we talk about “voided” embroidery, generally we mean embroidery that covers the ground fabric everywhere except where the actual design is. The design really stands out because it’s left blank amidst a busy ground fabric more or less covered with stitching.
Voided embroidery isn’t limited only to monograms. So if you’re not a huge fan of monograms, you can take any bold shape with good clean lines and turn it into a voided embroidery project. Clear silhouettes of pretty much anything recognizable would work well for voided embroidery.
There are different ways to go about a voided embroidery project – today’s example is one of the easiest ways to do it, using a stem stitch outline for the letter and then covering the ground fabric with random, multi-colored seed stitching.
Select a Lettering Style
Start with a lettering style that has bold, clean lines and some some space between most of the lines in the letter.
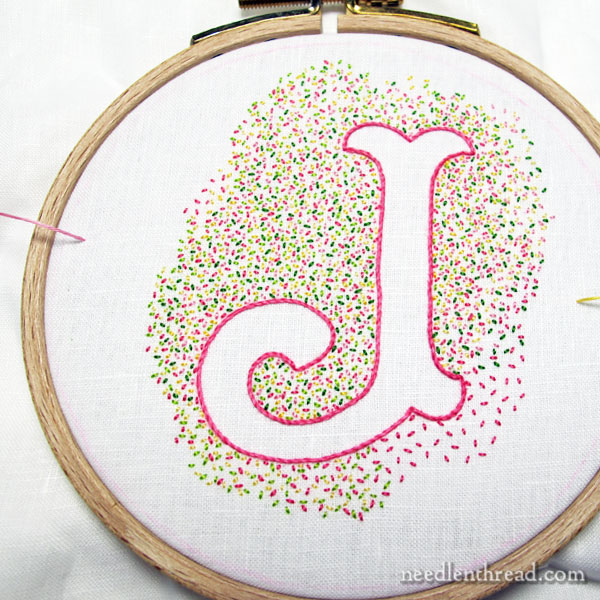
With this particular Confetti monogram, I chose one of the letters from the Plain, Bold Letters in Favorite Monograms.
In Favorite Monograms, there are several alphabets that would work well for voided embroidery: the plain, bold letters (like the J I’m using), the shadow work alphabet, the open script alphabet, and the modern Roman alphabet.
Transfer the Letter to Fabric
Transfer your letter to your ground fabric.
For the Confetti J, I’m using a handkerchief weight white linen, backed with white muslin.
Backing or lining the lightweight linen with the white cotton is really essential, because I don’t want the threads on the back of the fabric to show through to the front and detract from the seed stitching.
I traced the 2.5″ letter directly onto the front of my ground fabric, using a light pencil. Since the line will be completely covered with stitching, I didn’t worry too much about whether my transfer medium will wash away.
However, it just so happens that I starched this particular piece of linen before I ironed it, so there should be no problem with a light pencil line washing away easily. I wrote about using spray starch when transferring designs here, if you want to read more about it.
Once your design is traced, hoop up both pieces of fabric in a 4″ embroidery hoop (or whatever size you want or need for your particular design).
Pick Out Threads!
The fun part – picking out colors!
For the Confetti J, I selected three colors of cotton floche for the embroidery: pink, yellow, and green, with two shades of each color. The DMC color numbers are:
Pinks – 602 & 604
Greens – 905 & 907
Yellows – 743 & 744
I wanted bright, candy shop colors for this one. As my niece put it when she saw the J the first time: “Gum balls!”
Floche is a lovely embroidery cotton. (You can read all about it here.) It’s a single strand embroidery thread, with a soft twist and a very soft, beautiful sheen.
If you don’t have floche, just substitute two strands of regular floss (from the six). The color numbering for DMC floche and DMC stranded cotton is the same. If you want your stitching to be a little heavier, you can even use three strands of floss. Up to you!
Outline the Letter
I used a #7 crewel needle for all the embroidery in this project.
Outline the letter using stem stitch.
If you haven’t mastered the stem stitch yet, you can read all about it here. The tutorials that will help you the most with this particular letter style are the stem stitch video and perfect corners with stem stitch.
Seed Stitch the Background
Now it’s just a matter of seed stitching the background all around the letter!
For my project, I used all six colors of floche for the seed stitch, and I worked my seed stitch rather small, slightly longer than 1/16″, but not as long as 1/8″.
You can definitely speed up the process of seed stitching the background by working slightly larger stitches (1/8″, for example). The longer the stitch, the less “seedy” the whole thing will look, so I wouldn’t personally go much longer than 1/8″.
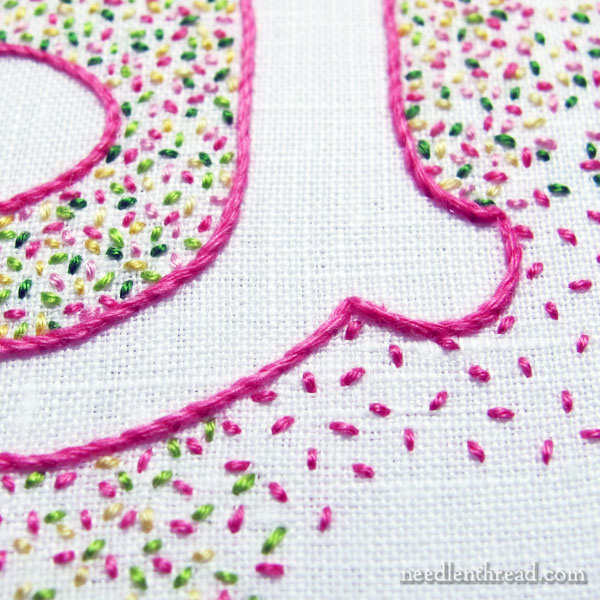
I started with one color of thread and seed stitched an area. The stitches point in random directions, and are spaced out, so that I can work the other colors in between. On the lower right corner of the J, you can see where I seed stitched in dark pink only. I’ll fill in between those dark pink stitches with the other colors.
The key to good coverage to achieve the same type of look is making sure that your tiny stitches are more or less evenly spaced apart (you don’t want stitches butting right up to each other) and that the color distribution is consistent (as much as possible).
In the scheme of the whole finished piece, any inconsistencies in color distribution will more or less blend in, so you don’t have to really stress out about that. Just make sure that, as you work along, you work all your colors into a given area where you’re stitching.
Don’t try to have all your threads going at one time, switching threads with each seed stitch! This would be an inefficient way to stitch, and you could end up with knotted and tangled threads all over the back.
If you do have one or two threads you aren’t finished with (you can see that I’ve parked two threads, one on each side, in the photo above), you can “park” them off to the side by bringing them up from the back to the front of the fabric, out of your stitching path, and leaving them until you need them again. You can read all about parking embroidery threads in this article, if you’re unfamiliar with parking your threads.
The more threads you park, though, the more complicated things can get on the backside of the hoop, so I’d recommend parking no more than one or two threads at a time.
So, basically, I just seed stitch an area with one color, until I run out of that color. Then I grab another color and add some seed stitching to the same area in the new color, until I run out of the new color. I continue doing this until I’ve added all six colors to the area and started a new adjacent area.
Occasionally, I hold the piece out away from me and look for holes in the seed stitched areas. If I find any, I just fill them in with whatever color happens to be in the needle at the time.
That’s It!
In a nutshell – trace the design, stick the fabric in a hoop, outline the letter with stem stitch, and seed stitch your heart out all around the letter!
You can find the alphabet I’m using for the Confetti J available in Favorite Monograms, if you’d like to give this simple, effective approach to voided embroidery a try.
I hope you do! It’s loads of fun!

