Well, hello there!
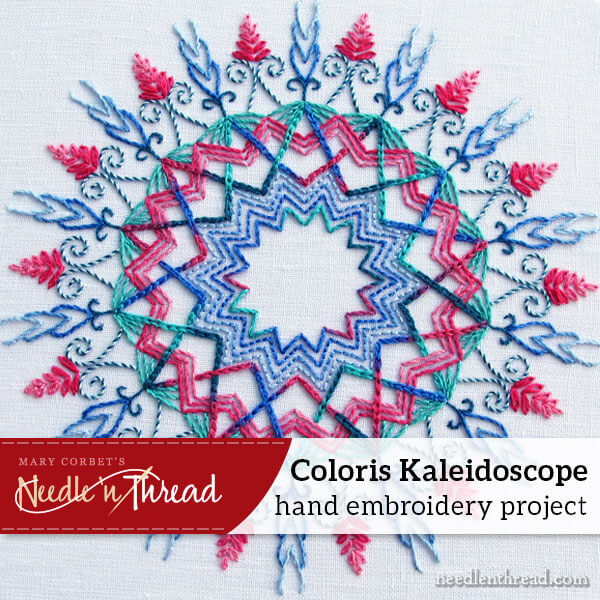
Ready for a really colorful, super-fun hand embroidery project?
The concept for these hand embroidered kaleidoscopes that I’ve been playing with this year developed from a combination of inspirations and ideas: the whole adult coloring book craze, the desire to embroider with lots of lively color, and the addictive practice of doodling repeat geometric designs.
Earlier this year, the folks at Commonthread by DMC sent me a set of their new thread line, Coloris, and I agreed to work up a project and write an article about it for them. You can find my overview of the Coloris line here, and a handy chart of DMC floss colors that correspond with Coloris here.
When I first started playing with Coloris threads, I realized that they would work great, incorporated into a kaleidoscope design!
So today, I’m going to walk you through my Coloris Kaleidoscope so that you can embroider it, too. You’ll find a printable embroidery pattern at the end of today’s article. As always, feel free to mix up your own batch of stitches and colors. Maybe you have a particular Coloris color way that you love – just match up some corresponding DMC floss colors with it, and you can create your own unique version of the Coloris Kaleidoscope!
Materials
Remember, you can make substitutions as you wish! This is the list of materials that I used for my Coloris Kaleidoscope:
1. Fabric: White linen backed with cotton muslin. I used a lightweight linen which was slightly transparent, which is why I backed it with a good quality white muslin. If you’re using a medium weight or heavier linen, or any other heavier fabric that isn’t transparent, you don’t necessarily need to back it.
2. Threads:
DMC Coloris: 4507
DMC Floss (stranded cotton):
blue (798, 799, 800)
pink (600, 601, 602, 603)
aqua (959)
turquoise (3808, 3811)
3. Crewel (embroidery) needles #7 and #9; tapestry #26
4. 8″ embroidery hoop
5. Embroidery scissors and a pen or pencil to transfer the design
Transferring the Design & Setting Up the Project
To transfer the design, I used Sublime Stitching’s iron-on transfer pen, which I reviewed here. I found that the iron-on pen worked well for an intricate design like this. However, if your fabric is easy enough to see through, or you have a good light source behind your fabric, you can trace the design using a pencil or a water soluble transfer pen.
Once the design was transferred to the linen, I hooped up both the linen and the backing fabric, ensuring that they were drum taut in the hoop.
Selecting Thread Colors
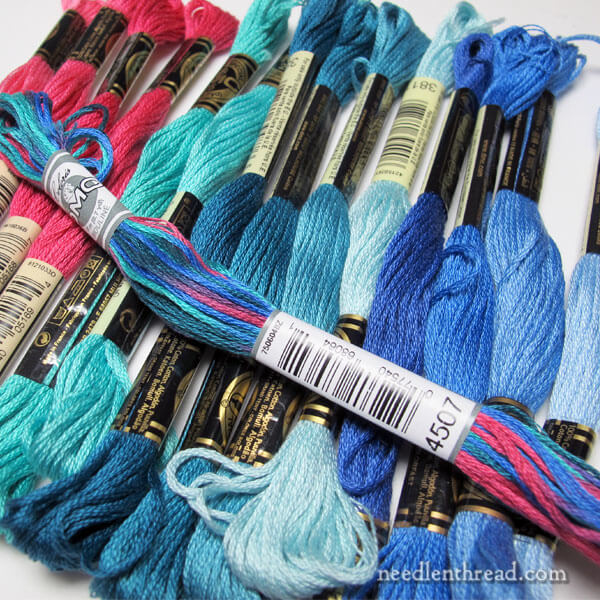
Using this chart to select DMC floss colors that correspond with Coloris 4507, I picked out shades associated shades in each floss color, so that I had a range of shades of each color of solid floss to work with.
As easy way to pick out shades of any solid floss color is to refer to the color number. Normally, shades in the same color family are will have numbers that are very close in sequence to the solid color’s number. For example, the pink in Coloris 4507 is 602. Other shades of that pink color family are numbers 600, 601, and 603.
If you decide to use a different color family, you can find associated shades of your solid floss colors the same way.
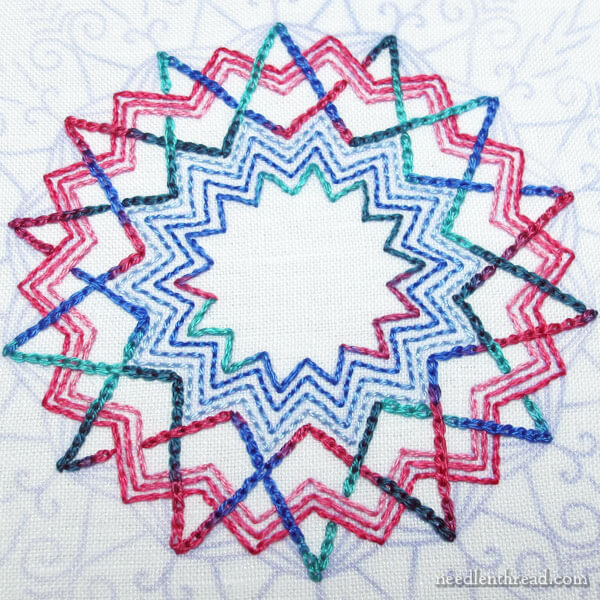
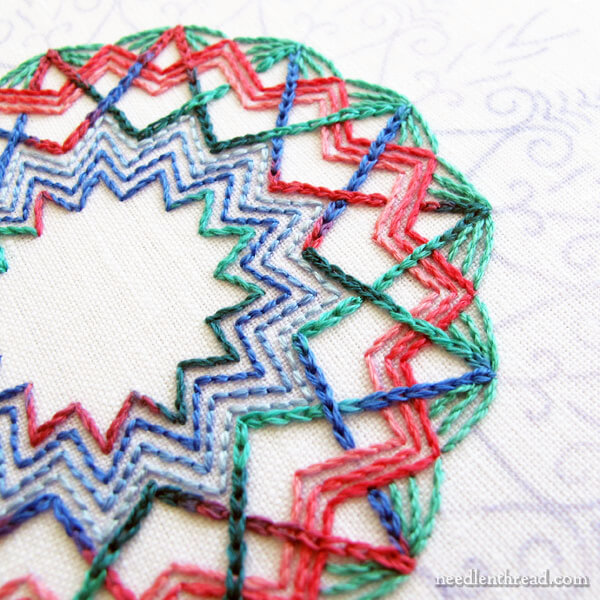
Order of Work: Inside to Out
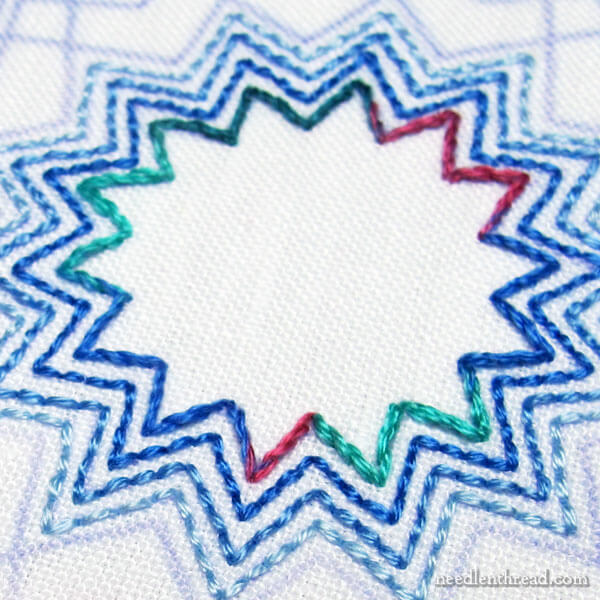
Stitch from the inside of the kaleidoscope design to the outside.
The innermost line is worked with Coloris 4507, with two strands of floss in the needle, using stem stitch.
The next three lines out are worked in blues, from dark to light, in backstitch, with two strands of floss in the needle.
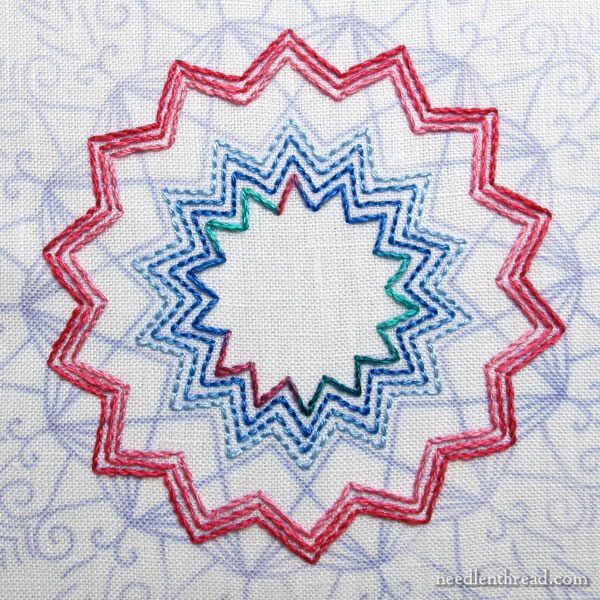
After finishing the closely grouped innermost lines, I skipped forward to the next group of three lines, pictured above. These are worked in stem stitch, in pinks, from light to dark, with two strands of floss in the needle. For these lines I used 603, 602, and 600.
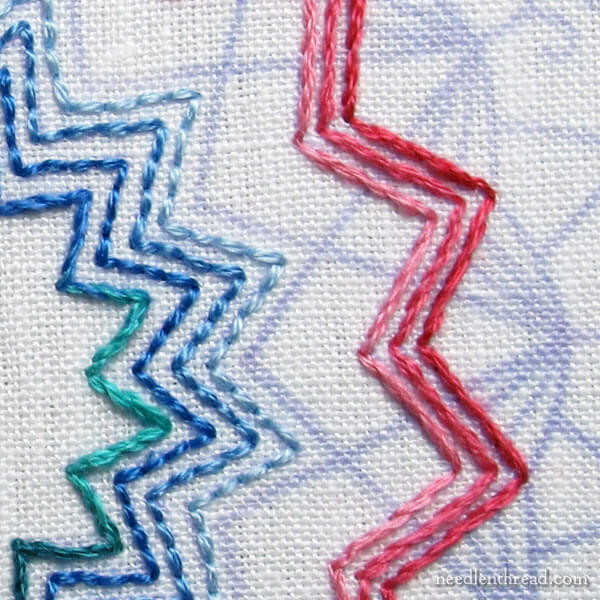
To come to a sharp point with stem stitch, you’ll find this tutorial for stem stitch on sharp corners handy. Even though the tutorial focuses on scallops, stitching the sharp stem stitch corners in the kaleidoscope design use the same concept.
The Coloris Bursts
The Coloris bursts in the center of the design look interwoven. To achieve the interwoven look, this is how I stitched these two lines.
The Coloris bursts are worked in chain stitch, with two strands of floss in the needle to create a nice, bold line.
First, embroider the line in the design that does not have any breaks in it. This is a continuous burst pattern, and it will cross over the pink stem stitch lines.
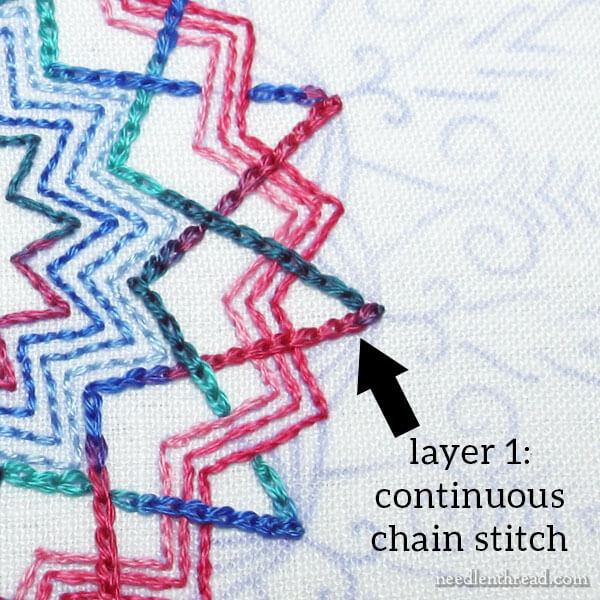
You can see in the photo above that Layer 1 in the burst pattern in chain stitch does not stop and start again over the pink stem stitch lines. Just work your chain stitch right over them!

Layer 2 of the burst pattern seems to pass over and under the pink stem stitch lines and the previous Layer 1 of the burst pattern. The line of chain stitch simply breaks and starts again to give the effect of passing under those previously stitched lines.
On the printable pattern, you’ll see where the line of layer 2 breaks for the pink stem stitch group of lines. Use that break to gauge where you pass over and break for subsequent stitched lines.
Just remember: the first layer of the burst is a continues chain stitch. On the second layer of the burst, work the chain stitch so that it looks like an over-under sequence.
Chain Stitches on a Sharp Corner
To work the chain stitch on a sharp tip, like the tips in the large Coloris burst in the middle of the design, simply end each chain stitch line in the pattern as you normally would with a little anchor stitch at the end of the line.
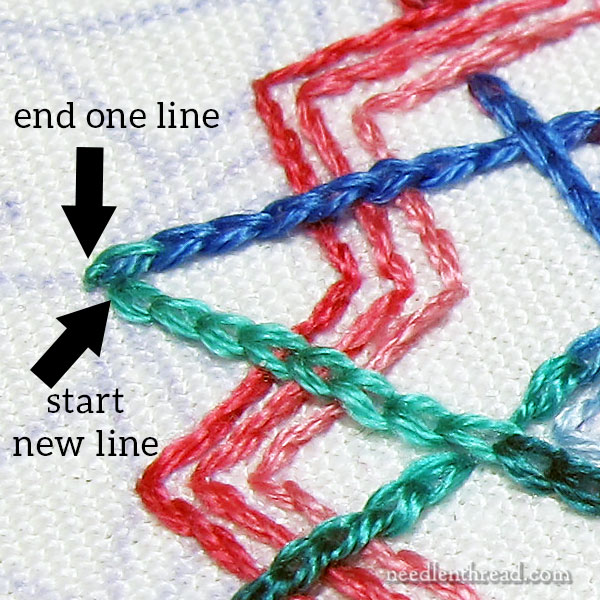
After making the little anchor stitch, start a new line right up next to the end of the first line, as shown in the photo above.
Aqua Layer
Once the Coloris bursts were finished, I added three layers of stem stitch in aqua around the tips of the burst. Use two strands of floss in the needle for each layer.
The Outer Edge

The first element I stitched on the outer edge are what I call the blue lobster claws.
The small scrolled base of these blue lobster claws is worked in the dark turquoise, in stem stitch, using one strand of floss in the needle.
The blue layers are also stem stitch, worked in blue from dark to light, using two strands of floss in the needle.
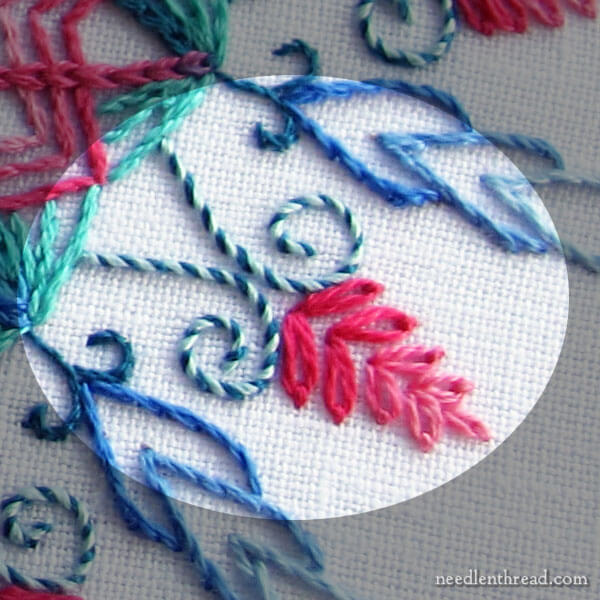
For the pink triangular bunches on the outer edge of the design, I worked the swirled base in whipped backstitch, using the dark turquoise for the backstitch and light turquoise to whip the backstitch. I used two strands of floss in the needle. To whip the backstitch, use the tapestry needle so your needle doesn’t snag your stitches.
The pink bunch is worked in detached chain stitch, from dark pink to light pink. The two detached chains at the base of the bunch are 600, the next two up are 601, the next two are 602, and the last three detached chains at the tip are 603.
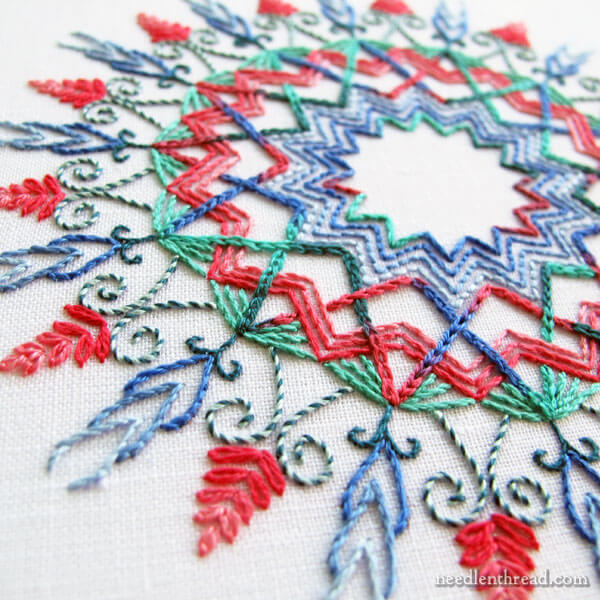
And that’s it! The design is finished!
This kaleidoscope design stitches up pretty quickly. The layers of lines make it a good study in line stitches, and the whole stitching experience is relaxing and fun. There’s just something mesmerizing about watching the whole piece grow in color from the inside out!
Embroidery Pattern for the Coloris Kaleidoscope
Here’s a link to the PDF for the Coloris Kaleidoscope. The design prints at 6″ in diameter, if you choose 100% or “no scaling” in your printer options. You can enlarge and reduce it as you wish. I worked it at 6″ in an 8″ hoop.
Coloris Kaleidoscope – PDF
Resources
You can find stitch tutorials for all the stitches used in this project (and lots of other stitches!) here.
If you don’t have Coloris available locally yet, you can find it available online through Commonthread in individual skeins here.
I hope you enjoy embroidering this colorful kaleidoscope and that it gives you a good excuse to have some fun playing with colors and stitches!

