I’ve made a little more progress on the Mellerstain Firescreen crewel embroidery project that we talked about a couple weeks ago, and that I reviewed here.
Today, I’ll answer some questions and share a couple stitching tips – whether you’re working on this particular project, your own crewel project, or even any other embroidery project where the tips are still relevant.
I’ll also share a quandary and ask your opinion!

Golly! Crewel work is so satisfying! It gives you all the sensory pleasure of other types of surface embroidery, and, on top of that, there’s the speed of crewel. You might not be stitching any faster than you normally do, but the picture sure develops more quickly!
When you finish a stitching session, you see a relatively ginormous amount of progress.

These little bumps or hillocks are called “hummocks” in the design manual. A hummock is just a little hillock or mound … or bump. Or knoll.
(You get the idea!)
For some reason, I keep wanting to call them “humpies.” But here in America (well, in the Northwest, anyway), a humpy is a fish (it’s a nickname for humpback salmon). Apparently, there are other meanings of the word, varying from culture to culture, none of which work for these little bumpies.
I suppose I’ll stick with hummocks. Or hillocks. Or knolls.
In any case, whatever you call them, these design features on traditional “tree of life” type crewel pieces are great fun to work!
Why? Because every bumpie features a different type of filling stitch or technique. But many of these fillings are fairly light, making them quick to work. The bumpocks develop quickly, so you get to enjoy a frequent feeling of satisfaction in finishing a section or reaching a small goal.
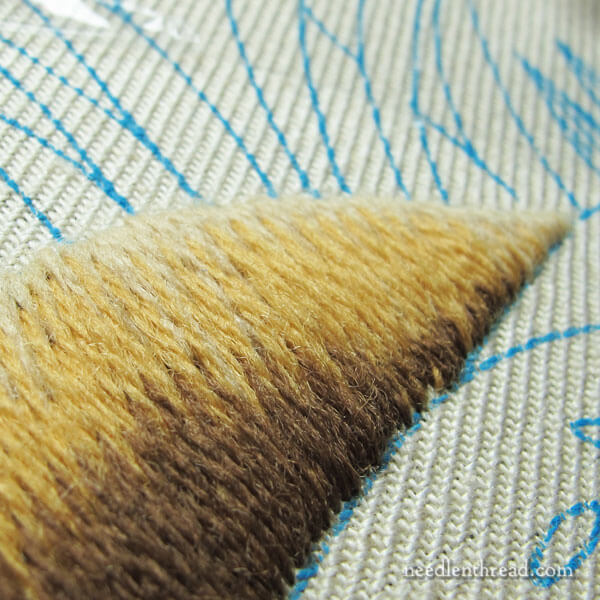
I do have one little quandary with my hilly-bumpy-thingies, and it’s this long and short stitch mound.
Overall, the soft shading here worked out “ok,” but in fact, the lower part of it is quite dark, compared to the picture of the original firescreen. On the original, it shows the darker brown at the base just barely sketched into the other long and short stitches.

But when I look at my hillock, all I see is the very dark contrasting shadow.
I’ve contemplated taking this out.
But I do like the dark, just because it’s a rich deep brown that provides a deep contrast on the piece so far.
The thing is, this particular crewel piece has nice colors, but they’re not exactly vivid colors. But contrasts can help make the piece look more vivid.
So I’m torn: do I pick it out? Do I leave it in?
So far, I’ve left it in. And the more I stitch around it, the less inclined I’ll be to pick it out. But that doesn’t mean I can’t pick it out.
Right now, I’m just letting it talk to me a bit.
But what do you think? Too much contrast?
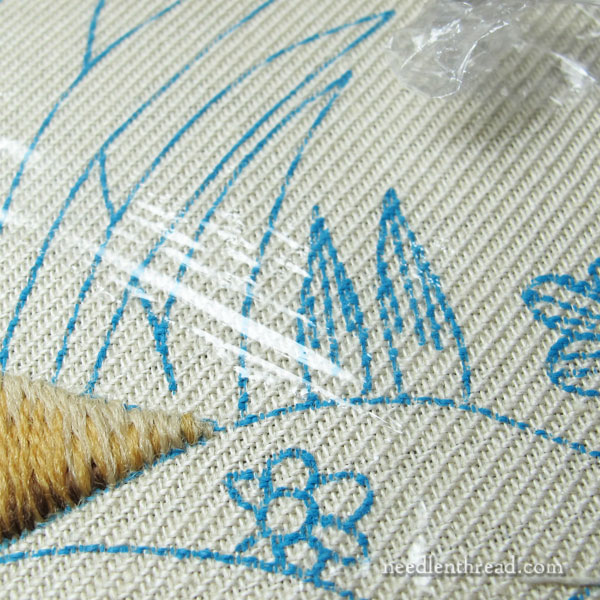
Speaking of letting things talk to me, the two blades of grass in the photo above have been talking to me ever since I started on the hills.
It’s probably sacrilege when you’re working on historical re-creative sorts of pieces, but I think I’m going to make an adjustment on these.
I can’t help it! I just have to do it! I’ll never be happy with the piece if I don’t.
I’ll show you the adjustment once it’s accomplished and explain why (and how) I did it.
Answering Some Questions
Some stitcher have written in to ask about the first layer of long & short stitch and how to keep it smooth.
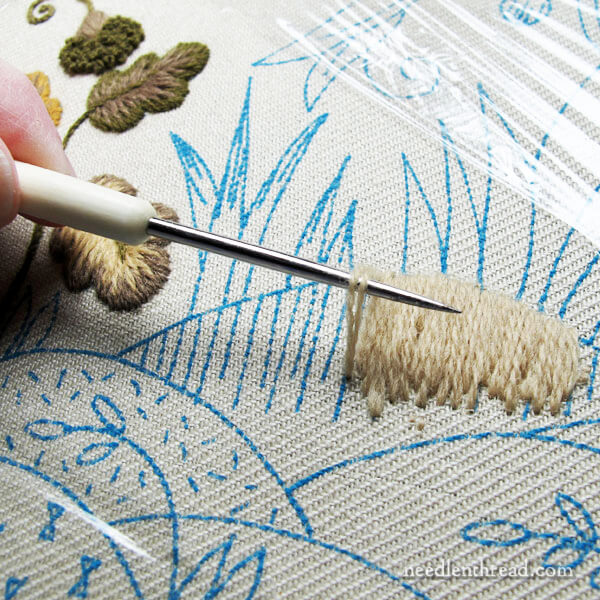
The first layer of stitching on the hillocks when working the long & short stitch is done with a double thread in the needle, to give some height to the edge and to give the long & short stitch a good foundation to bite into while filling the rest of the hill.
I use a laying tool to keep the two threads parallel when they go into place, so that they aren’t twisting over each other. I like a smooooooth long & short stitch filling!
But there are some points to keep in mind if you’re going to use a laying tool in this application:
1. Don’t stroke the wool. Wool just doesn’t stroke the way silk and cotton do. Just use the tool to keep the threads parallel as the stitch is placed on the fabric.
2. If you have a laying tool with a rounded tip, that’s the best option. A sharp-tipped laying tool is murder to wool if you snag the threads.
If you’re not sure what a laying tool is, here’s an article explaining what a laying tool is, and here’s my video showing how to use a laying tool.
Split Stitch Outlines
A couple stitchers have written to ask about working a split stitch outline under the long and short stitch on this project – whether on the leaves or on the hills or on the animals.
It’s true that I usually work a split stitch line on the design line, and then I work the long & short stitch over this split stitch line. Especially when working with cotton and silk, the split stitch line helps lift the edge and helps achieve a smooth edge along the design line.
With this project, so far, I’ve found no reason to add a split stitch outline under any of the long & short stitch filling. The thicker wool thread provides plenty of lift on the edge (remember, with the first row, you’re going down on the design line, which also helps lift the edge), and it hasn’t been difficult to maintain a smooth edge.
Also, if you’re working the kit, the instructions don’t call for the split stitch line. If you do decide to work it under all the long & short stitch elements, you’re going to be using a lot more wool than required for completing the project as written, which may leave you short on wool as you near the end.
Personally, I’d skip it. But it’s up to you! The nice thing is, Appleton wool is easily ordered, it’s not that expensive, and the colors are consistent across dye lots. So if you end up needing an extra skein or two, relatively speaking, it won’t be a huge investment.
Increase the Longevity of Your Wool Thread
Crewel thread is notorious for being short-lived when you’re stitching with it. You can’t get away with long lengths.
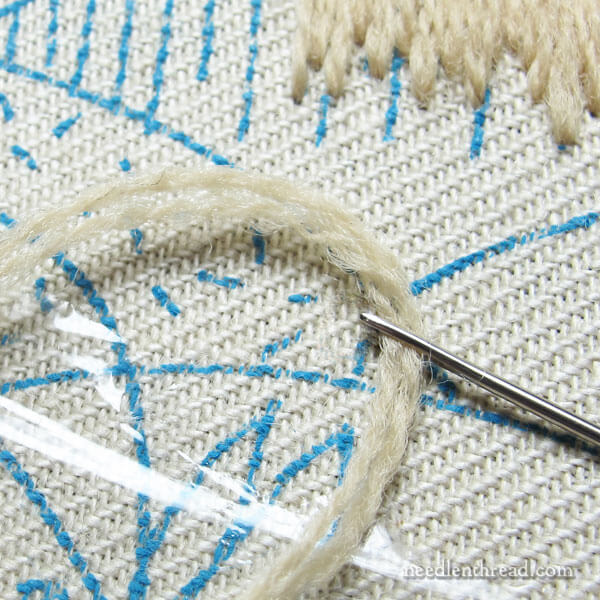
Even when using short lengths, you can further increase the longevity of the wool thread in the needle by shifting the location of the thread in the needle every now and then.
Every several stitches, if you move the needle a little way along the thread, it won’t wear down around the eye as quickly.
This will help the thread last a little longer and it will decrease the amount of fuzziness at the end of the thread (by the eye), which will help decrease the amount of fuzzy residue that can show up on the fabric as you stitch.
Onwards!
So, that’s where the project is at the moment! I’m having a swell time with it!
A busy week ahead here, though – lots of other things I’m working on for the website, and then, you know, there’s that holiday popping up on Thursday! – so I’ve put the firescreen aside for little bit, to concentrate on other delights.
If you have comments, suggestions, ideas, criticisms… feel free to join in the chatter by leaving a comment below! I’d love to hear from you!

