It seems like ten forevers since I’ve shared an embroidery project progress report with you!
But today’s your lucky day! Not only do you get a project update, but you’ll also get couple tips that will speed up your stitching process and that will save your sore little fingers.
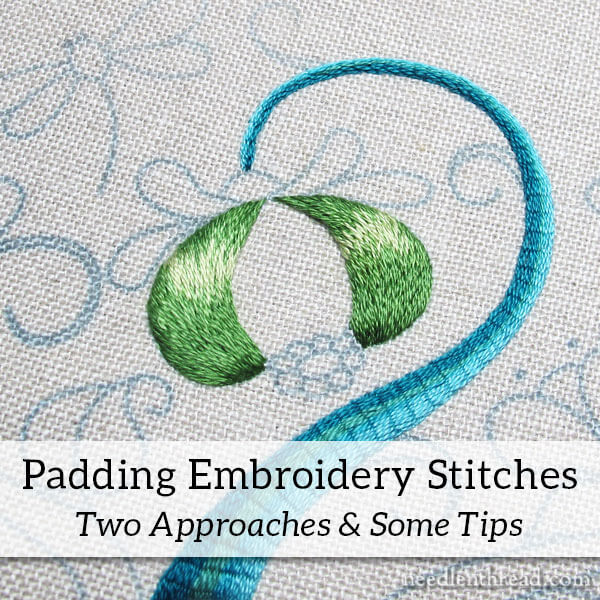
The project here is Modern Crewel, a surface embroidery project worked in a variety of cotton threads with some bead embellishment. You can find my review of the embroidery kit here, if you’d like to know more about it.
The last time we visited Modern Crewel, I had just finished the trunk, which is worked in raised stem stitch. You can read about that segment of the project and some tips here.
If I were following the instructions for the project carefully, my next step would be the other two trunks in the design. Instead, I decided to jump straight to the central element of the design – the pomegranate.
Padding Approach #1
The sides of the pomegranate, as you can see from the images of the design, are worked in long and short stitch shading.
To give the sides of the fruit a little lift, each side is embroidered with layers of padding stitches before the final layer of long and short is embroidered on top.

I started by outlining the areas to be filled in split stitch. A fine split stitch outline underneath a long and short stitch element helps define the edge, and it helps the stitcher keep the edge nice and smooth.

From there, it’s a matter of filling the center of the element with padding stitches. In this case, the instructions called for four layers of chain stitch padding using two strands of floss, working each layer perpendicular to the layer before.
When padding with layers of stitches, you want to make sure the final layer of padding is perpendicular to the direction of the top, covering layer of long & short stitch.
Incidentally, stem stitch, split stitch, chain stitch, and even just layers of straight stitches worked randomly to fill the area can all be used for padding. The structure of the chain stitch seems to add a little bulk as the layers are built.
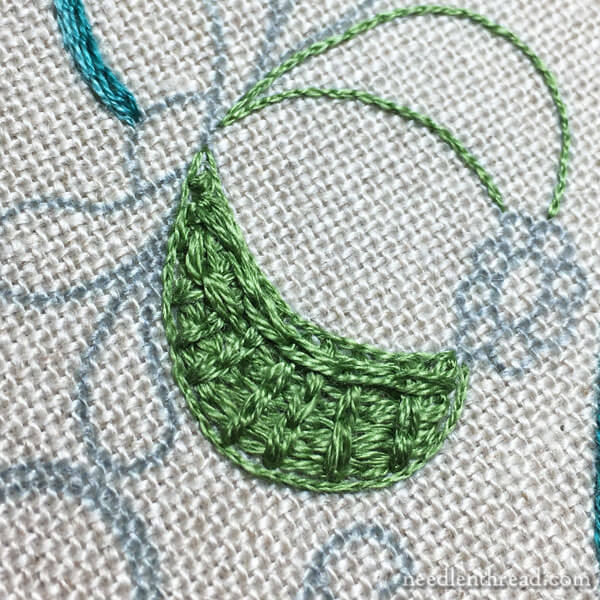
You can see here the third layer of chain stitch going in. The second layer (perpendicular to the first and the third), I spaced out slightly. As I looked ahead to the fourth layer of padding, I couldn’t help thinking, “Gosh, that’s a lot of dense stitching built up there.”
With the fourth layer of chain stitch padding, I ended up working the chain stitch lines a little farther apart, and then, to ensure that there wouldn’t be any noticeable dents in the surface, I filled between the short chain stitch rows with long straight stitches.
At this point, it really didn’t matter what stitch was used – I probably should have followed my instincts and worked straight satin stitches for that last layer of padding.
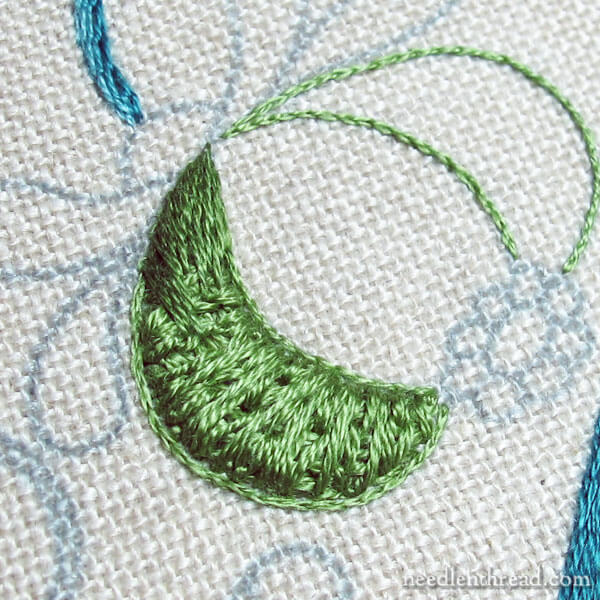
In any case, it was done, and on to the long and short stitch!
Using the smallest needle in the kit and one strand of floss, I worked the long and short stitch layer over all the padding.
It came out ok, but…
…golly. It was a pain to stitch!
The layers of padding increase the density of stuff in a relatively tiny space, and the poor needle has to pass through all of it, working against that density.
Needle Go Small!
Once I realized that it was going to be a laborious undertaking to work through those layers, I scrounged for the tiniest embroidery needle in my pincushion. I found a #11 – very tiny – that can accommodate one strand of floss.
Using a smaller needle when passing through densely populated stitched areas makes a huge difference in the ease with which the needle goes through the bulk. The larger the needle you use when trying to stitch through anything densely packed with stitches, the harder it is to get the needle through.
So switching to a tiny needle made it easier to stitch over this whole area with long & short stitch. It wasn’t perfectly easy, but it was easier.
Once that side was finished, I was ready to move on to the second side of the fruit.
Sort of.
My fingers were a little hesitant.
And really, I thought. Do I want to take the time to work up all those layers of chain stitch padding?
I answered myself: No.
Padding Approach #2: Same Height, Different Padding
At this point, I could have done two things: I could have changed the stitches used for the padding to long straight stitches. The lack of chain stitch structure would ease the density of the filled area a little bit, anyway.
Or I could change the padding approach entirely.
I chose the latter.
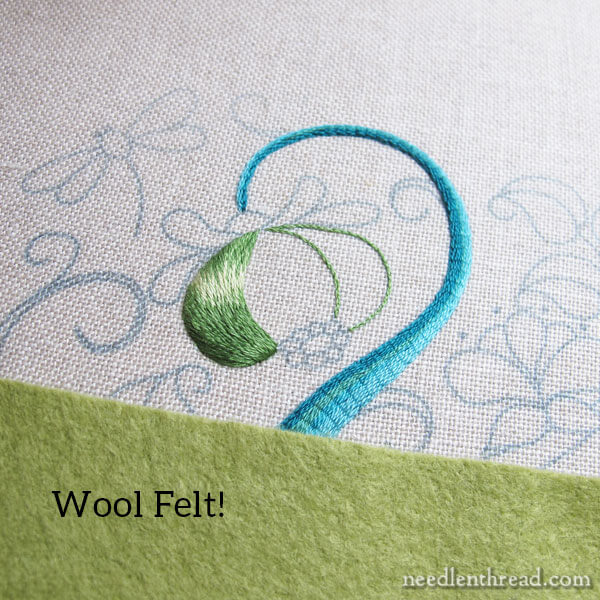
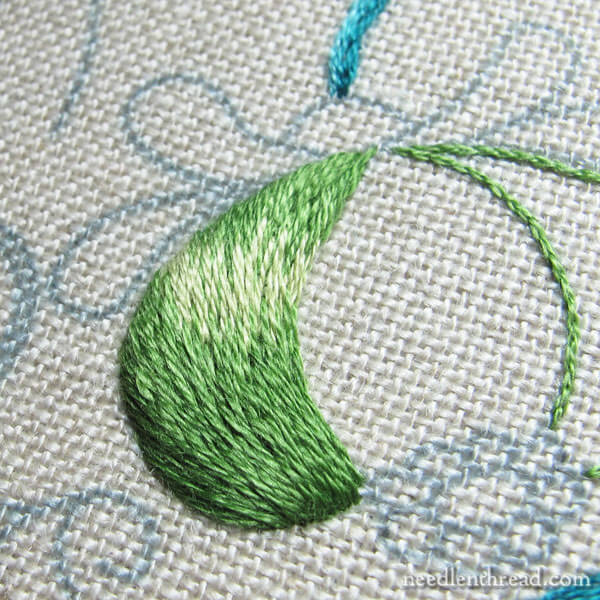
The kit already uses wool felt for padding in the hillocks at the base of the design. It’s a different color wool felt, and it wouldn’t really work under the pomegranate sides, but it just so happens that I have a fair collection of wool felt scraps.
I knew I just needed a tiny piece to fill the area, and I found a green that was close enough to do the trick.

After trimming up a tiny crescent of wool felt that would fit inside the split stitch outline on the pomegranate side, I tacked it down on all sides using a matching color of floss, and then I started the long and short stitch right over the wool felt.
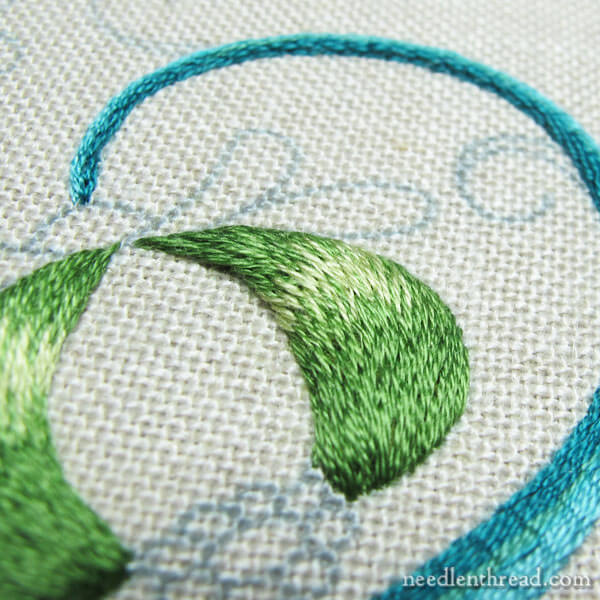
It took considerably less time to prepare the area for the long and short stitch (I didn’t have to embroider four layers of padding), it was much easier on the fingers when it came to stitching through the padding, and I think the finish, overall, was much nicer.
The height is no different between the two sides – or if it is, it isn’t noticeable to the naked eye. The both look sufficiently raised.
To Sum Up
When padding an area of embroidery, to avoid dense padding that’s difficult to stitch through, try these approaches:
1. Try long straight stitches rather than chain stitch or other stitches with a more complex structure.
2. If it makes sense to do so (with the design you’re stitching), substitute wool felt for padding stitches.
3. Use the smallest needle possible when stitching through heavier padding. It’s much easier to pull smaller needles through dense areas.
If you’re undertaking any padded embroidery any time soon, I hope you find these tips handy!
Other Articles on This Project
If you’d like to know more about this project or catch up on it, here are the previous articles:
Modern Crewel kit review
Setting Up Modern Crewel for Stitching (including transfer tips)
Raised Stem Stitch on the Trunk
