Have you noticed that there’s an increasing trend in the embroidery world to find different ways to finish needlework, besides framing it?
This is completely understandable, given the fact that any one house only has so much wall space, and anyone’s circle of friends and family’s houses only have so much wall space!
Still, despite our reasonable desire to find multiple ways to display needlework, framing is still the most popular approach to finishing a project for display. Professional framing, though, can be mighty expensive! So, in many cases, I do my own framing.
I’ve written about how to frame up pieces of embroidery before, using a lacing technique for mounting the finished work on board before putting it the frame. You can read about that here.
Today, I’m going to walk you through a recent framing job, this time employing pins.
If you’ve pondered framing your own embroidery but haven’t taken the leap, come along while I frame up a favorite piece of needlework, and you’ll see how easy it is!

Just like with any project, there are some preliminaries to framing a piece of needlework. You’ll need to prepare the needlework (I block and damp stretch mine) and you’ll need to gather supplies and tools.
To frame this piece of needlework – it’s this Sense of Hearing miniature tapestry from MicroStitchery – I had to purchase a few things:
1. A frame – 12″ square simple black frame
2. A mat – double mat cut to fit the embroidery & the frame
3. Foam core board – acid-free
When it comes to the glass in the frame, you can also decide if you want to have a custom piece of museum glass cut for your fame. Sometimes I do that. Sometimes I don’t. I didn’t on this piece.
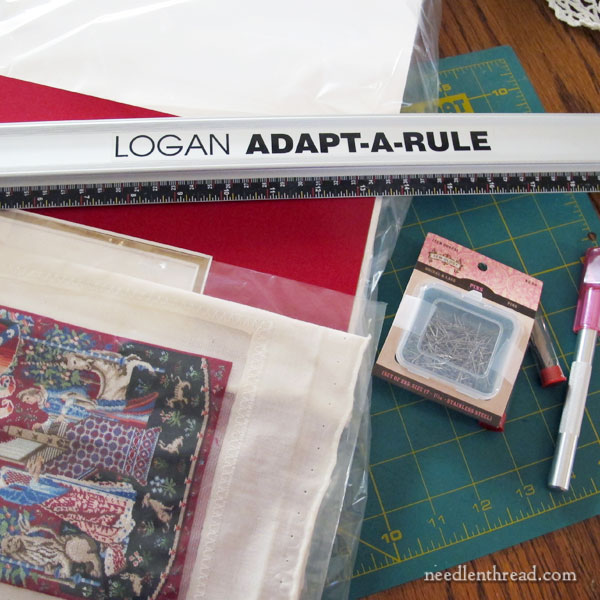
I already had on hand the other supplies used to do the job:
1. A craft / utility knife to cut the foam core board
2. Stainless steel pins (also called lace pins)
3. A precise ruler
4. Framer’s tape (acid neutral)
5. A cutting mat
Try to Buy Supplies on Sale
Everything I had to buy to do the job myself, I purchased on sale.
I used a 50% coupon on the frame during one shopping excursion, so I got it for about $12.
The foam core board was on sale when art supplies were on sale, and the piece was much larger than I needed. It cost about $4.
The mat was the expensive part. I had it special cut. I did that during a custom framing sale, so it ran about $20 instead of $40. It’s a linen finish on the red, and on the gold, a metallic leaf finish.
Since I had everything else I needed, the framing job cost me about $36.
Don’t Rush!
Don’t be like me and leave your faming job to the last minute! I was a little rushed with this particular job, since I was giving the piece as a gift that very day.
Make sure you have a few hours set aside for the job, just in case you need to make a lot of adjustments as you go, and if you intend to take photos of the finished piece (I highly recommend doing so if you’re giving it away), try to work at a time of day when the lighting is conducive to good photos. I didn’t. My photos here pretty much stink, and I never got a good photo of the finished framed piece.
On the bright side, I gave the piece to my niece, who lives a whopping three blocks away, so I’ll get a good photo at some point just for my own archives.
Note: my finished embroidery piece (including all the excess fabric) was too small to mount onto one single piece of foam core board that fit behind the mat and filled the whole frame. Because of this, I had to mount my embroidery on a small piece of foam core board and make sure I had enough excess board to fill around it and it keep the mounted embroidery tightly in place behind the mat.
If your finished embroidery and its excess fabric will fit over the whole piece of foam core board that fits perfectly inside your frame, you don’t have to cut your foam board like this. You can just skip ahead to the mounting part!
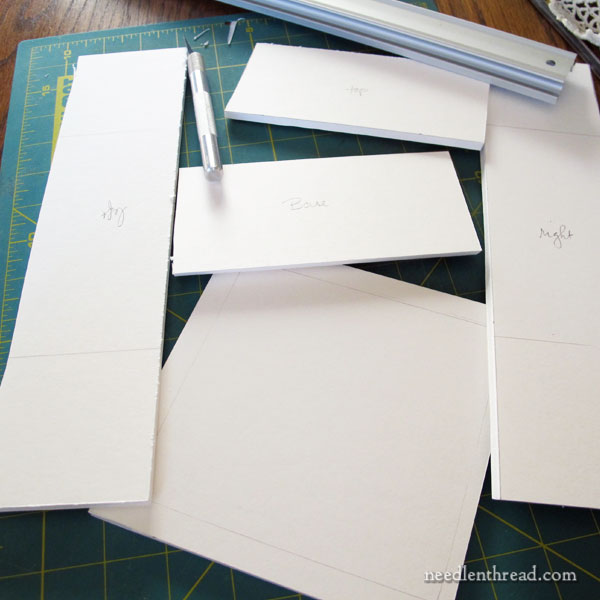
Start by cutting a large piece of foam core board to fit inside the frame.
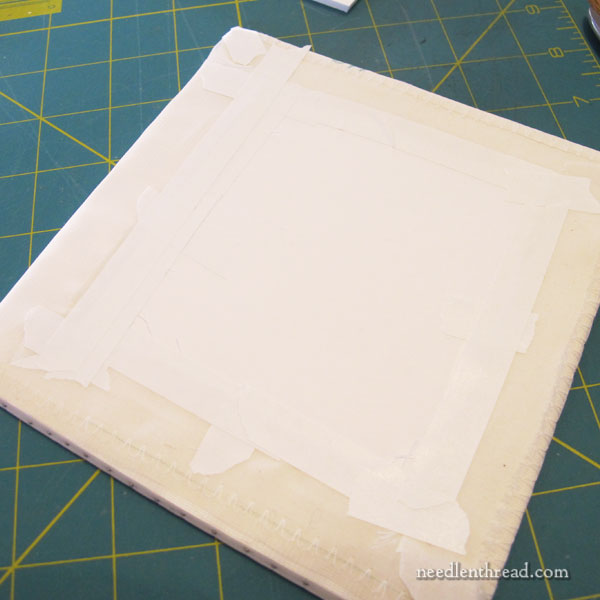
Then, measure the placement of mat on that piece of foam core board. Place the mat on top of the cut foam core board (it should fit right on top of it) and Very Carefully, using a light pencil, just trace the mat opening. Don’t get pencil residue on the cut edges of your mat!
Then, measure beyond the mat opening about 1/2″ or so (your fabric has to fit over this piece, so don’t make it too big, if you don’t have a lot of excess fabric around your embroidery) and mark a line around the opening drawn on the board.
Using the ruler as a guide, cut the foam core board into pieces, keeping the center area intact as one piece. You’ll end up with extra pieces of foam core board that will fit exactly inside the back of your frame, to keep the embroidery tightly positioned where you need it. I marked these (base, top, right, left) to make it easier to assemble everything at the end.

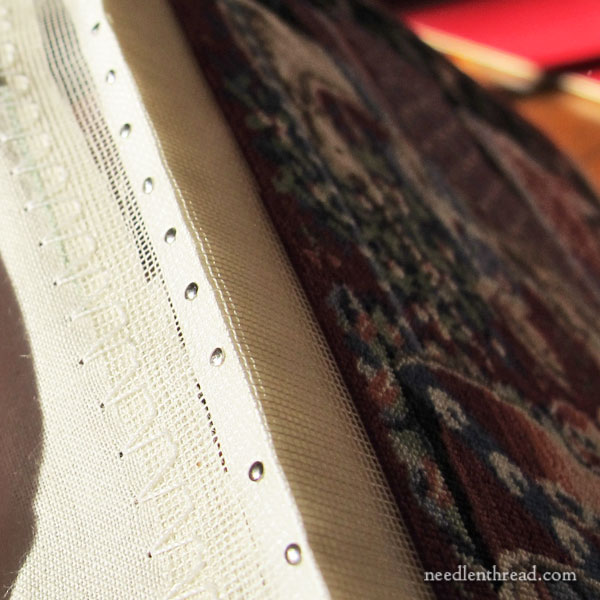
Now it’s just a matter of mounting the needlework onto the foam core board, using stainless steel pins.
(Note: it’s important to use stainless steel pins because they are not prone to rust. Don’t use regular sewing pins!)
Starting in the center of one side of the needlework, insert a pin into the edge of the foam core board so that it goes into the board straight. You don’t want it to pierce out the back of the board or – worse yet! – the front where the needlework is.
Pin this side of the embroidery, from the center outwards to the edge, making sure you’re keeping the embroidery edge square with the edge of the foam core board. Go slowly, pin carefully, make adjustments as you go. Don’t be shy about taking a pin out if you’re not pleased with the placement of the embroidery on the board. You want the piece to line up nice and straight and square!
Place a pin about once every quarter of an inch.
If you need help pushing the pin into the board (they go in very easily, but your fingers might hurt from pushing that many tiny pin heads), using something nearby that’s flat and easy to hold. I used the flat end of a small container that holds my craft knife blades to push the pins in.
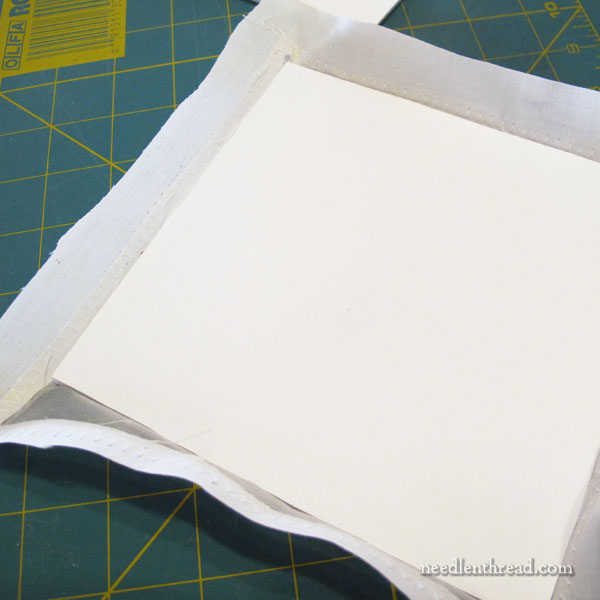
Continue pinning, from the center out, right across the edge of the foam core board, and then go back to the center and work out to the opposite edge.
With one side finished, move to the opposite side and repeat the process, starting from the center and working out to one edge, and going back to the center and working out to the other edge.
Pin the last two sides the same way.
When you’re pinning, pull your embroidery somewhat taut, so that it fits snugly over the foam core board, but don’t pull the needlework really tightly, because you don’t want to warp it. But you do want it to fit nice and snugly over the board.
The needlework won’t look perfect on the board until all four sides are pinned.
Once all four sides are pinned, examine the needlework closely to make sure it’s on straight and looks good. Make sure there are no warbles in the surface of the embroidery or in the design, where the work might be pulled too tightly or left too loose. Make any adjustments you need to, by removing pins and re-pinning.
Remember: Take Your Time!
When the embroidery is on the board to your satisfaction, turn the piece embroidery-side down, and cut off any excess fabric, leaving about an inch all around.
At this point, though I didn’t show it, I also trim the corners off, within about 1/4″ of the board’s corners.
Using framer’s tape, tape the excess fabric down to the back of the board, all the way around.
And yes, I forgot to take a photo of the front of the piece, on the board but out of the frame. Sorry!
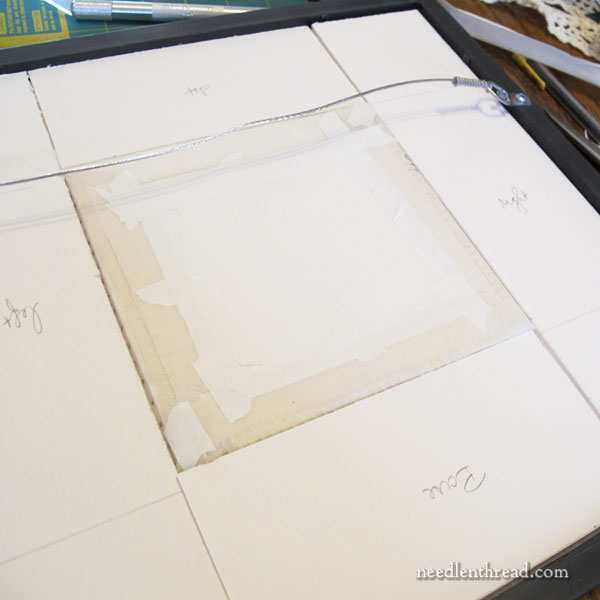
Situate the embroidered piece in place behind the mat opening.
At this point, I like to tape the piece in place on the back of the mat, once I have it right where I want it. Once the embroidery is exactly where I want it, I run a couple long pieces of framer’s tape across the piece, rightly down the edges of the piece, and across the back of the mat, and secure the embroidery in place so that it doesn’t shift while finishing the framing.
Turn the frame face down (if you need to, wash the glass first!), put the glass in the frame, put the mat (with the embroidery taped to it) on top of the glass, and then configure your extra pieces of foam core board around the embroidery piece, behind the mat. It should all fit together like a nice comfy jigsaw puzzle.
Finally, place the backing of the frame over the insides, and either nail it in place or bend down the little bendy tabs on the back (this part depends on the type of frame you purchased).

And there it is, ready to go!
That’s the best photo I got of the finished frame piece, thanks to really bad lighting that day. Still, you get the idea.
Unfortunately, you can see how the very base of the design is slightly cut off, because the mat opening was not large enough. This was my fault – I didn’t take the embroidery with me when I had the mat cut. I just took the dimensions. Learn a lesson from my mistakes – always take the embroidery with you when you are having a mat custom cut! The folks who cut the mat will be much more precise when they measure.
I hope this little tutorial comes in handy the next time you’re contemplating doing your own frame job. It really is simple – it look me much longer to write this tutorial than it did to do the framing!
