Ah, Embroidery Project Rotation! It can drive you nuts or keep you sane, depending on how you look at it!
These days, I have several embroidery projects going, and I work them in a kind of rotation schedule. I showed you earlier this year how I organize multiple embroidery projects at once. And as the year ticks along, things are working out ok with all of them, although, admittedly, some projects are getting more attention than others.
We’ll chat later on about the pros and cons of working many projects in rotation (and I’ll show you a couple more that I’ve added into the mix), but today, I want to update you on Modern Crewel, this project kit that I reviewed here, featured in Inspirations Magazine issue 90.
There are two tips I want to share that surfaced while I was stitching along the other day. I think they’re worth knowing, whether you’re working this kit or not!
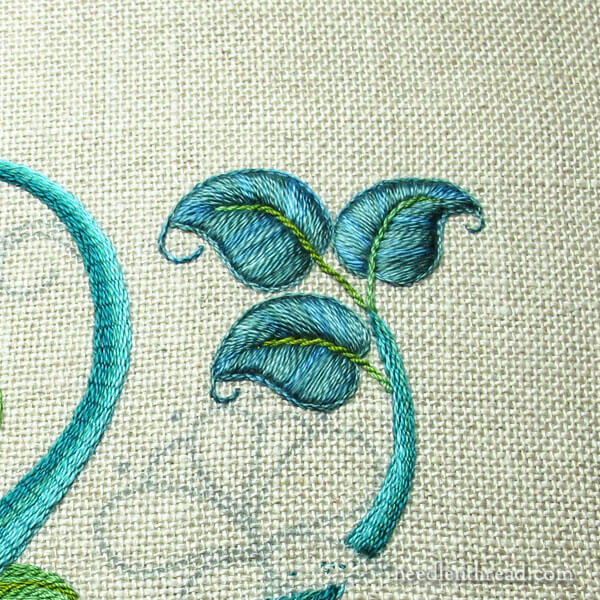
The last time we visited Modern Crewel, I had finished the central pomegranate, all the main trunks or stems, and had just started on the leaves, by padding them.
My next stitching session with this project focused on finishing the leaves and working all the little stems and tendrils.
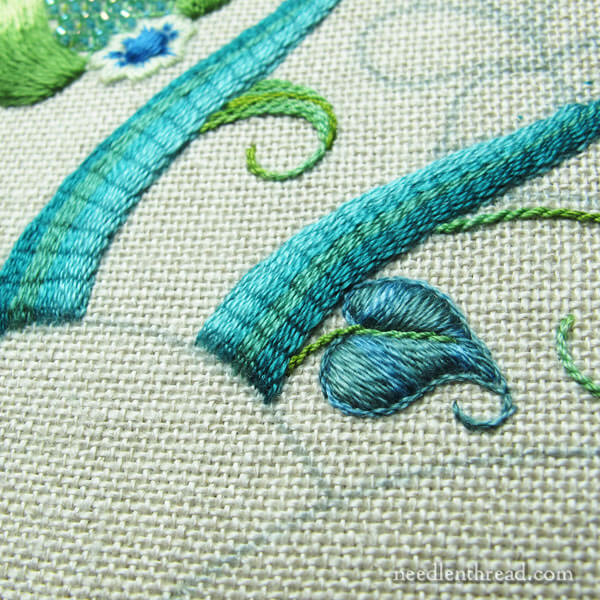
The leaves are pretty straightforward padded satin stitch, outlined with stem stitch. They’re worked in an overdyed cotton so you get kind of a stripy effect with each of them.
I’ve never been too fond of satin stitch in overdyed threads, because I don’t really like that stripy effect. And with satin stitch, you can’t manipulate the color placement like you can with other stitches.
But on this piece, with all its vibrant color, its textures and movement, I find I really love the overdyed leaves! They add a certain what’s-it. A little pizzaz. Something different, and a little unexpected. Not the typical solid satin stitch or shaded long and short stitch.
Yep! It works!
Needle Check
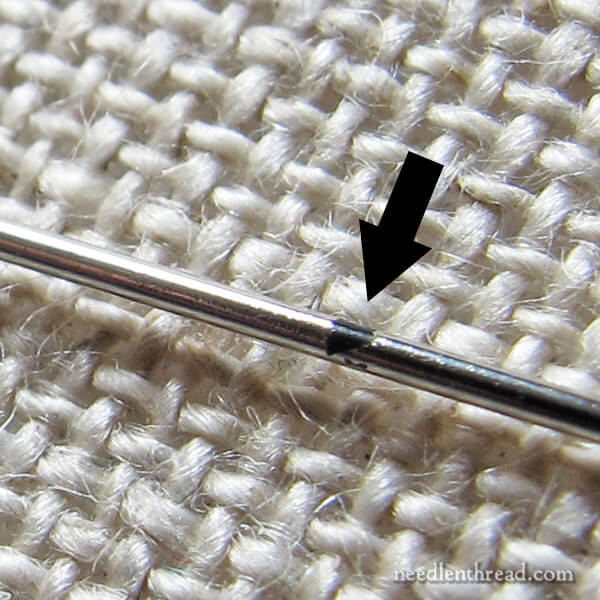
I ran into a little snag while working the satin stitch, and it took me a moment to figure out what was frustrating me and – worse yet – frustrating my threads!
Sigh.
I do hate to see flaws in a needle.
After very little stitching with this magnified beauty above, the finish began to wear off the needle. Usually, you don’t notice right away when this happens – often, it’s hard to see a spot where the finish has chipped or rubbed off.
But your thread notices. Subtle snags as the needle passes through stitches can become an increasing frustration if you don’t find the source of the problem.
Tip: If your needle is not passing smoothly through your stitches, if you’re noticing a little roughness in the passage, if you’re noticing a slight pulling or snagging as you pass through other stitches, or a slight hairiness left behind after your needle passes through… check your needle!
Also, if your thread is wearing faster than normal around the eye of the needle, check the eye carefully for burrs.
Substituting a new needle in good condition can definitely reduce thread wear and stitching frustration.
On Thread Twist
This topic is going to get a wee bit complicated. For those of you who have the kit and are stitching along, this is just a heads up. It’s a good tip for any stitching, actually!
I received an email from a reader who’s working this project, too. She ran into some problems with the stems and tendrils, and since I hadn’t gotten to them yet, I wasn’t sure what she was talking about and I couldn’t help much.
But, as soon as I got to the stems and tendrils myself, I knew exactly what my stitching companion was talking about, and this is specifically for her (sorry I couldn’t help you earlier, Rebecca!) and for anyone else getting to this point in the project.
The brighter green stems and tendrils on this piece are supposed to be worked in stem stitch, using a thread from Clarence River Rainbows. I’ve never used these threads before, and although I did a quick search for further information online, all I could find was a Facebook page. I couldn’t find a page with complete product descriptions.
I assumed that the thread (described as “P4 perlé 40”) was cotton. There are two perlé threads in the piece – a size 10 and a size 40. Everything else is cotton. So I figured they were cotton, too, and just numbered differently from the standard cotton perle number sizes.
But when I finally got around to taking out the thread to start the tendrils, my first thought upon feeling it was, “Oh, this is silk?” There’s no mention of silk threads in the materials list, so I was a little surprised.
It’s not shiny enough to be a synthetic, but it is shiny. It’s a bit bouncy (but then, it’s put up in a very tight twist on the thread card), and it has the feel of (and it’s about the weight of) a nice buttonhole silk.
Does it really matter if it’s cotton or silk? Well, sometimes it does.
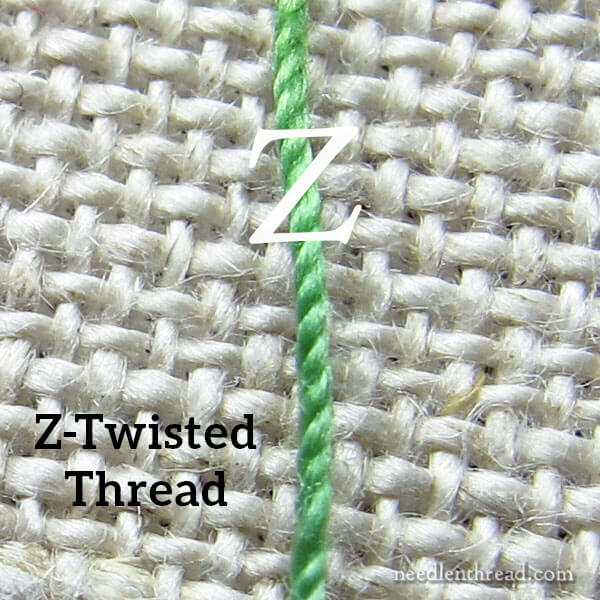
I’ve written pretty extensively about s-twisted vs z-twisted threads here on Needle ‘n Thread.
There are some instances in stitching when it’s important to know if a thread is Z- or S-twisted.
If you’re working only with cottons, it doesn’t usually matter, as most common cotton threads made for hand embroidery are s-twisted.
But with other threads, like buttonhole silks, synthetics, and the like, the threads are often Z-twisted. And the twist of the thread makes a huge difference in the outcome of some stitches.
If you’re not sure what the difference is between s-twisted and z-twisted threads, you can read more about them – and see the differences between the two – in the following articles:
S-Twisted vs Z-Twisted Embroidery Threads
S-Twisted vs Z-Twisted Embroidery Threads, Stitched
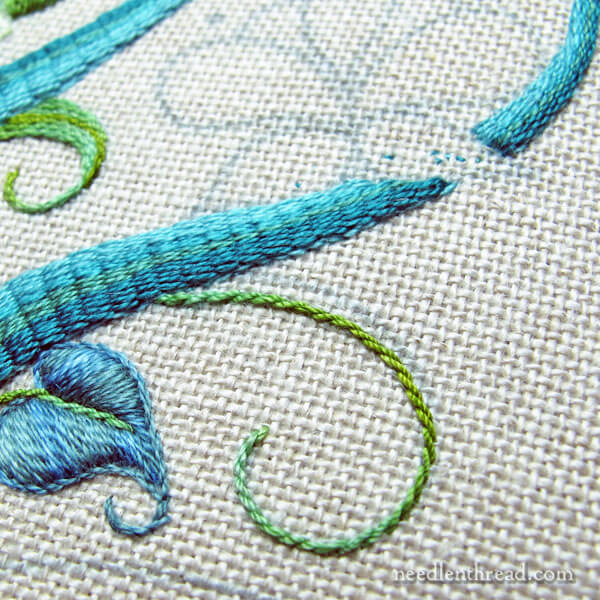
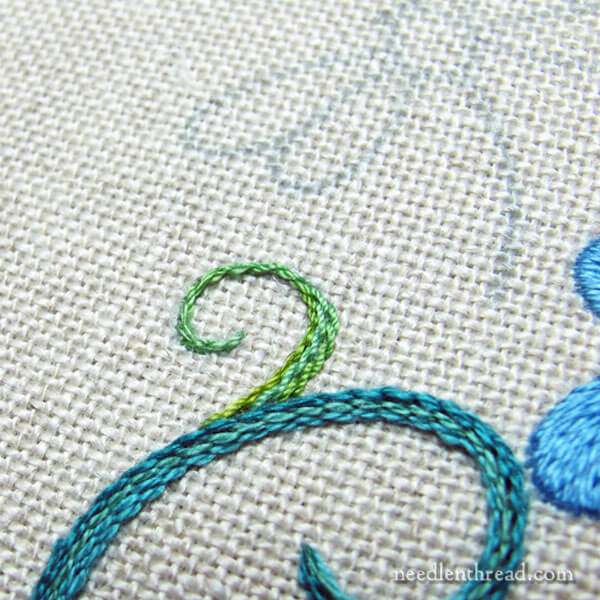
If you’re working with a z-twisted thread and you’re trying to achieve a ropey stem stitch – like the one seen on the tendril above – it isn’t going to happen if you follow the regular instructions for stem stitch that you’ll find just about anywhere today.
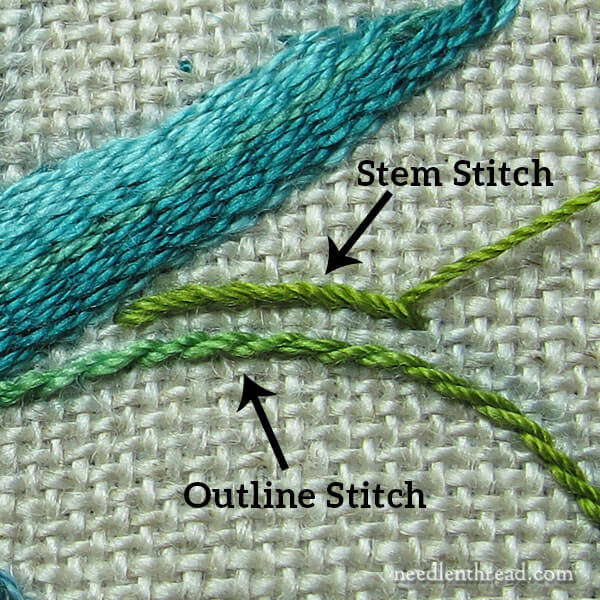
If you follow the standard stem stitch approach, where, when working from left to right, the needle comes up into the fabric above the working thread, your stem stitch with a z-twisted thread will look like the top line in the photo above. The thread will lose its twist and all the stitches will blend together.
If you want to achieve the ropey stem stitch look that we’re used to achieving with s-twisted cotton following the standard instructions for stem stitch, you actually have to work an outline stitch, where the needle comes up in the fabric with the working thread above it instead of below it (when working left to right).
These instructions vary depending on the direction of stitching and whether you’re stitching with your right hand or left. If you want a thorough understanding of what’s going on with the thread twists, you’ll find the information in the articles on s-twist and z-twist linked above, and in the articles on my stem stitch video page (and watch the video) and on my outline stitch video page.
In most books today, the instructions for stem stitch are the same as the instructions I use in my video and in the many articles on stem stitch here on Needle ‘n Thread. That being said, there are some books – especially older books – that don’t distinguish between stem and outline stitch, or that actually call them just the opposite (they call outline “stem,” and stem “outline.”) So that may be the point of confusion in the instructions.
In any case, there are no instructions for stem stitch in the article in Inspirations, as it’s such a basic stitch, so if you want the ropey look of stem stitch with the thread called for in this kit, you’ll need to work the outline stitch instead of the stem stitch.
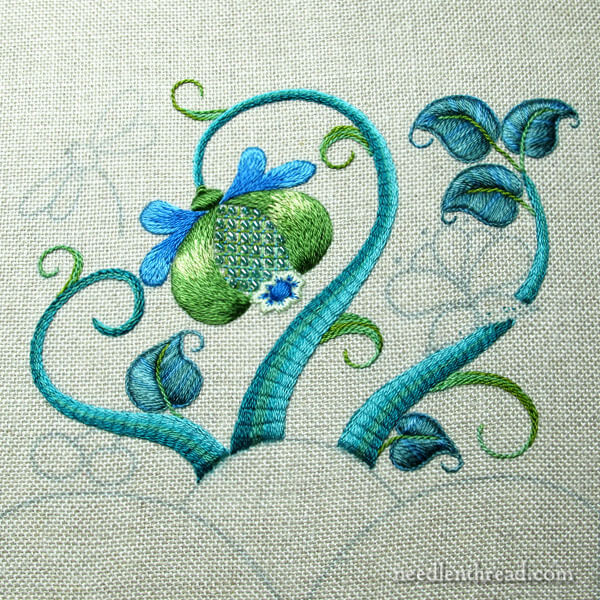
And that’s where I ended that stitching session – leaves, stems, and tendrils complete. Next time, I’ll tackle the flower, the dragonfly, and the two little berries. And then it’s just a matter of the hillocks!
It’s a fun project. Every time I take it out to work on it – especially on gray February days! – it’s like taking out a bit of sunshine!
