Happy Monday, from a windy, springish Kansas!
We’re going to hop back to gridded work today! After finishing Modern Crewel, I took a good chunk of time to set up a couple of my own projects last week and to make a wee bit of headway on them. (I love it when that happens!)
But when it comes to a quick-stitch-fix, a project that I can work on in 15 to 30 minute bursts when I have a little down time, it’s this 56-count silk gauze Tree of Life project that I turn to.
The last time we looked at the project, we chatted about the lower panel and thread re-organization. Today, I’ll show you a turn on the corner, we’ll talk about lining up the whole frame layout and my cheater method of double-checking my counting, and finally discuss working a project like this with the frame turned, to make the stitching area easier to see and reach.
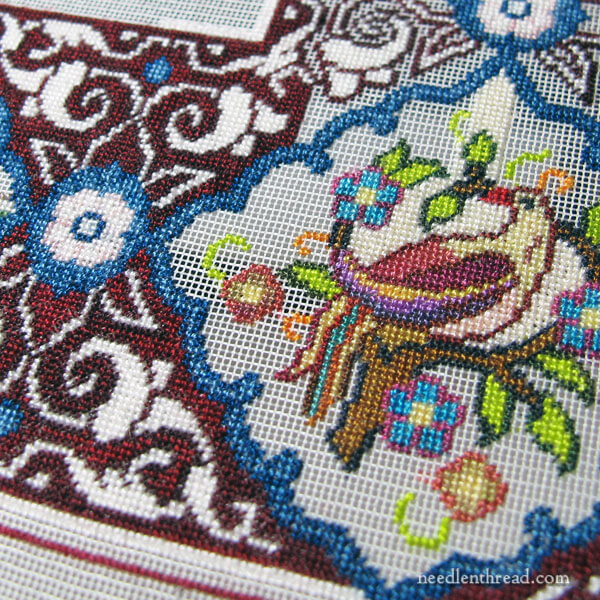
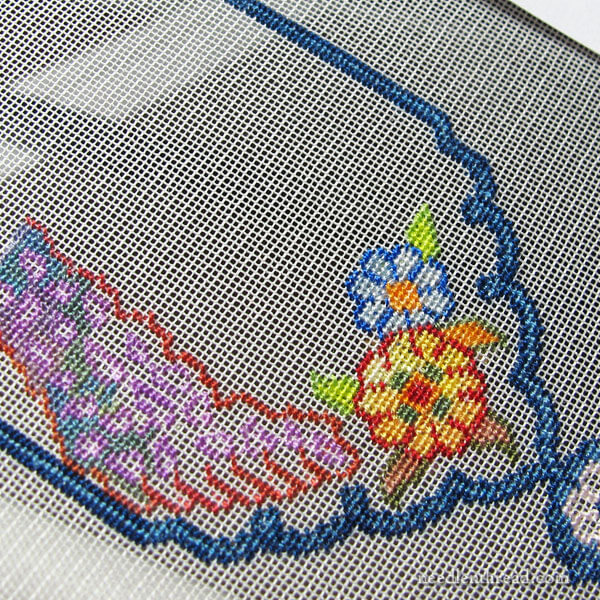
This is the lower right corner of the design – another colorful bird medallion tucked in the corner!
Why the Un-Stitched Backgrounds?
I should re-mention that none of the panels or medallions I’ve worked so far are actually finished completely. I’ve been leaving a lot of the background stitching undone on each area. I’ll go back and finish those when I want something easy and mindless to stitch on, that I don’t have to think about at all. The unstitched background areas don’t require any counting. It’s just a matter of filling.
Those areas are perfect for stitching while watching a movie, listening to an engrossing book, chatting on the phone, or Face Timing with my family far away. They’re also perfect for group stitching situations, when it’s more fun to chat than to concentrate!
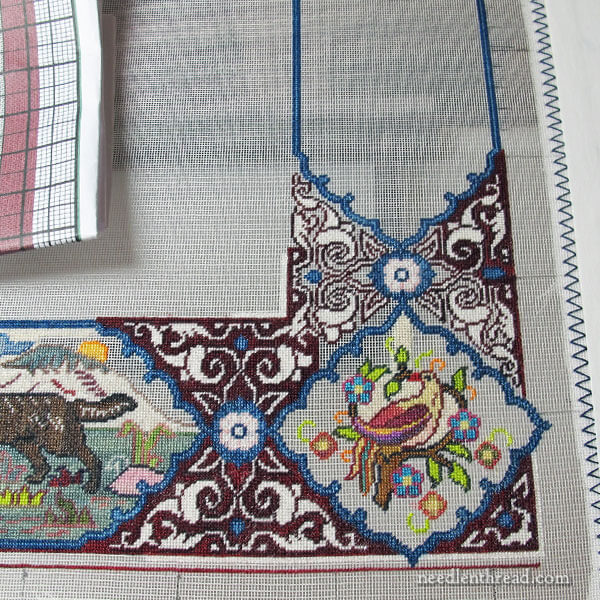
When last we met on this piece, I had planned to stitch in the blue frame all around the design as my next step.
I started to do that. But then I got hooked into the bird medallion. And then I got hooked into the background filigree design on the corner.
And you know, that’s my favorite part of Natalia Frank’s Tree of Life designs – those filigree backgrounds around the border! I love them. They’re fun to work. I do the white design element first, and then work around the white with the dark burgundy, and then it’s just a matter of filling with the brighter burgundy red. It’s very satisfying to get an area finished! The contrast in the design is quite striking!
After finishing the lower right bird medallion, I kept going with the blue frame. And, in fact, I finished it, although I never did get a good photo of it finished!
Using a Basting Thread to Keep Things in Line
I was a little nervous about the frame, as it’s symmetrical, and making a mistake on the count from one side to another would throw off the top, where the frame meets up.
So I worked the blue frame elements up the right side of the design first, and then I worked them up the left side of the design, with the intention of working the top part of the blue frame last, meeting in the middle.
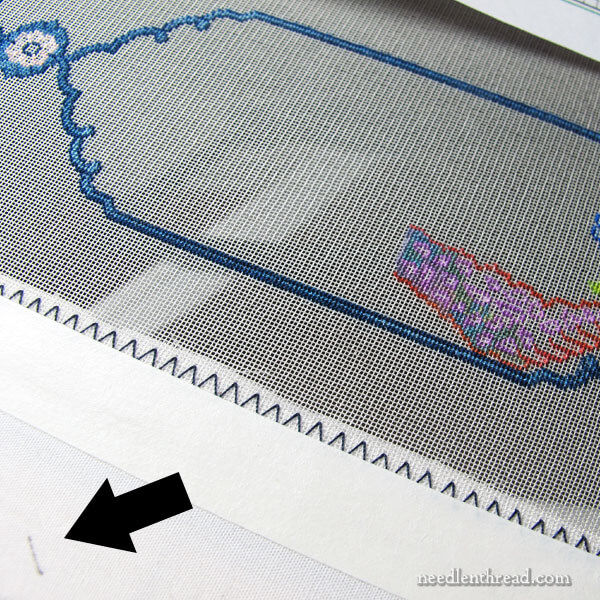
To make sure my left and right sides lined up correctly, I used a sewing thread and basted across the silk gauze from the finished left side of the frame over to where I was stitching up the right side.
The basted sewing threads helped me align the frame elements precisely. If I made a mistake in counting, it would be evident right away!
In this way, the frame worked out just right on the first go, without any unwanted counting mistakes.
At first, stitching the blue framed elements was slow going, because I was exceedingly worried about making a counting mistake. But once I was just working on the frame alone, things sped up. Each element is structured the same way, so once you become familiar with the structure, you don’t really even have to refer to the pattern frequently. It’s just a matter of repeating the same structure.
Once I finished the blue frame all around, it became vital to start the peacock panel, which runs up the left side of the design.
Why vital? Why, because it’s a peacock, of course!
Turning the Frame & Stitch Direction
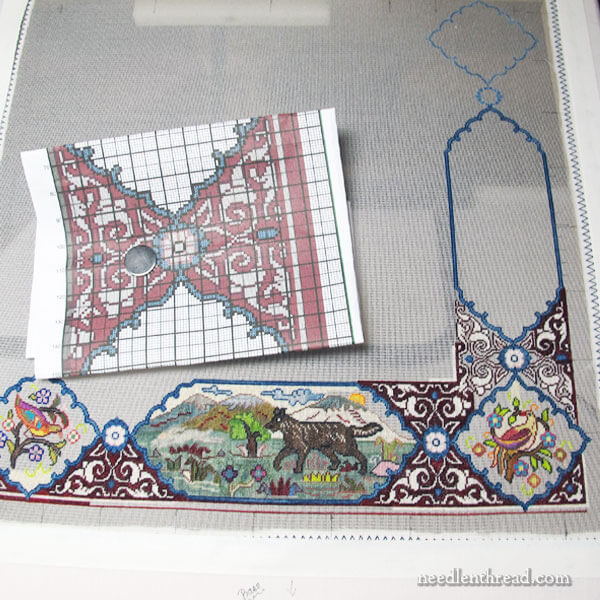
To work on this panel, I turned the frame 90 degrees so that it was sideways in front of me. This way, I could see the gauze more easily (I stitch on it without my glasses on, so it has to be relatively close to me) and reach the stitching area very easily.
When you’re doing petit point like this (tent stitch), all your stitches should point in the same direction. In fact, it’s very obvious if your stitches don’t point in the same direction!
If you work with a turned frame, it’s easy to get confused on stitch direction.
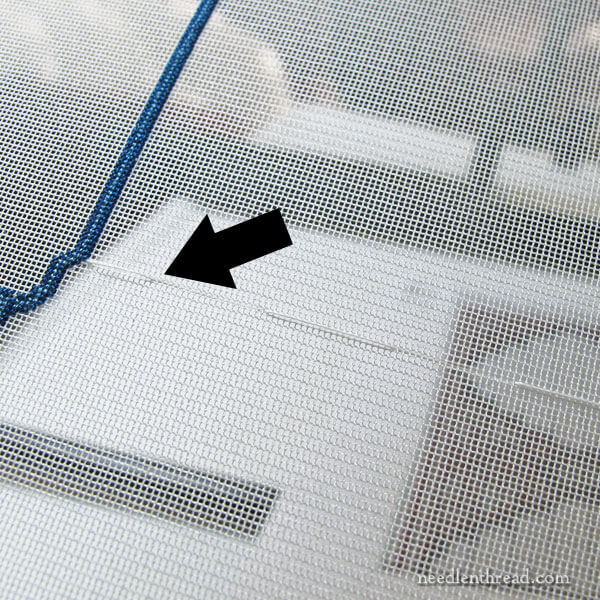
To keep myself oriented, I mark a little slash on the fabric on the side of my frame. The slash indicates the stitch direction when working with that side of the frame directly in front of me. I turn the pattern on its side, too, and then I just work the whole thing like I would any counted piece.
The little slash is just an extra little guide that I can refer to, in situations of befuddlement. And, when you’re working on a piece like this, where you might move from one side of the frame to the other just for the heck of it, and where you turn your frame so that the side you’re working on is easier to see, it’s a good idea to take as many precautions against befuddlement as possible!
So now I’m attacking the peacock panel on the left side of the design.
You can see why this type of project – jam-packed with all its little separate elements – is perfect to work on in smaller bursts of time. Whenever I have a moment where I’m waiting (dinner’s in the oven, I’m expecting a visitor who’s late, I’m finished with something early and I have a few minutes before leaving for an appointment), I find myself saying, “Hey, I’ll stitch that tiny flower…” or “Hey, now’s a good time to stitch that rabbit…or outline that tail…”
Going about a project like this that way, before you know it, you can make some serious progress!
So, that’s the Tree of Life Update! Maybe I’ll be able to show you that peacock soon.
Here’s a list of the previous articles on this project, including the kit review and where to find it:
Miniature Tree of Life – kit review
Setting Up the Project – silk gauze on a frame
Stumbling Through some Strategies for Stitching
Coming Up on Needle ‘n Thread
A Stitch Fun! tutorial will be up later this week! It’s been a while, but I’m back to working up tutorials, so I hope you’ll keep an eye out for that!
Don’t forget that I’m giving away a gorgeous slate frame. If you haven’t joined in on that yet, here’s the article.
I’ve also got a great book on color with embroidery that I want to show you. I know a lot of stitchers (including myself!) struggle with color selection, so if you’re one of us, you’ll find this one quite helpful!
Hope your week’s off to a great start!
