Last week, I shared this embroidery design with you, that I’m using to embellish a cover for a First Communion prayer book for my niece.
Her First Communion is on Sunday, as a matter of fact, so this is a bit of a rush job. I’m still not sure if I can have it finished on time. But I’m not ready to give up yet!
Today, I’ll show you the beginnings, talk a bit about choices for stitches and whatnot, discuss a few details you have to pay attention to on this type of project, and tell you about flipping.
Yes.
Flipping.
To set the project up, I ended up using a lightweight linen for the ground fabric.
I wanted the cover itself to be a lightweight linen, and the backing fabric behind the ground fabric to be lightweight, too, because it’s much easier to make up the actual book cover if there’s not a lot of bulk to the fabric.
Because the linen is lightweight and I don’t want the cover to be sheer at all, a backing fabric is essential.
My plan for the backing fabric was a lightweight cotton batiste. I knew I had a small piece of cotton batiste Somewhere, leftover from Something…but I couldn’t find it.
And being a little pressured for time, I figured I wouldn’t pull apart my workroom looking for it. Instead, I backed the linen ground fabric with another piece of linen.
To transfer the design, I ironed it on. If you want a decent iron on pen that makes a fine line, I strongly recommend Sublime Stitching’s fine-tipped iron-on transfer pen. I reviewed it here.
Why did I iron the design on? Ummm….time! Now the trick is to be able to cover all the transfer lines adequately!
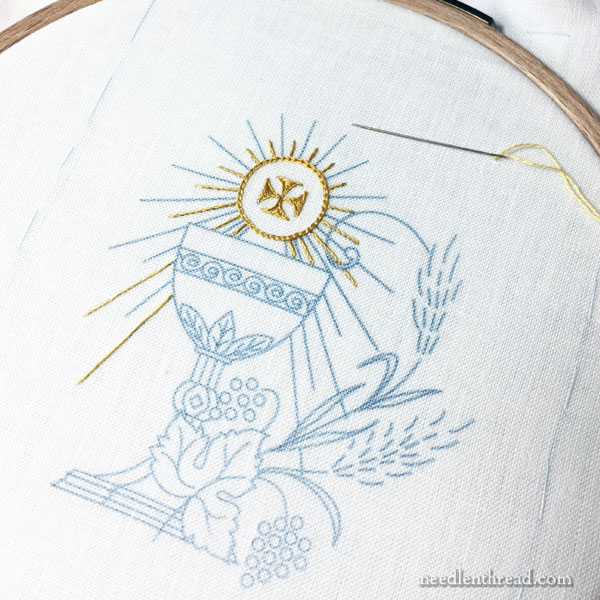
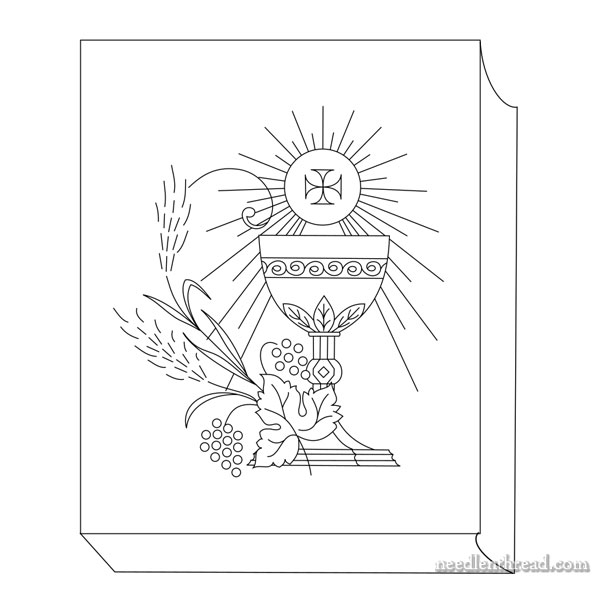
Incidentally, the original design prints much larger than the size I’m using. I had to reduce the size significantly, to about 3″ wide by 3.3″ tall, to fit the size of the book.
I’m using one strand of DMC floss (from the six) for all the stitching. I plan on keeping things pretty basic, with simple, simple stitching!
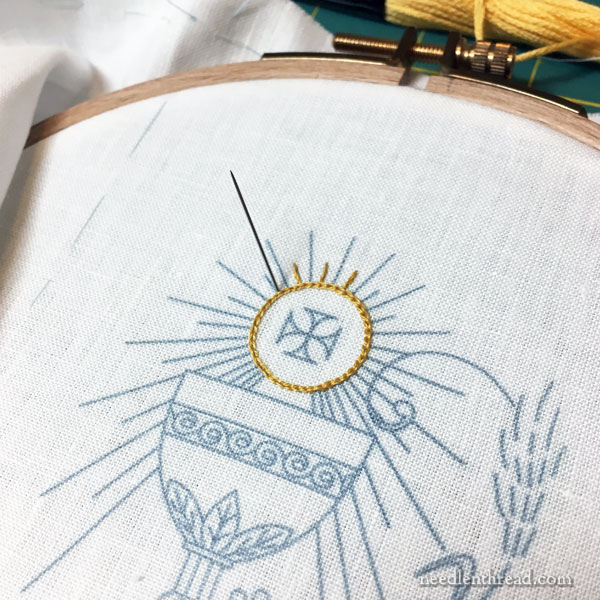
On the host and chalice, I’m using two shades of yellow-gold.
Using the slightly darker shade, in chain stitch, I outlined the host. I’ll do the same thing to the chalice.
I worked the cross in satin stitch outlined with stem stitch in the darker shade.
I’ll use the lighter shade (and stem stitch) to work all the details on the chalice.
The rays are embroidered in stem stitch, alternating the lighter and darker yellow-gold.
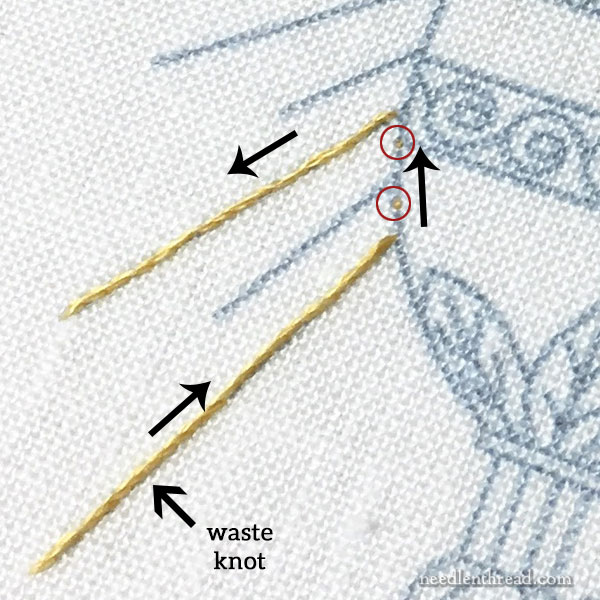
With this type of embroidery, where both fabric layers are lightweight and a little sheer, it’s super-duper important not to carry the embroidery threads across the back of the fabric in any empty design space. They would definitely be visible, even with the two layers of fabric.
So, to give you an example of the direction of stitching that saves the most time, you can follow my stitching path in the photo above.
I started with a waste knot where the arrow points in the photo above, leaving the knot on the top of the fabric, taking two tiny little backstitches, moving towards the beginning of the line in the lower left corner of the image.
From there, I started the stem stitch on the line, towards the chalice design, clipping the waste knot as I approached it, and covering up those two tiny tacking backstitches with stem stitch.
When I got to the line of the chalice, I took two tiny backstitches along that design line (they’re circled in red) and then started the next radiating line, moving out away from the chalice.
This way, I could easily stitch those two long lines without having to turn my work over and run the threads under the backs of stitches to get to a new line, or end the thread and start again.
The idea is to create paths for yourself that allow you to stitch as much as possible without having to end a thread, and without carrying your thread on the back across an empty design space on to get to a new part of the design.
After stitching that second radiating line, I still had plenty of thread, so instead of ending the thread, I turned my work over, whipped the thread around every other stitch on the back, and moved myself back to the chalice line, where I could make two tiny tacking stitches to move myself to the next radiating line in that color.
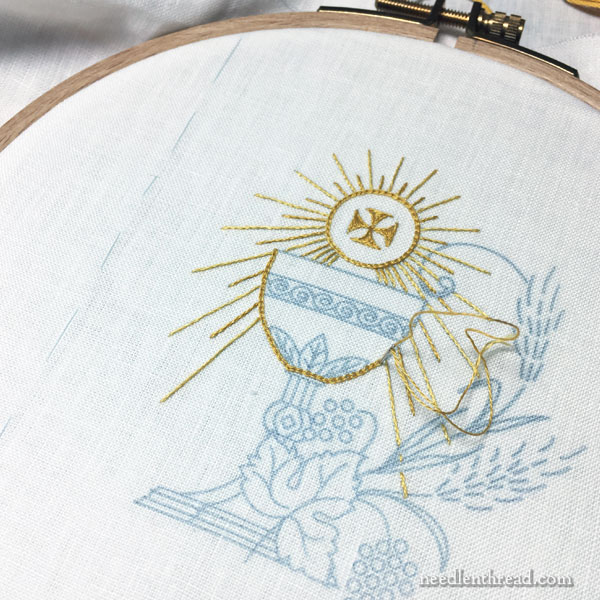
And here I’ve started on the chain stitch around the chalice, using the darker shade of yellow gold.
My chain stitch on this bit isn’t looking so hot. But hopefully, once there’s more around it, it’ll all just blend together and look fine!
And that’s as far as I’ve gotten on the stitching! Woohoo!
Guess what I’m doing today?
I flipped the design on purpose, by the way.
When I originally drew the design, I didn’t think of it actually on the book cover. Above, you get an idea of what the originally orientation of the design would look like on the book cover.
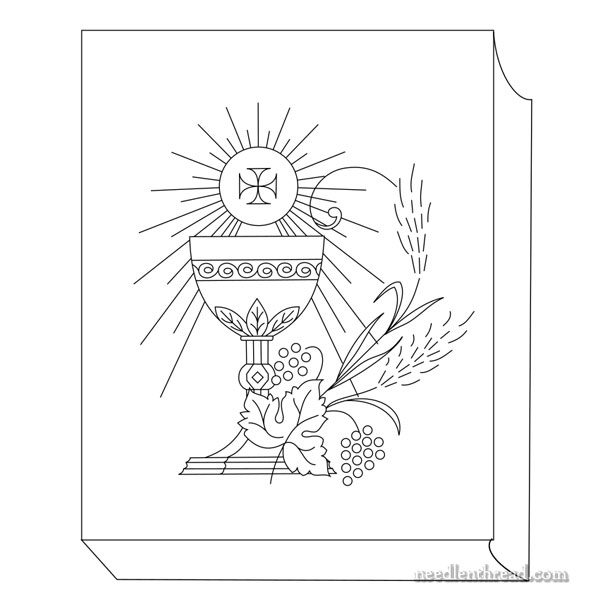
And here it is, flipped.
I like the heavier part of the design, with the up-swoosh of wheat, on the outer edge of the cover. In the overall scheme of All Things Book Cover-ish, I don’t know if it makes that much of a difference, but I just like it better. It “closes” the design, somehow.
So that’s where things stand today – hopefully, by the weekend, they’ll stand quite a bit further along!
Incidentally, while I stitched the small amount above the other day, I listened to Yvette Stanton on Fiber Talk – a positively charming, fun, thought-provoking episode of the podcast. Loved the reflections on materials and the development of art and craft in any particular region or era! If you haven’t heard it yet, have a listen!
