Have you ever started an embroidery project from scratch, with just a line drawing, and found yourself wondering, “What stitches should I use?”
Whether you’re new to embroidery or you’ve been stitching for a while, chances are, you’ve run into the What Stitch Where dilemma.
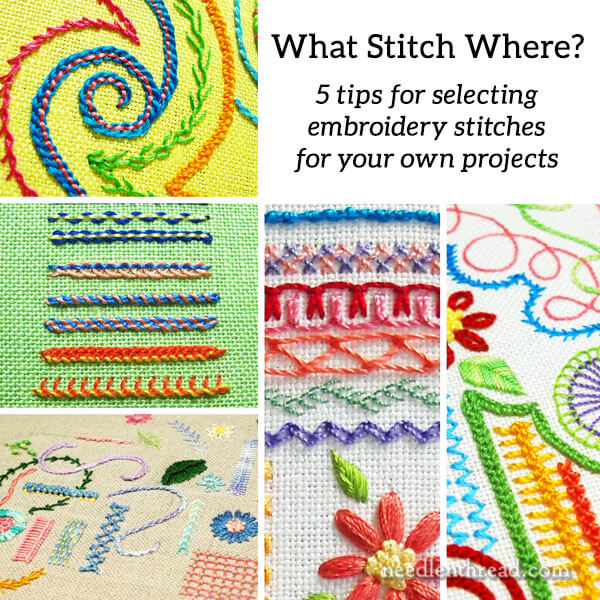
Today, I’m going to share five basic tips with you, to help you gain confidence in selecting your own stitches for hand embroidery projects. Down the road a bit, we’ll revisit the topic in much greater detail – let me I’ll explain why…
A few weeks ago, when I started sneak-peeking my newest kaleidoscope adventure (this one), I got a small flood of emails asking some variation of this question: How do you decide what stitch to use where when you’re designing a project from scratch?
This is a Huge topic, and one that definitely deserves some in-depth exploration!
In an attempt to help people who face the What-Stitch-Where Dilemma, I set about writing an article.
An article just won’t do it on a topic like this – a point I realized when my first attempt hit the length of your average dissertation.
So today, I’m going to share five basic tips to get you started, to help you build confidence in selecting your own embroidery stitches for any project. And then we’ll revisit the topic in depth later on, in a format that allows deeper exploration.
#1: Get to Know Stitches
I don’t mean get to know every stitch. But if you want to select your own stitches for your own projects with any confidence at all, you should be aware of the different types of embroidery stitches that are available to you.
Breaking down embroidery stitches into definite categories can get complicated, because different stitches can be used in different categories. Basically, for starting out, you need to know that there are line stitches, filling stitches, and isolated stitches.
A good stitch dictionary would be very helpful at this point! Here’s a list of stitch dictionaries I’ve reviewed – all of them are terrific for different reasons. If you’re moderately interested in really pursuing embroidery, you should have at least one good stitch dictionary.
Embroidery Stitch Bible
A-Z Series, including Embroidery Stitches & Embroidery Stitches 2
Stitch Sampler – which is available under a new title. You can read about the the various editions of this book here, including the newest one, but it’s the same book!
Left-Handed Embroiderer’s Companion or Right-Handed Embroiderer’s Companion
#2: Practice Stitches
Whether you practice stitches by embroidering various patterns (like the embroidery patterns you’ll find here on Needle ‘n Thread) for the fun of it, or by working random stitch samplers, you need to get to know how the basic stitches work and what look they produce.
If I were to narrow down ten embroidery stitches that are worth knowing, that will help you confidently choose stitches for projects, these are the ten stitches I recommend.
Working random samplers is a fun way to “document” your discovery and progress of different embroidery stitches. I’ve written quite a few articles on sampling, along with some tutorial series and e-books, all of which can help you practice stitches:
Embroidery Stitches & Samplers
5 Reasons to Make and Keep a Doodle Cloth
Hand Embroidered Lettering and Text Sampler
Long & Short Stitch Sampler
The Lattice Jumble Sampler (e-book)
Stitch Sampler Alphabet (ebook)
The Blackwork Fish Project
Felt Needlebook Project
#3: Start Simple
Perhaps you’ve stitched a lot of kits, or you’ve followed lots of step-by-step embroidery projects designed by someone else, but now you want to choose your own stitches for any design – whether it’s fun and funky iron-on transfers or some complicated drawing you fell in love with while meandering through Pinterest.
Whatever the case, start simple.
The drawing itself doesn’t have to be simple. It could be complex! But start with simpler stitches, or a simple concept or interpretation of the design.
You’ll be more likely to succeed without feeling frustrated or chucking it all in! And that success will help you move on to more complex interpretations.
Start Simple!
#4: Use Good Materials
No, you don’t have to invest a fortune!
But don’t use “craft” floss. Don’t use flimsy fabric.
Invest in decent materials – the best that you can reasonably afford – because stitching on poor quality materials using poor quality floss leads to:
1. frustration while you’re stitching – which can cause you to chuck it all in!
and
2. a poorer quality finish (no matter how good the stitching is), which can be disheartening.
You want your stitching to be as frustration-free as possible, with the nicest finish as possible. This helps build confidence!
#5: Don’t Be Afraid…
There’s nothing to be afraid of when it comes to stitching. Specifically, though, there are three things you shouldn’t fear:
1. Don’t be afraid to try anything, stitch-wise.
No matter your level, no matter how complicated it may look. You’re just trying it! Be adventurous! There’s nothing wrong with trying something!
2. Don’t be afraid of imperfection.
You might not get something right the first time. More than half the fun of stitching is the journey of discovery and improvement! And it’s ok to have imperfections in your work. They tell a story. They document your improvement.
3. And don’t be afraid to fail entirely.
The end result of whatever we’re doing might be nothing like we envision. We might even dislike it immensely! It might turn out looking like doo-doo! (It’s happened to all of us!) And it’s ok. That’s part of learning – as long as we’re willing and brave enough to get up and try again.
If we never try again after failing…well, that’s where we really fail!
All That Being Said…
Those are my tips! We’ll explore the whole idea in more depth down the road.
Hopefully, the basic tips will get you started, but I think we could accomplish more – and learn more deeply – if we delve into the whole matter of making good choices with stitches through exercises and visual examples.
So that’s my plan. Now I just need to develop it.
Enjoy your Monday!
