I’ve been asked to salvage a couple embroidered figures from a piece of ecclesiastical embroidery.
I said yes, without first having seen the pieces in person…which could have been a mistake. But, hey! I love this kind of work. There’s no set deadline, either, so I don’t feel super pressured about it. My excitement will provide momentum (I hope!), even without a deadline.
Now that the piece has arrived, I’m thrilled about the project – it’ll be interesting, and it will be challenging to pull the whole project off successfully!
I thought I’d share my explorations with you. Along the way, we’ll run into some snags, I’m sure. But we’ll muddle through! And, whether you’re into ecclesiastical embroidery or not, I’m betting we’ll pick up a few tips along the way that can be applied to other types of embroidery, too.
Today, I’ll introduce you to the original embroidery and talk a little bit about it.
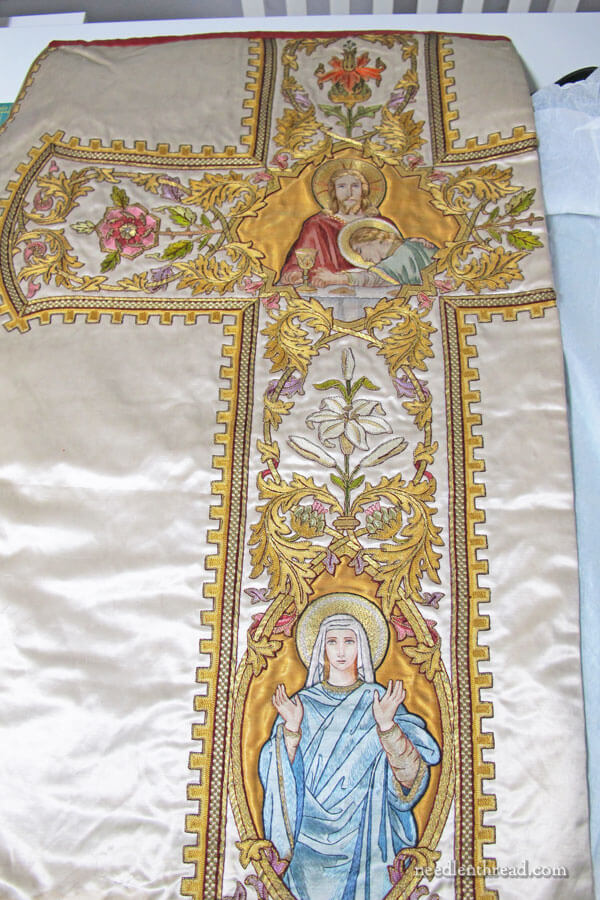
This is the background: the piece above is a sales sample. It originated most likely between the end of the 1800’s through the first part of the 1900’s. It’s a partial (and smaller) chasuble, which is a robe worn in the Catholic and Anglican churches by the priest during Mass.
Houses of embroidery, convents, and other institutions that specialized in ecclesiastical embroidery would often make smaller, partial samples of embroidered pieces, to include in a portfolio so that the customer could feel, touch, and see what the finished garment would be like. The sample has a numbered tag inside, for ease of ordering.
This piece represents the embellishment for the back of a chasuble. Notice on this particular piece that the right side is cut off. The chasuble sample is significantly shorter than usual, with both the top and the bottom truncated a bit.
The ground is a silk satin and it is lined with red silk.
The figures on the piece are the main focus for my particular project.
Typical of this style of vestment, which is obviously made by a company that produced many vestments that were very much alike, the figures are made up of appliquéd fabric that was hand embroidered in silk for the details.
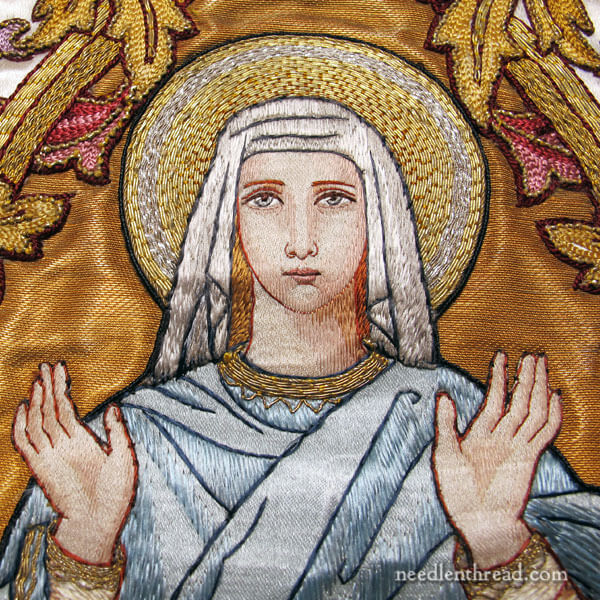
The hair, the eyes and other details on the face are all embroidered. The face is a silk ground in a pale skin tone, highlighted with stitches.
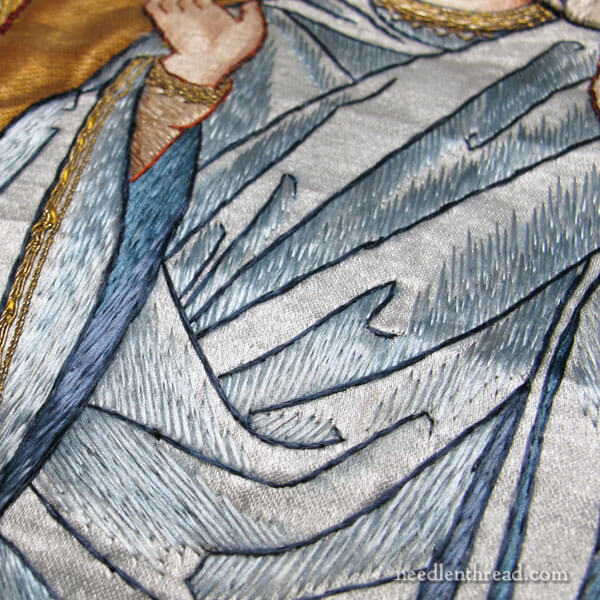
The garments on the figure are silk in a pale blue. The fold lines are stitched using a dark stem stitch and the shadows or highlights on the garment are worked in straight stitch or long split stitches over parts of the fabric, leaving other parts of the fabric exposed.
Some areas are entirely embroidered with long and short stitch, too.
This method of using fabric appliqué mixed with hand embroidery was fairly common from the mid-1800’s onwards.
With the industrial revolution, we became, as a whole, a people used to getting things made quickly and less expensively, thanks to machines.
In order to fulfill the demand of a quick and affordable turnaround on hand embroidered vestments, the fully embroidered figure was replaced with the partially embroidered figure that looked like hand embroidery from a distance, but wasn’t quite complete hand embroidery.

While this type of figure embroidery is certainly not the same quality or artistry found in the figure embroidery that emerged in England in the Middle Ages and spread to Belgium and Flanders and beyond during the Renaissance, it is still fairly decent, when it comes to producing a figure that, seen from a distance, is expressive and clear.
While earlier figure embroidery often involved a real artistry on the part of the embroiderer and on the part of the designer or painter who might have been involved in the initial planning of a design, these types of appliquéd figures required only the skill to stitch neatly and quickly. Everything was mapped out – the design of the piece, the color layout, what threads to use, what stitches went where to produce the desired result.
Occasionally, you can find these particular figures (in these exact designs) that are stitched very well, with the facial details being clear and, again, expressive. This is the case with the two figures on this particular vestment (keep in mind, after all, it was sales sample).
I’ve seen these figures stitched on lesser-quality vestments, with somewhat disappointing results. If the face isn’t just right – and especially the eyes – the resulting figure can be more of a distraction than anything else!
So, as far as the figures go, they’re worth salvaging. Why not use them, if they’re usable?
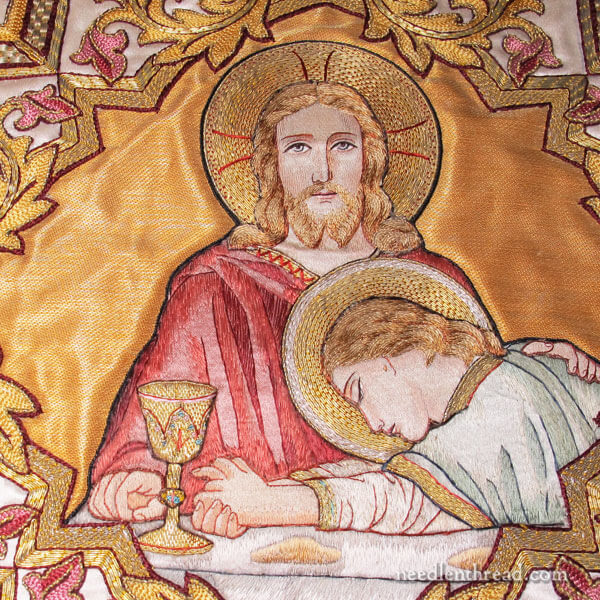
The central figure on the vestment is Christ with St. John.
You can tell that the design style here, while it is very traditional and very clear in the story being told (St. John, the “beloved apostle,” rests his head on Christ’s heart during the Last Supper – a story that most folks attending church regularly would be aware of), is not the same high level of artistry that is seen in earlier vestments of the 12th – 18th centuries, and even the more expensive vestments produced during the 19th and early 20th centuries.
This is more of cartoon drawing typical of “mass-production” hand embroidery patterns and embroidery. (Embroidery patterns and tapestry patterns were referred to as “cartoons” – not to be confused with the Sunday funnies or Saturday morning animated children’s TV shows!)
Notice, for example, the chalice (cup) and its simplicity and lack of depth. The hands are very simply executed, filled with one color of thread, with some fabric exposed, and outlined with a dark thread around the nails and the fingers. In a way, the overall effect of the piece is somewhat reminiscent of a filled-in coloring book image.
Now, don’t get me wrong. This is not a criticism of the embroidery or of the original designer. This is simply what was produced at the time, for affordable embroidered vestments. And they are, in a sense, beautiful. When they’re seen from a distance (which is the whole point), they are attractive. They’re just not “high art,” compared to other approaches to ecclesiastical embroidery.
The face, though, is a little more artistic and a little better executed. This is where the more skilled embroiderers did their thing.
From sources that I’ve read, I’m sure this was normally the case – the embroidery on the figures was done by more than one person. The faces were worked by the more experienced and skilled embroiderers in the workshop, while the more simplistic elements were done by those who had the skill to be neat and precise and work with fine threads, but not necessarily the skill to handle the more demanding facial features.
I’m very eager to take the back off this piece and examine how the different elements were put together.
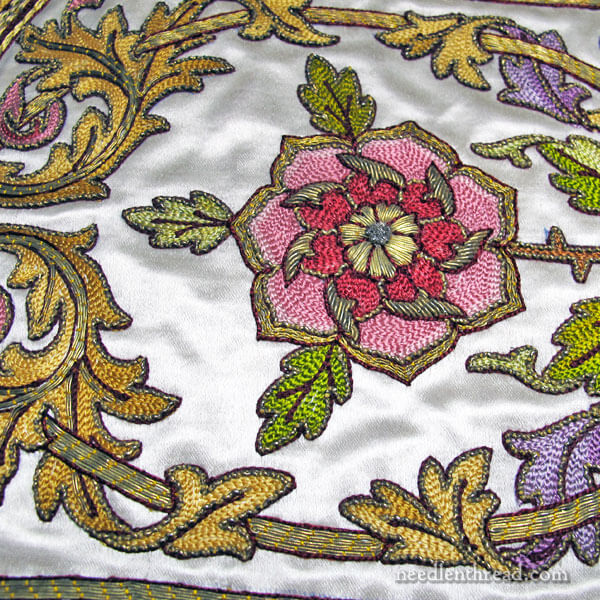
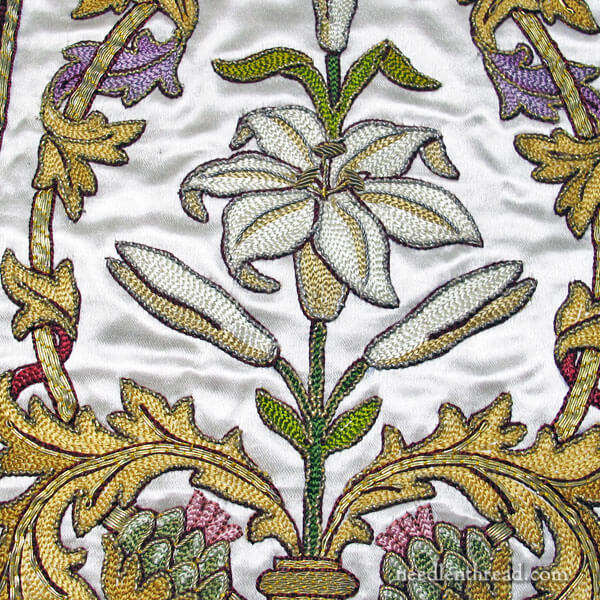
There is definitely some appliqué work going on with some of the embroidered foliage. You can see this from the front, where the foliage overlaps the medallions the figures are set in.
But I suspect the rest of the foliage on the cross is worked directly on the ground fabric, which is most likely backed by linen.
The colors on this piece are still fairly good and bright – it’s really the gold that’s aged the most, giving the piece that patina that comes with oxidized gold threads.
And the embroidery over all, even on the foliage, is in fairly good shape. In fact, the gold threads, though oxidized, are intact on the whole piece.
It’s rare to see that on a piece of this age, but the reason is pretty obvious: as a sales sample, it didn’t get used much!
You might remember this piece of ecclesiastical embroidery that I based my Mission Rose project on. The gold threads on that were perhaps less oxidized, but definitely showed more wear and tear, with the embroidery coming apart completely or missing altogether in some areas.
Although the foliage and the floral elements are in fairly good shape, and they are somewhat pretty, in taking the piece apart, they will most likely become useless. Perhaps they can be salvaged for framing, but as “whole” pieces, they won’t be salvageable.
If this were art embroidery of great value, the outcome for the foliage would concern me, but in fact, as far as this style and type of embroidery goes on old ecclesiastical vestments, this stuff is fairly common, workshop-assembly-line produced stuff. It isn’t of much value in the whole history of embroidery, or even in any particular embroidery niche.
So that’s an overview of the piece. In the near future, we will look at the elements close-up, we’ll discuss some definite pitfalls when it comes to taking it apart, and we’ll examine the inside of the vestment – the back of the embroidery, underneath the lining – where we will learn a lot about the individual parts that make up the whole, and how the whole was assembled.
Down the road, when we eventually get to that point, I’ll show the process of applying the embroidery to a new ground fabric – and not just any ground fabric, mind you! A fantastic fabric that you don’t see too often these days!
Finally, if the decision is made to go forward, I’ll share the whole process of embroidering new goldwork frames for the figures.
This process will take a good amount of time, so we’ll only be visiting this project every now and then. I hope you’ll join me in the adventure, asking plenty of questions along the way and providing suggestions and ideas, too!
Questions? Comments? Suggestions?
If you have any questions, comments or suggestions, anything that befuddles you, any worries or concerns, any ideas about what lies ahead, feel free to join the conversation below!
