Earlier this week, we chatted about using cotton twill and duck for embroidery projects. I started out on my twill stitching experiment, to see how well it would work out for the pocket of a tote bag.
I think it will work Just Fine.
This isn’t the first time I’ve ever stitched on cotton twill. Many moons ago, I used twill as a ground fabric for a kids’ embroidery class that I taught, mainly because it is such a sturdy fabric and it’s relatively inexpensive.
But this is the first time I’ve used it for stitching something that I want to come out pretty nice, that has a specific purpose, and that fits a certain color scheme.
It’s easy stuff to stitch on, but it is a bit bouncier than linen and regularly woven cottons. It seems a bit “softer” because of the weave – it’s not quite as tight as a plain-weave fabric.
But the stitching experience is quite pleasant overall!
I’m not 100% certain of my stitch choices and whatnot. To tell you the truth, I didn’t put any real planning into this – I’m just stitching whatever occurs to me as I go.
Incidentally, I find the color scheme a bit limiting. Normally, when I’m working with color, I like to work with at least three color families (or four, or more…) with lots of shade choices within those color families.
With this little doohickey, even though I have tans, golds, and reds, it feels more like stitching with just two colors – kind of a neutral / tan / gold set and the reds.
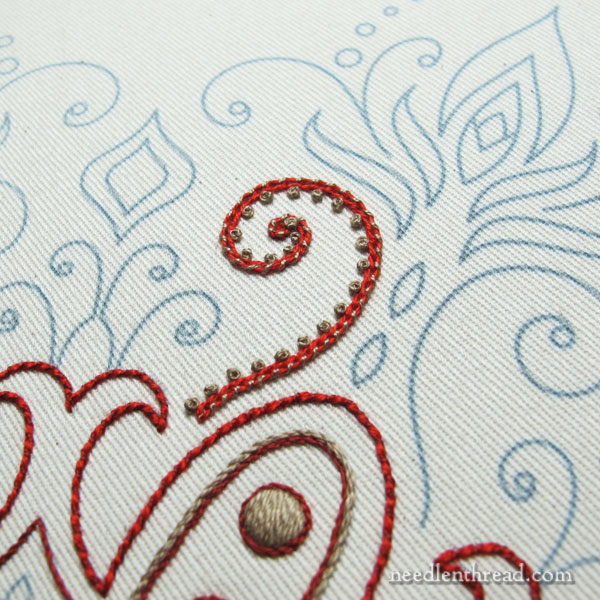
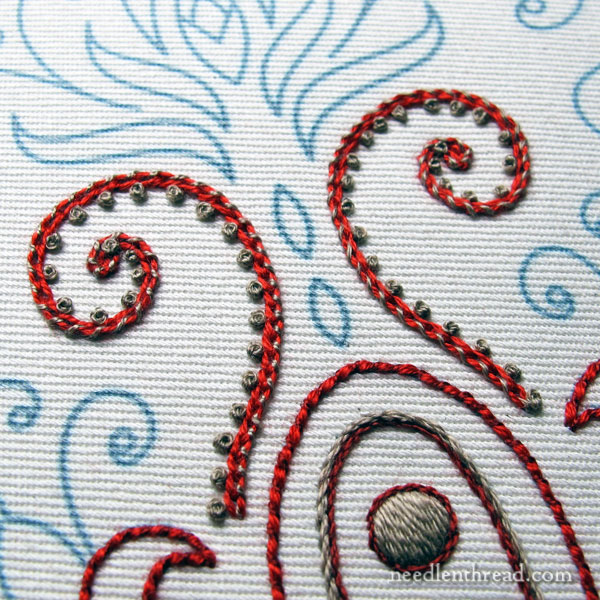
Aside from a few satin stitched dots, I’m not doing any solid filling on this design. Instead, I’m using line stitches – some more textured than others. I’ve got some stem stitch, of course! It’s my favorite stitch ever, because it’s so dang versatile. And I’ve got some chain stitch, some coral stitch, some backstitch (whipped) and I’ll probably incorporate some
herringbone stitch
for loose, open fillings on the leafy elements.
There won’t be any beads on this one, either. All in all, it’s pretty simple, quick stitching!
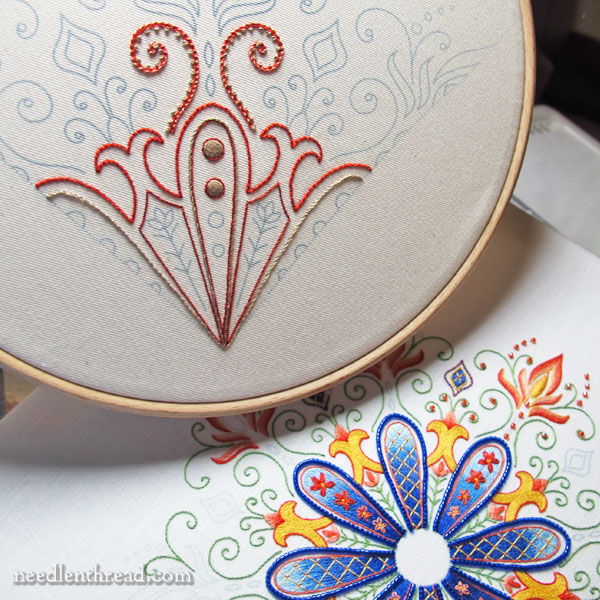
I’ve enlarged my design slightly, so that a quarter of it fits comfortably into the six inch square that I’m planning to use as the outside pocket on the tote I’m making.
The original design is a bit smaller, and if you look at the Provence kaleidoscope in the photo above, you can see that my original interpretation (which was planned much more carefully ahead of time!) is a bit more complex, especially in the area of solid fillings. The original interpretation of the whole kaleidoscope definitely takes a lot longer to stitch!
Besides the solid fillings (the long and short stitch and shaded stem stitch), the thread weight makes a Huge Difference in how long it takes to work the design.
In the original interpretation of the whole kaleidoscope, I use one strand DMC cotton floss (from the six), whereas, in the pocket interpretation, I’m using two and three strands on most of the stitches.
The exception to this is the satin stitch dots, which require one strand of floss. Why one strand only? These satin stitch tips will explain. If you’re looking to improve your satin stitch, the satin stitch tips will help you out – and so will this article, which also covers several tips for satin stitch.
So, that’s where I am on this project! It’s coming along! We’ll see what develops with the rest of the design one of these days. In the meantime, I’ve had to shift onto a different project for a couple days. We’ll talk about that one a wee bit later!
Any questions, comments, suggestions? Feel free to join in the conversation below!
