The last time we visited my Embroidery Archeology project, it was all about preliminaries – the things you should do before delving into the … uh… destruction? (for lack of a better word!) of an old piece of embroidery like this.
Now, now, before you balk! I’m not destroying it. I’m doing my best to conserve every conservable part of it. As I explained in the initial backstory – which you can read here – my primary goal is to retrieve the figure embroidery from the piece, and salvage those so that they can be used on real vestments.
If possible, I also plan to salvage some of the floral elements, though for what use, I’m not sure yet!
With the preliminaries out of the way, it was time to take the piece apart.
Typical of this type of vestment, the embellishment on it is worked primarily in chain stitch. At first, you might be tempted to think that it’s done with a tambour hook. The tambour hook is certainly a possibility, as it is a relatively quick way to achieve hand embroidered vestments.
But there’s another alternative to tambour work that produces this look of hand embroidery without actually being hand embroidery – yes, a machine! And not just any machine. This type of work, machine done, was done with a Cornely machine, one of the very first embroidery machines.
Is it machine done, or is it hand done with a tambour needle? The only way to find the answer to this question is to examine the back and make some assumptions.
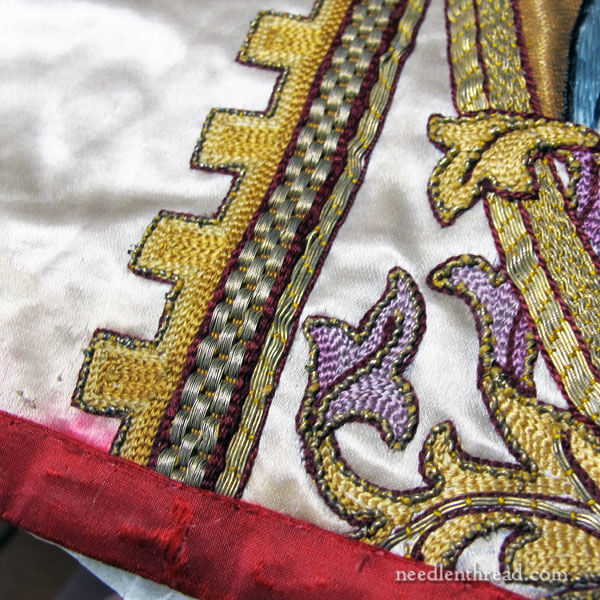
The embellishment on the cross (the whole embroidered element around the figures) is a combination of chain stitch (the crenelated outside edge and all the foliage), couched goldwork highlights, some chip work (with metal threads), and an applied galloon, or pre-made trim that sports gold threads.
In this case, the gold threads on pretty much the whole piece have oxidized quite a bit.
There are a few areas on each piece of figure embroidery where the foliage that decorates the cross overlaps the frame around the figure and encroaches on the figure itself, more or less appliquéd onto the figure.
This part can be tricky – I want to remove the foliage, but I want to avoid damage to the figure. At the same time, it’s extremely likely that the removal of the foliage here will leave marks on the figure. In that case, whether or not I have to cover up this part of the figure in the final finishing will depend on how visible the marks are.
And so, the back comes off!
Not a very big deal – the red silk back was lightly slip-stitched to the front. With a sharp seam ripper, it was just a matter of making a few key slices through the threads, and voilá!
Once you see the back, you get a pretty clear idea of the structure of the piece. The entire figure part is appliquéd to the floral cross from the back – reverse appliqué – and then bits of the floral elements are worked over the edge of the goldwork frame on the figure.
We’ll look at the whole layering process once I get the figure off its background.
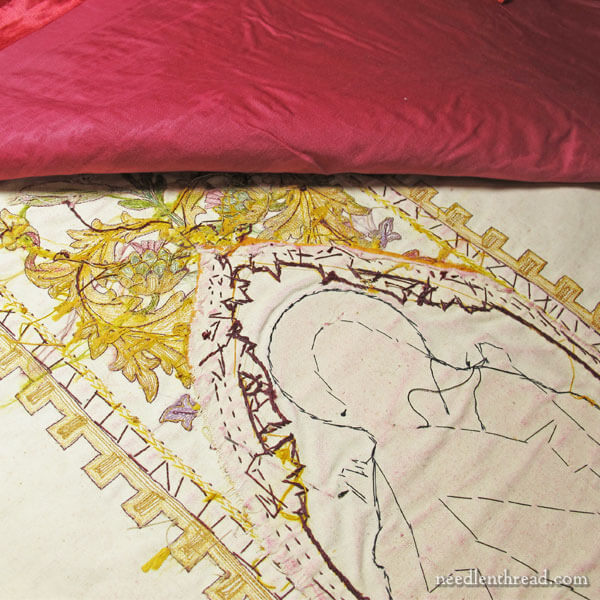
Here’s an image of the back of the chain stitching and couching threads for the goldwork, as well as some appliqué threads for the elements on the front.

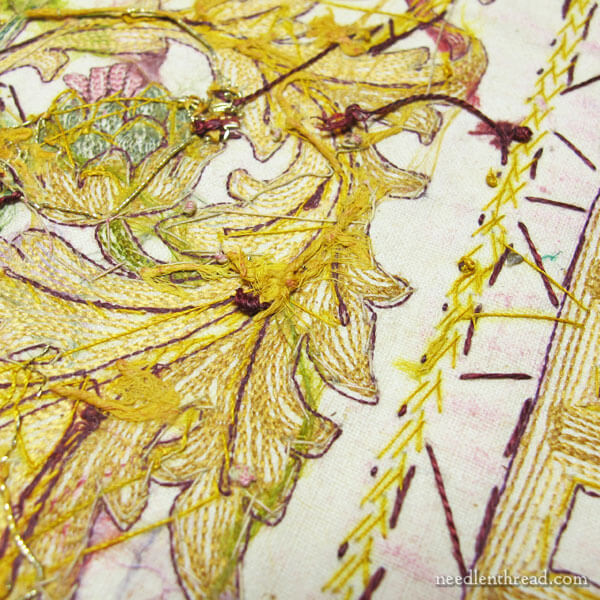
Here’s the back of the rose.
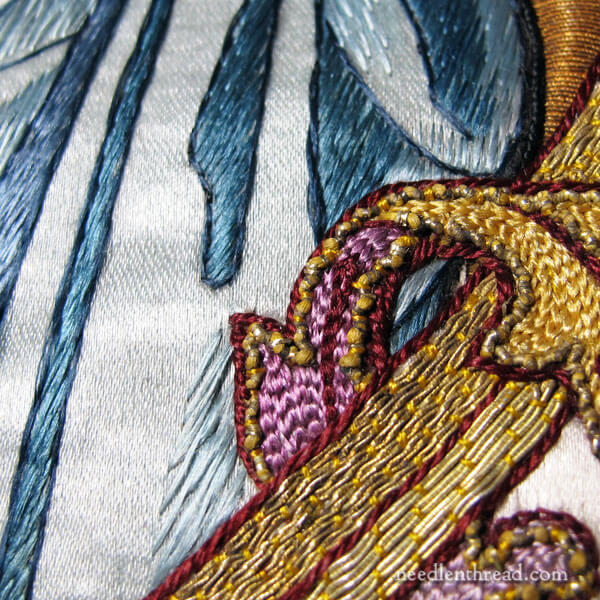
The dark threads in there are the threads that accent the rose over the chain stitching – mostly outlines or veins on the leaves. Here’s the front side of the rose, to remind you:
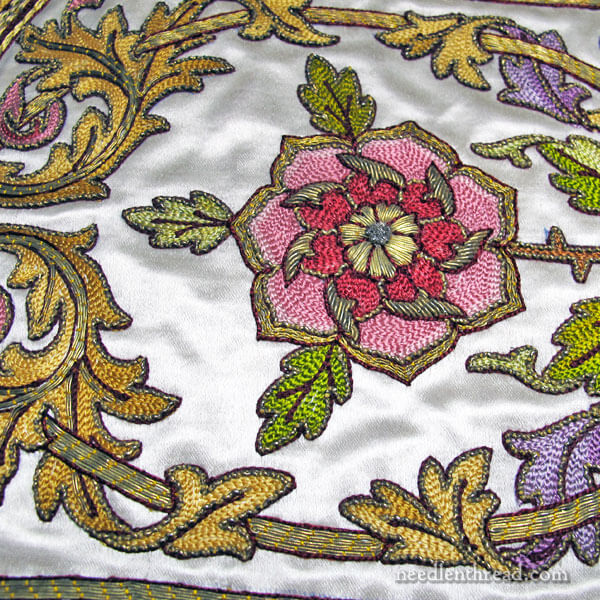
You can see the dark red outline threads there. They are around all the embroidered elements.
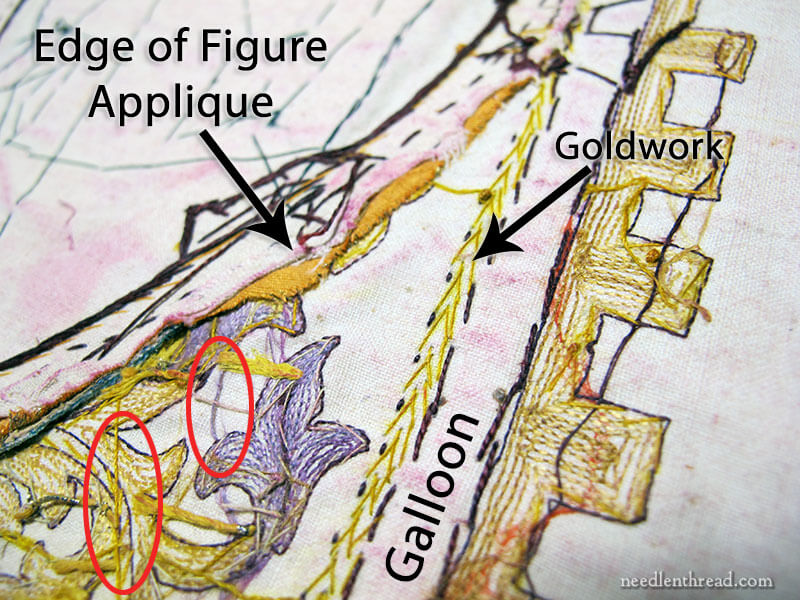
Just to give you an idea of some of the layout from the back, you can click on that photo above to get a larger view.
Some things of note: You can see where the galloon (or pre-made trim) is sewn down in that blank strip that says “galloon.” You can also see the yellow threads used to work the goldwork strip just inside the galloon. You can clearly see the edge of the figure appliqué. Notice that there are no goldwork threads in that area, that indicate the goldwork frame around the figure.
Normally, you wouldn’t expect to see the edge of appliqué on the back of a piece. In this case, the process is more of a reverse appliqué. We’ll see how that works once the figure is completely off.
Notice the red circles in the photo above. Those are carried threads from one area of chain stitching to another, worked in the same color.
I’ve yet to get a good shot of the beginning or the end of any of the chain stitching, but I’ll take a leap here and say that this chain stitching is machine done. Pretty much no doubt. It comes from the right era, it was an “inexpensive” and faster way to produce “mass-produced” (no pun intended!) vestments, and it just seems more reasonable that it would have been machine embroidered – as far as the chain stitch goes – and then finished by hand with the goldwork and trim.
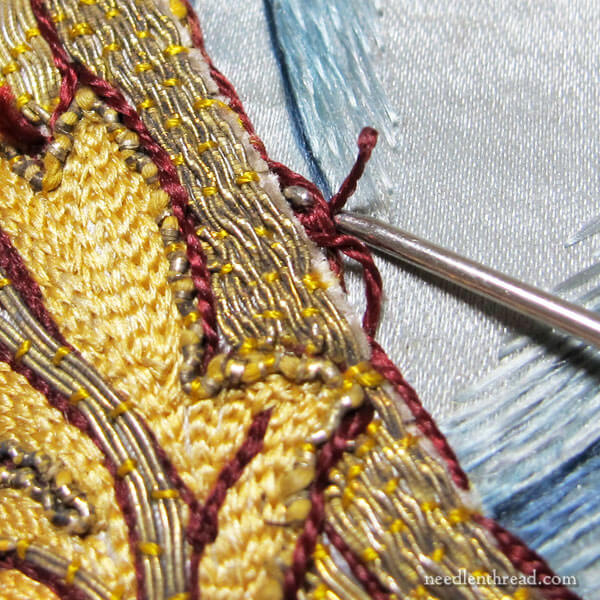
In the photo above, I’ve started pulling out some of the clipped silk threads that edge the embroidery on the front of the figure around the frame and that serve as appliqué threads as well as outlines.
This week, I’ll be devoting several more hours to this piece, and hopefully, I’ll get the figure completely off. At that point, I’ll try to make up a sensible graphic for you that gives you a clear idea of the layering and the order of work in the whole piece.
It might take a little more computer genius than I actually possess – but there’s nothing wrong with trying!
Hope you enjoyed this installment of Embroidery Archeology! If you want to read the previous articles about this particular piece, you will find them here, in chronological order:
Embroidery Archeology: Salvaging Embroidered Figures
Embroidery Archeology: First Things First – Creating a Visual Record
