Once upon a time, I started stitching an embroidery sampler that featured circles. I suppose you could call it, literally, a spot sampler.
I had a specific color scheme in mind for it, and a specific effect that I wanted to get across in the finished piece – combining texture and color in such a way that a particular mood or scene is suggested.
One day, I put the sampler aside. I had other projects to focus on. But, in the whole Sorting and Shifting going on perpetually in my workroom, I recently came across it again. So I figured I’d tell you a bit about it and chat in general about sampler stitching.
A sampler is simply a collection of examples of something. In the case of needlework, a sampler is usually a collection of stitches – or even design motifs – that exhibit stitching skill, stitching ideas, design ideas, thread experiments, and so forth.
When we think of samplers today, we often think of the historic schoolgirl samplers from centuries past, many of which were worked in counted techniques but often included surface or non-counted embroidery stitches, too.
But samplers are not relegated solely to the historical needlework category. Today, stitchers stitch samplers of all kinds of techniques! They’re a great way to document stitches you’ve learned, techniques you’ve explored, threads you’ve tried…
Samplers are sometimes categorized by the layout of their design elements.
For example, band samplers are usually composed of bands of stitched elements, arranged in rows on the fabric. Spot samplers are usually composed of spots of elements scattered around the ground fabric, either in an organized way or sometimes in a haphazard fashion.
Some samplers combine spots and bands.
Alphabet samplers are pretty common – they include a stitched decorative alphabet – and they might include spots or bands, some stitched wording (a quote, a poem), information about the maker, and so forth.
But whatever the kind of sampler, the upshot is this: a sampler is exactly what its name implies – a collection of samples.
And you don’t really have to follow any particular formula or layout to work your own sampler.
The resulting sampler might end up a functional record of developing skills, or it might end up a real work of art, or it might end up both!
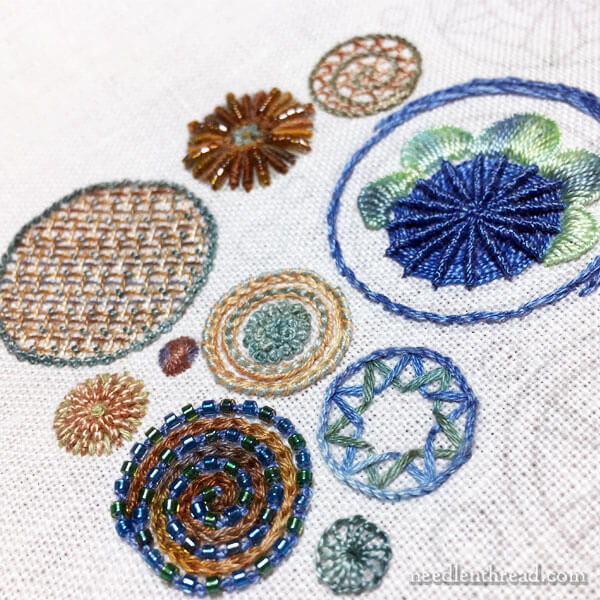
With my circle sampler, my point was to explore all kinds of stitches, textures, and weights of thread in a specific color scheme, and all stitched within the confines of a collection of circles.
Technically, it’s a spot sampler. And literally, it’s a spot sampler, too!
To create the layout of a circle sampler, I used a circle template – like any of these circle templates on Amazon – and arranged different sized circles within an 8″ square, in a way that was balanced, pleasingly spaced, and made some kind of visual sense.
I collected a bunch of threads from my stash that worked within the color scheme I had in mind. Once I had threads together, I went through my bead storage trays and selected different beads that worked with the colors.
I gathered up beads and threads, picked out the appropriate needles and stuck them in a little needlebook, grabbed a pair of embroidery scissors, and tucked everything into a project pouch like this, so that I could dabble with stitches on the sampler whenever I had the inclination.
I didn’t plan out specific stitches for any given circle.
With projects like this, I like spontaneous stitching. Whatever stitch occurs at the time is what I experiment with.
The stitches don’t have to be filling stitches or line stitches or any specific type of stitch, because, when it comes down to it, when you’re working with surface embroidery, any stitch can work, even in a circular shape.
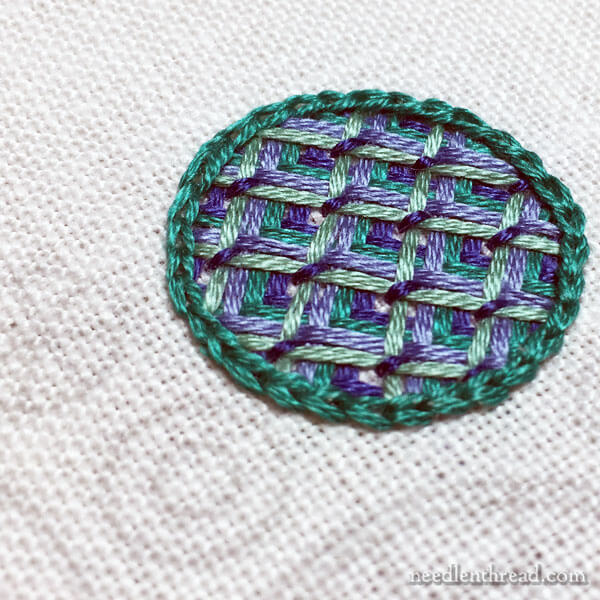
For example, fillings like battlement couching – which is a particularly square-ish sort of approach to filling! – can work just as well in a circle or any odd-shaped element.
Once the shape is filled, a nice bold outline around it will set off the contours and curves just fine!
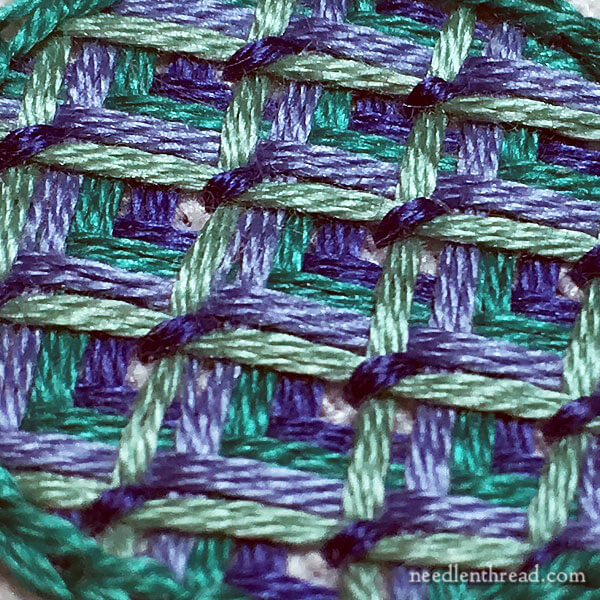
I love the layers of colors and depth you can achieve with battlement couching.
If you’re not sure how to do this technique, you might enjoy checking out this tutorial on battlement couching.

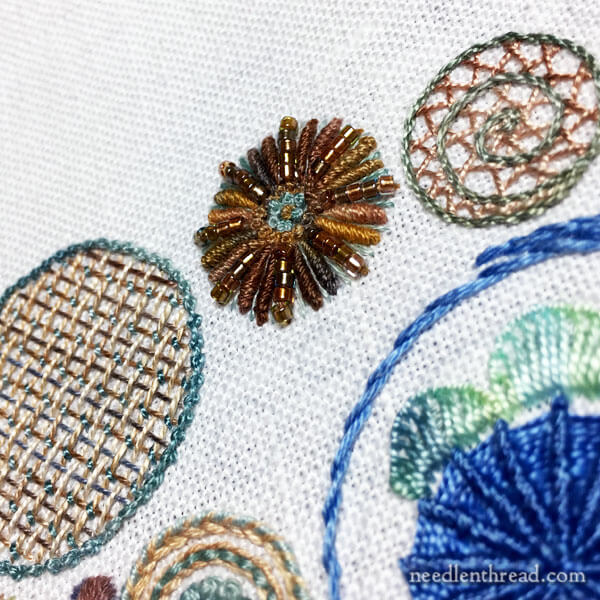
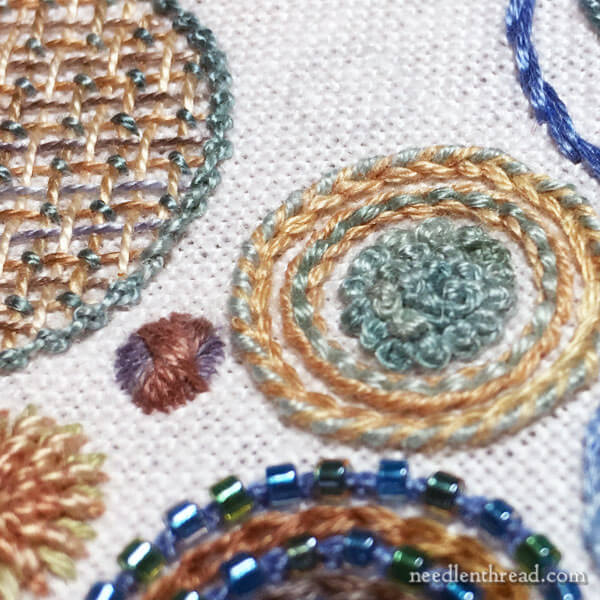
Playing with texture on a sampler like this is great fun, too!
You can achieve texture in embroidery in different ways. Obviously, stitches that result in texture on the surface of the work – like the ribbed spider web in the photo above – are one way to add texture.
But switching up your thread weights and embellishments (from, say, stranded cotton floss to different weights of perle cotton, to adding in wools or other specialty threads, ribbons, and beads) is another way to add a lot of different textures to your stitching.
If you’d like to read more about adding texture to embroidery, here’s a list of 16 stitches (and their tutorials) for adding texture and dimension to hand embroidery.
And if you’d like to learn more about thread weight among different cotton threads, these two articles will help:
Sizing Up Cotton Embroidery Threads
Comparing Cotton Threads, Stitched
Not Forgotten
While my Circle Sampler has been set aside – and is still set aside – I haven’t forgotten it! It lingers in my mind, begging occasionally for attention, and one of these days, I’ll get back to it.
One of these days… I think I’ve heard that before!
In the meantime, if you hanker to stitch up a sampler of sorts, whether it is a circle sampler or any other type of stitch sampler, here are some articles and resources that will help you get started:
On Stitches & Samplers & Such
On Embroidery Stitches and Samplers
Developing an Embroidered Spot Sampler
Lattice Jumble: A Stitch Fun Sampler Layout Guide & Tips
A Unique Technique Sampler
On Random Stitch Samplers
