Oh boy, oh boy! I’ve actually finished a whole entire embroidery project, and we’re only a week into 2018!
Of course, the design is only about 2″ high. And it’s not all that detailed. And it takes a whopping 6-7 hours to stitch…maybe.
Yes. Well. So much for bragging.
But I’ll show it to you, anyway! I have mixed feelings about it. I like the outcome, but there are some things that I wish I had done differently, and there are some things I did do differently.
So, let’s take a look at this tiny needlepainted bird. I’ll tell you a bit about the kit, how I approached the stitching, the mistakes I made, and the things I changed.
The little bird is one of three birds that come in this embroidery kit by Maison Noel from The French Needle.
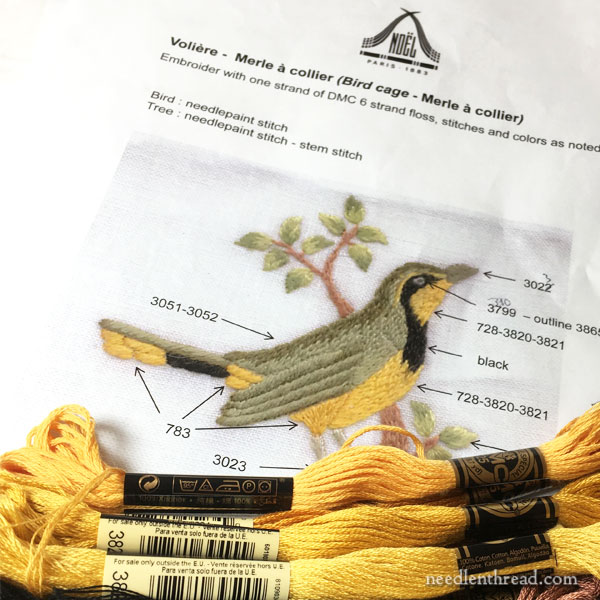
It’s a partial kit. That is, it includes three pieces of linen with a different bird transferred on each of them, along with an enlarged photo of the finished embroidery for each bird, the colors used (DMC stranded cotton floss), their general placement, and the stitches used. The kit doesn’t include the thread or needles, which makes sense because DMC floss is easy to come by, and not including it keeps the cost down. (In the US, DMC floss is decidedly less expensive than it is in Europe.)
The designs are suitable for intermediate embroiderers and beyond. A determined beginner who has had some experience stitching – and especially stitching with one strand of floss at a time – could probably handle them, too.
They are small and they take a little bit of stitching judgement, which is always easier if you’ve had a little experience or if you have someone on hand for advice.
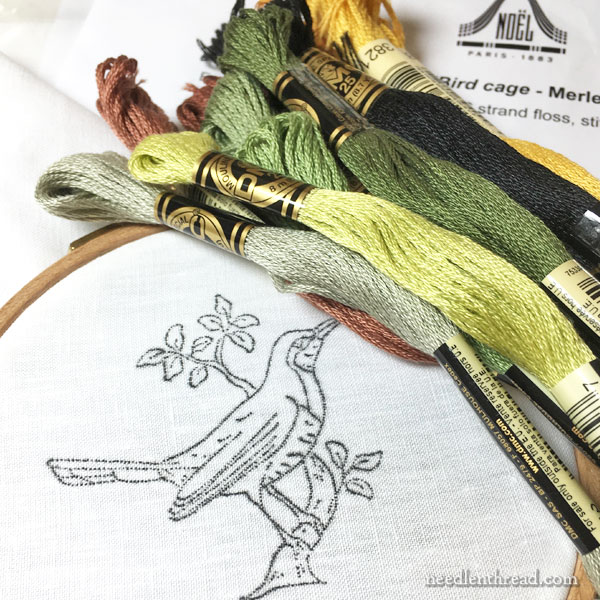
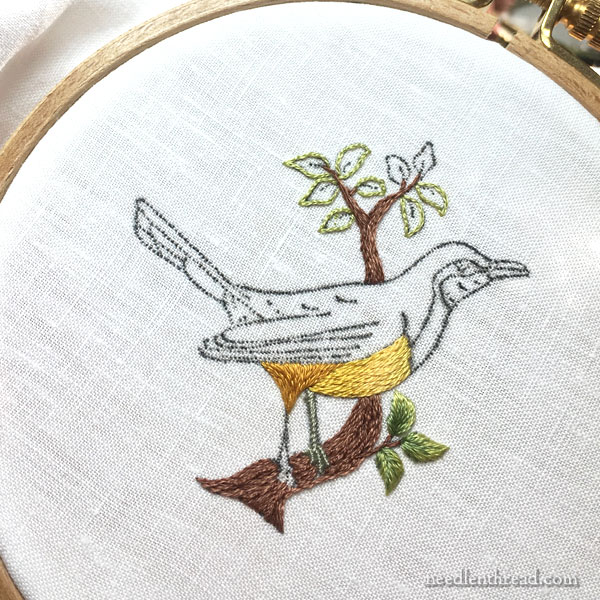
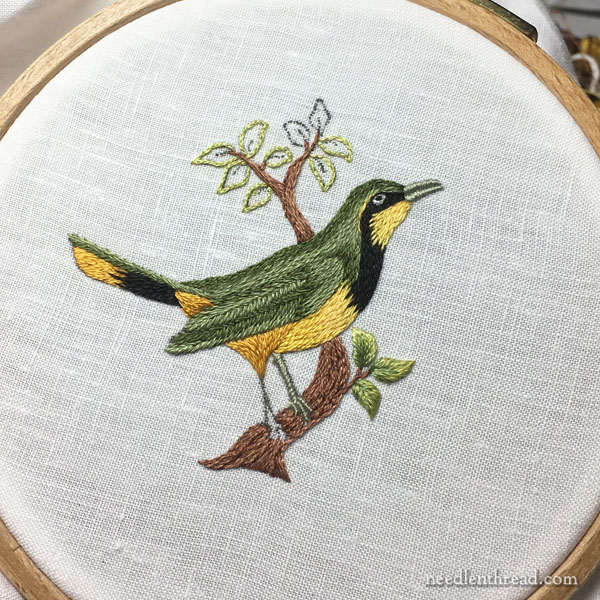
In the photo above, I’ve mounted the linen with the pre-transferred design in a 4″ hoop. The whole design, from the bottom of the branch to the tips of the highest leaves, is just over two inches high.
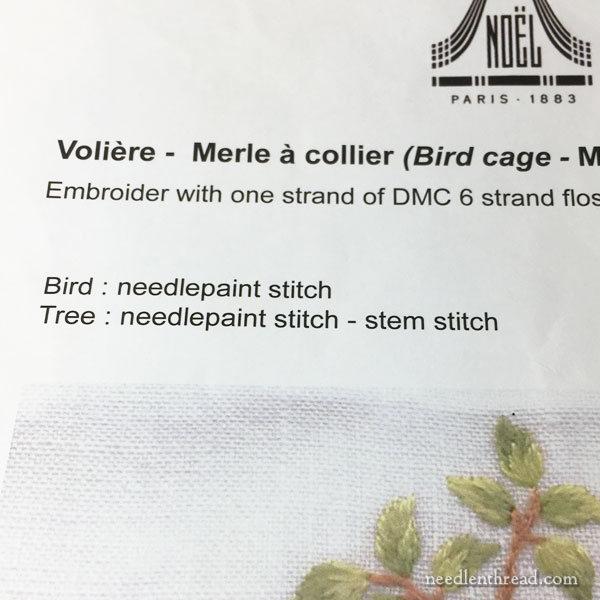
As far as instructions go, that’s it, above. Well, that, and the enlarged photo of the finished bird, so that you have an approximate idea of what it should look like when stitched.
So a little knowledge of stitchery does help, when tackling these little feathered beasties!
Since there’s no order of work indicated, you need to make that decision yourself.
If you’re working these birds (or the other animals in the same series of kits), look over the design carefully. Break the design down into the elements that are farther back in the design, and go forward to the elements in the forefront. This should be your order of stitching.
Working from the back (elements that are overlapped by other elements) and going forward, you’ll be able to create a better overall dimensional effect with your design.
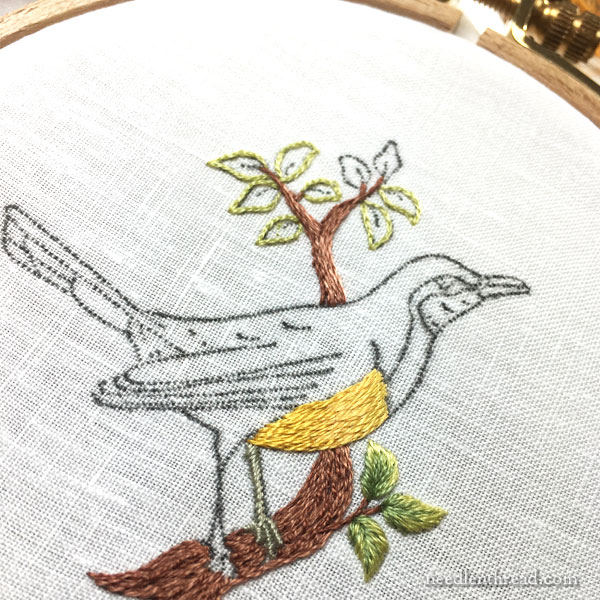
So I started with the branch and then I worked the breast of the bird.
On the branch, I added a few little areas of whipped stitching, to give some texture to what was otherwise a very smooth branch. The two shades used for the branch are very similar, so there’s not a lot of contrast. I figured working in a little texture might pick it up a bit.
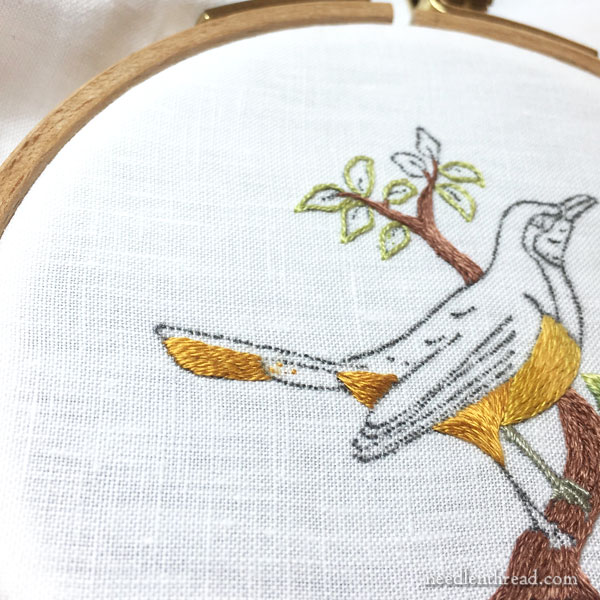
After I worked the bird’s breast, I worked the colored part of the leg in the forefront (the thigh).
When I finished the thigh, I realized that, had I thought ahead, I would have made a change.
I would have arranged the colors a little differently. Instead of a darker yellow thigh in the forefront and the lighter colored belly further back, I would have blended that dark yellow used on the thigh into the yellow on the belly, and then I’d use one of the lighter yellows on the thigh – or even a medium yellow on the edge of the thigh, and a lighter yellow in the middle.
This, I think, would lend a little more realism to the shading.
Since I didn’t think ahead, and since I wasn’t really keen to pick it out, I left it and moved forward!
Then I moved on to the underside of the tail, which I stitched differently from the picture. In the picture, the underside of the tail area (the vent – or birdy butt – and undertail coverts) are somewhat blocky. I blended these all into longer stretches of long and short stitch.
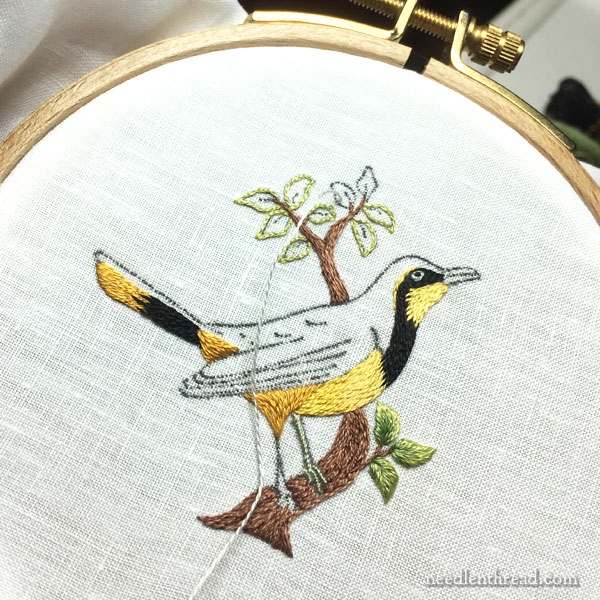
I worked the black next, on the underside of the tail and on the head and breast, making sure to stretch the stitches down over the breast a bit to get a blend so the color change didn’t look to blocky.
I substituted black for the eye, rather than the reddish brown color originally called for. I have A Thing about birds and beasts whose eyes are reddish….!

Then, I moved on to the wing.
At this point, I should have moved on to the back and rest of the body, because the wing sits over the body, but the wing was troubling me all along, and I just wanted to tackle it.
I started out attempting long and short stitch on the lines of the wing that are supposed to be long wing feathers.
I consulted the photo, and tried to mimic what I saw there.
But in fact, I didn’t like it at all! The space between the lines is not even 1/8″ – just a tiny, tiny space – and trying to fit two layers of long and short stitch in there with one strand of DMC floss just didn’t work. It was too much in too small a space.
So I cut it out.
And then I tried it again, increasing the width of the long feathers.
But I still didn’t like it.
So I cut it out.
And then I tried it again, in satin stitch, with a small line of dark stem stitch between each feather.
But I didn’t like.
So I cut it out.
(There’s a point to this!)

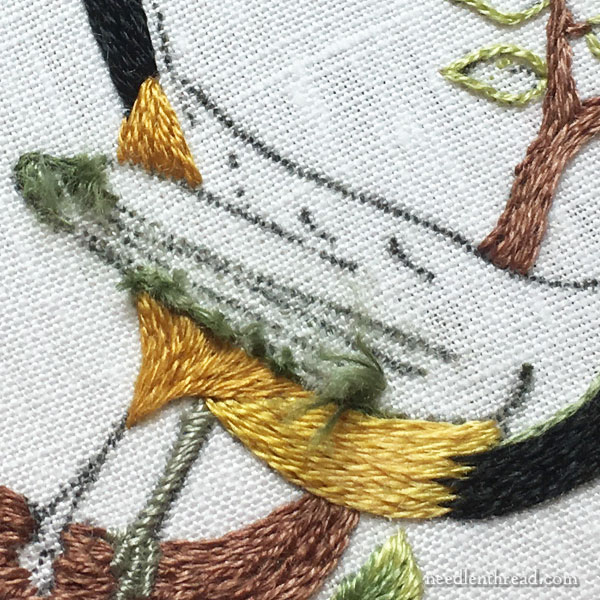
Then I tried this conglomeration, which was stem stitch, alternating light and dark, with the larger feather on top in fishbone stitch.
Guess what?
I didn’t like that, either!
So I cut it out!
And that brings me to this point:
The linen in these little kits is just fantastic. It’s a really nice linen. And it’s a good, sturdy linen. After cutting out no less than four times and picking stitches out and tweezing fuzz away and so forth – all in a tiny space, heavily stitched – the linen still looks fabulous!
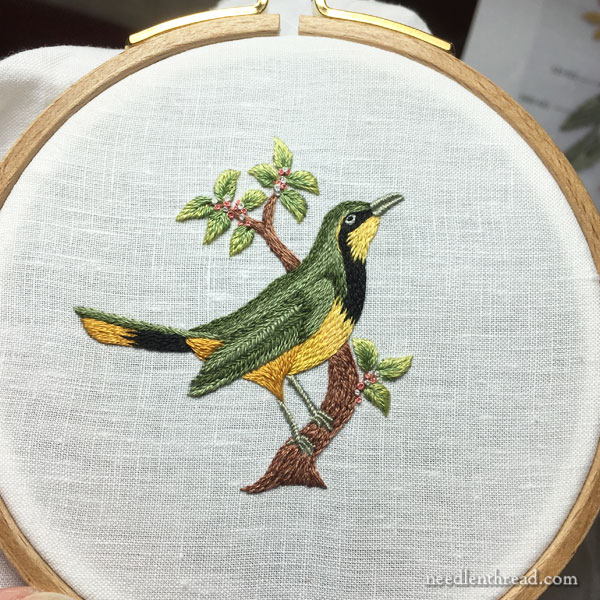
Finally, I settled on feather stitch for each long feather, in alternating shades.
Now, if I were doing this again, I’d probably still use this stitch choice, but I’d do a couple things differently:
1. I’d stitch the rest of the body first, leaving the wing for last.
2. I’d work some horizontal padding stitches (just long split stitches) along the feathers where the overlap is, and along the top feather, where it overlaps the body. Then I’d work the fishbone stitch over those long padding stitches. This would help bring the wing forward visually.
Down the back fo the bird, I would be more careful about blending the dark stripe into the lighter shade, to soften that stripe a bit. It needs a little more blending there, in my opinion.
I added the shading around the wing (especially behind the neck) and on the coverts or area of the wing above the long feathers, because otherwise, all of that looked somewhat flat to me.
The beak of the bird called for “needlepainting stitch” as well, but it was such a small narrow space, that I stuck with plain old satin stitch.
The leg (tarsus) and the toes… well, they are funny! If I were doing this again, I’d approach them a little differently, though I’m not sure how. I’ll find that out on the next one.
After finishing the whole thing, I decided it needed just a touch of texture and color in the branch, so I added a few French knots in pink and white.
Kit Advantages
The advantages to these kits, in my mind, are:
1. They’re on excellent linen.
2. The design (which is small and detailed) is already transferred, so you don’t have to fiddle with the transfer.
3. They can be stitched as is, or you can make changes as you go. Either way, the result is a sweet little bird, needlepainted.
4. They’re small enough that they’re fairly quick stitching. You get the satisfaction of a fast finish!
5. You don’t have to decide on colors. (Color decisions always take me forever!)
6. If you’re keen to needlepaint more advanced birds (like Tanja Berlin’s or Trish Burr’s beauties), but you’re a little hesitant or intimidated by the thought, these little ones give you a dip into needlepainting to get a feel for it, without having to tackle a much larger project. I took out one of Trish Burr’s bird kits after finishing this, and it seems enormous by comparison! So these will give you a taste for detailed needlepainting, before you undertake a larger and more advanced design.
Questions?
And that was my first finish of the year! Overall, a very satisfactory little project – so much so that I’m looking forward to working a second one!
If you have any questions, comments, or suggestions, feel free to chime in below!
