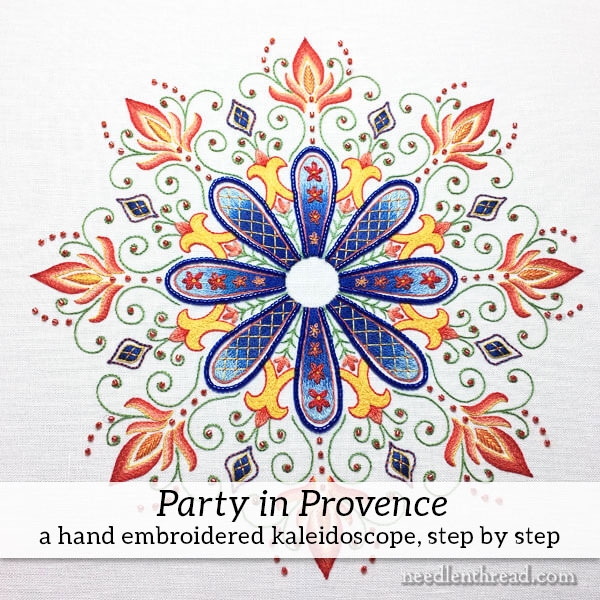
To kick off the New Year with a rather grand – and fun! – embroidery project, let’s travel step-by-step together through Party in Provence, a colorful embroidered kaleidoscope project reminiscent of the sunny region of Provence, and perfect for kicking the Winter Blues!
Today, I’m just going to introduce you to the project in a little more detail, tell you what you can expect from it, and for those who want to stitch along, I’ll list the supplies I used so that you can line them up if you want to use the same colors, threads, materials, stitches and whatnot.
If you’re not planning on stitching Party in Provence yourself, don’t worry! We’ll be covering plenty of embroidery tips and techniques that you can apply to your own needlework projects. So you won’t get bored (I hope!), and you might pick up some handy bits for your own stitching endeavors.
I also encourage you to tell a friend about the project! Maybe you can drum up some buddies who want to stitch Party in Provence, too! It’s always fun to work through projects together!
The Design
The design for Party in Provence can be found in Favorite Kaleidoscopes, so if you want to stitch along on the same design, you’ll need a copy of that.
Materials
You can substitute any of the materials below – fabric, threads, beads. I’m going to outline how I’ve worked the project, but you’re welcome to do what you want.
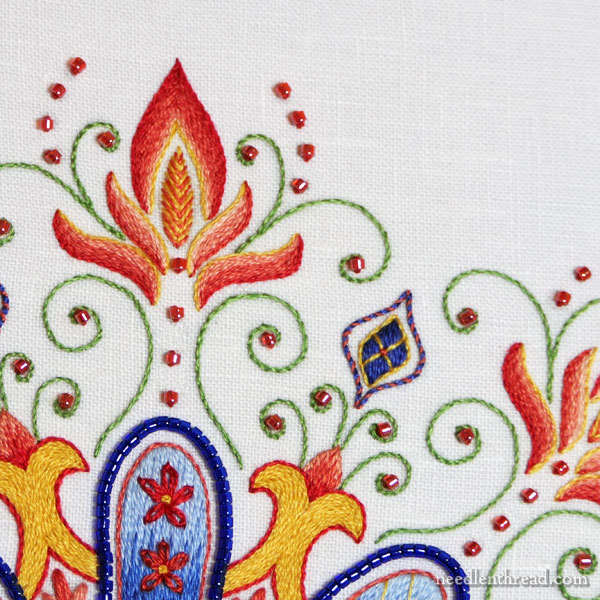
If you make substitutions, though, keep in mind that the version you see here is embroidered almost entirely with one strand of DMC cotton floss.
If you decide to substitute threads, any weight or size difference in threads will affect the outcome of the project. That said, again – feel free to experiment!!
Fabric
For my version of the design, I used Alba Maxima linen, backed with white quilter’s cotton. If you’re working the design at the size it prints from the e-book, you’ll want a 14″ x 14″ piece of ground fabric and backing fabric.
You can find Alba Maxima available through Needle in a Haystack online, if you don’t have a local needlework shop that carries it. In Canada, it’s available through Traditional Stitches. In Australia, Yvette Stanton carries Weddigan 925 linen, which is essentially the same type of linen.
Because Alba Maxima is a medium weight linen, it’s not absolutely essential to back it with cotton, but the extra stability does help, especially in areas that are beaded or densely stitched (like the blue petals) and just in case you tend to carry threads across the back of the fabric. The extra layer of white cotton will ensure no carried threads show through!
You can substitute any closely woven, high count linen, or even silk, cotton, or other fabric of your choice. If the fabric is lightweight or fairly light, I recommend backing it with cotton.
I usually use a cotton muslin called “Southern Belle” for my backing fabric. It’s essentially a very nice white muslin with no speckles or anything in it. You can pick it up through Needle in a Haystack if you’re ordering through there. That said, any good quilter’s cotton will do, so if you have a fabric store close by and you’ve already got your ground fabric, you can pick up any decent cotton to use as a backing fabric.
Threads
All the threads in this project are DMC stranded cotton. I used the following colors:
Red / corals (dark to light): 349, 350, 351, 352, 353
Blues (dark to light): 796, 797, 798, 809, 800
Yellow: 743
Green: 988
Beads
Mill Hill Magnifcas #10060
Myuki Delicas 11//0 Transparent Sapphire (DB707)
You can purchase beads through many different online outlets. Depending on the quantity I’m ordering, or who has what, or who has a sale, I order from Artbeads, Caravan Beads, Fire Mountain Gems, and, for Mill Hill, any of the numerous needlework shops online that carry them.
Tools & Miscellany
Design Transfer
Sublime Stitching’s fine-tipped iron-on transfer pen (you can find it here) – this is helpful for transferring complex designs like the kaleidoscopes. I prefer the blue pen. Practice with it first. The key is to get as fine a line as possible with the transfer, because it won’t wash out. You’ll need to cover the lines completely.
Alternately, you can trace the design with a light pad or light box if you have one, using a mechanical pencil. I like to spray starch my linen before transferring with a pencil. It helps release the pencil residue afterwards, if necessary.
You can also use a Sakura Micron pen (size 1 is good – or 005, although it tends to be a bit snaggy because it’s such a fine tipped pen). Black, brown, or sepia works. If you use this to trace, keep in mind it is permanent. When I use these pens, I trace carefully, and then I iron the fabric again, to help fix the ink, just in case. Sakura does not guarantee that their pens are permanent on fabric. As always, test if you’re unsure of what you’re doing!
Frame or Hoop
You’ll definitely want a frame or hoop to work the embroidery. I used an 11″ x 11″ Evertite stretcher bar frame on mine. You can read about Evertite frames here. You can find them online through Needle in a Haystack.
If you use a hoop, you’ll want about a 10″ hoop, which I think is a bit large to work with for most hand embroidery projects. The whole designs must fit inside the hoop, due to the beads. I prefer Hardwicke Manor hoops, and for this size piece, on medium weight fabric backed with cotton, I’d go for the 5/8″ thick hoop. You can find Hardwicke Manor hoops at Needle in a Haystack, too. Binding the inner ring of the hoop with cotton twill tape help maintain tension and protect your fabric.
All that said, I prefer stretcher bars when working on this type of design, since it will be on the frame for a little while, and you don’t have to worry about removing the hoop and then putting it back and getting your tension right and so forth.
Needles
I used a #7 and a #9 crewel needle for the whole piece. You can get away with just the #9 for most of it, or just the #7, but there are a couple places where I used two strands of cotton floss. I prefer a #7 when working with two strands of floss in the needle. It helps keep the thread from wearing and from getting as twisty or cranky. But the #7 might seem large when working with just one strand. You’ll need the #9 for the beads. So just get both – or a combo pack of size 3-9 crewel needles.
You’ll probably want several needles to work the project, since there are multiple color changes in small areas. You can avoid unthreading and re-threading your needle when you switch thread colors if you have several of the same size on hand.
Miscellany
A magnetic needle minder is nice to have when switching between different colors of threads.
Embroidery scissors are a must – small and sharp!
And you might line up a pair tweezers as well, just in case you have to pick any areas out. Scotch tape comes in handy, too, if there’s any un-stitching. It is useful for picking up stray thread fuzz.
What to Expect
We’ll launch into the first stage of the project in the next week or so. I’ll create an index of the articles for this project under “Tips & Techniques” in the main heading on the website, so that you have access to them when you need them.
If you subscribe to my newsletter (you can subscribe here), the articles arrive in your email inbox, where you can save the ones you want to save, delete the ones you want to delete, and print any of them easily. The newsletter comes 3-4 times a week right now. If you’re following a particular project, it’s an easy way to keep track!
And, as always, if you have questions as we work through the project, you can use the comment section below each article to ask your questions. This way, we can all help each other learn as we journey through the project.
And, on that note, if you have any questions, comments, or suggestions, feel free to chime in below!
