Thanks to a bit of home-bound weather on Thursday, a bit of determination on Friday, and a bit of down time on Saturday, I’ve made some progress on the wool mittens I started last week!
This project is an ideal project for deep winter, especially when you live in a house that’s about 150 years old. There’s nothing quite like being about to stick your hand inside your embroidery project for a quick warm-up!
I’m learning a lot as I work through the first mitten, and I’m keeping track of little tips to share with you, should you decide to embark on a similar project. So, let’s talk progress!
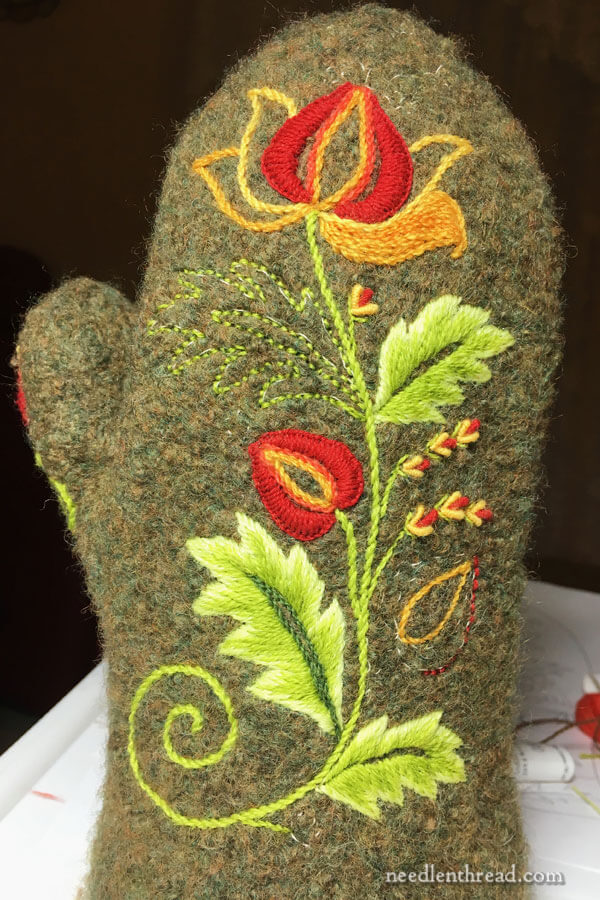
At the end of the weekend, this is where things stood with my embroidery on these felted wool mittens.
The Mitten Pattern, for Knitters
For those who didn’t catch it and were asking about a pattern, I updated the first article on this project to include the source of the mitten pattern. You can find that information at the very end of Hand Embroidery on Wool Felted Mittens. Just scroll down to the end of that article for the pertinent info on where to find the pattern.
What I like about this mitten pattern is that it includes a knitted second cuff (unfelted) fitted inside the outside felted cuff, that I’ll sew into place after finishing the embroidery. In cold weather, this inside cuff keeps your hands super toasty, it blocks out stray snow that might sneak in, and it fits the mittens nicely to your hands.
There are a couple changes I’d like to see on the knitted pattern, and I’ve put my knitting sister onto that. I think she’s going to experiment with a second pair and change the pattern up slightly to customize it.
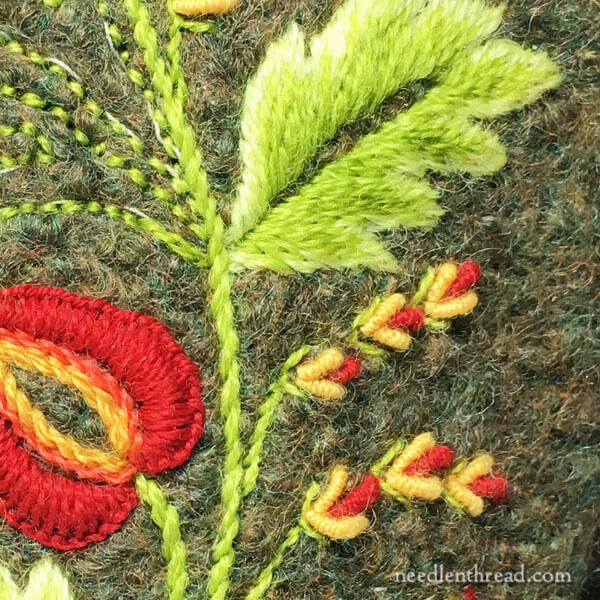
In the original design that I tweaked up for the mittens, these little sprays are actually round dots on the pattern. I like to put dots on a pattern in situations like this, because I’m not exactly sure what to do there yet. Dots would be ok, but I really wanted to pull in both the red and the yellow in the rest of the design.
So, instead, I worked up these little bullion stitch bud-like thingies.
I discovered that, in the scheme of All Things Wool Mitteny, bullion stitch is actually a super-easy stitch to work on the mittens, since the stitch is always done from the front, anyway. Relatively speaking, it is easier to execute than most of the other stitches!
When I started these little buds, I wanted the bullion knots to taper towards the base, and it worked out pretty well with most of them.
I found that, ironically, when I tried to concentrate on getting them to taper, the knot wouldn’t tighten up on the end. I’d end up with a “perfect” bullion. So I decided to stop thinking about it and just pull with a will and see what happened. That’s when I got the taper. Not a very precise explanation of how to get bullion knots to taper, but it seemed to work!
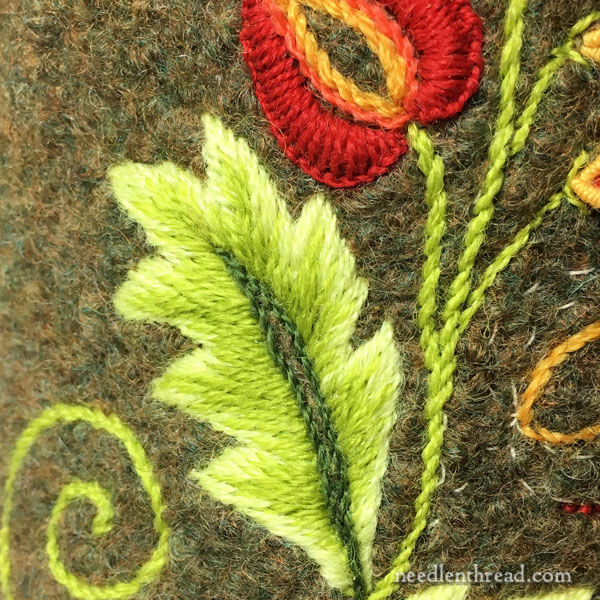
This long and short stitch leaf came out ok. It’s worked down on the cuff end of the mitten, so it’s very easy to access the back of the embroidery, allowing me to be more precise in my stitching.
I didn’t have to “scoop” each stitch – I could actually stab it, grab the needle, turn it around and send it back up. It’s not so easy to do this deeper into the mitten, so I started with this leaf just to get the feel of the long and short stitch on the felt.
I thought it turned out ok.
The dark green stem stitch up the center was added for two reasons: it neatens the inside edge considerably and evens it out a bit, and it adds a little more depth and contrast, even though it’s pretty much lost on the darker background! But it’s still an improvement over not having a bit of dark color in there.
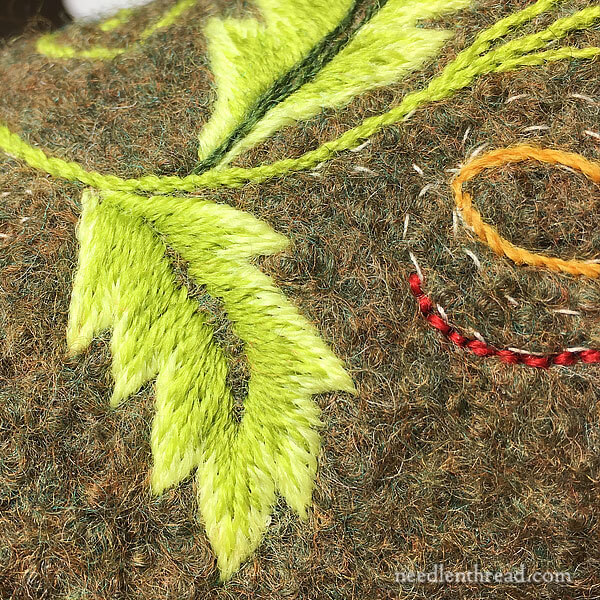
This is the Ugly Leaf. It doesn’t have that dark green down the center yet, which would be helpful in tidying things up there. It’s also a bit cramped. And it looks like part of the leaf was sliced off on the upper edge.
I thought this would be the easiest leaf to stitch, since it’s the closest to the edge of the cuff, but after being super careful and stitching super slowly on the leaf at the top of the design, I think I tackled this one with a little too much laxity. I figured I’d fly through it, and I did. But it came out a bit of a mess.
I’m not going to pick it out. This is all by way of experiment for me. I’m not fussing over a perfect finish.
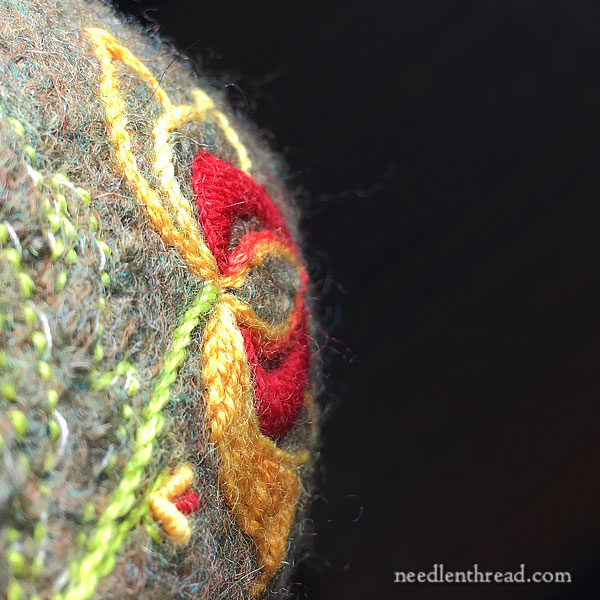
This shot is just to give you a sense of the way the embroidery sits on the felted wool. I like it! I like the way the wool embroidery feels on the felted wool, from both the inside (when my hands are in the mitten) and the outside.
I hope to finish Mitten 1 this week and get Mitten 2 underway. I’m eager to experiment with a different transfer approach that I have in mind.
Questions?
Want to ask any questions or join in the discussion? Feel free to use the comment form below!
Later this week, I’m going to show you something Really Pretty, really informative, and really worth a look – you historical embroiderers and book-loving stitchers and garden-enthusiast-needlers will just love it, I’m sure!
Hope your week’s off to a grand start!
