The last time we visited Party in Provence, an embroidered kaleidoscope project that we’re working through step-by-step here on Needle ‘n Thread, we worked the big petals in the center of the design and the little flowers between them.
Originally, I was going to start the week with some beadwork on Party in Provence, but as I prepared that article, it struck me that it might be better not to put the beads on until closer to the end of the project.
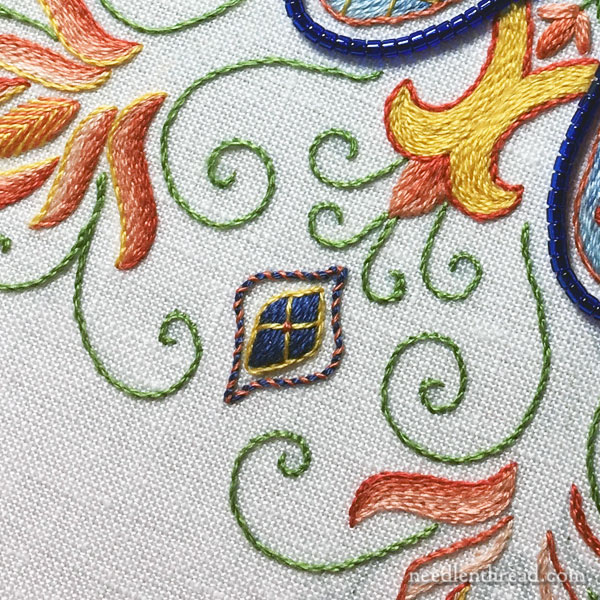
For those following along, don’t be too disappointed! I know you don’t get the finished look of the inside rounds until the dark blue beads are added to the larger petals, but there’s a good reason for not adding beads just yet.
You see, I’m all for avoiding as much frustration as possible when stitching. It’s easy for your working thread to catch on beads when you’re stitching other parts of the design, and since there’s still plenty of surface embroidery to tackle on this piece, we’ll try to avoid those little annoyances.
So, today, swirls. Lots of little swirls!
Now, the nice thing about all these little stem stitch swirls is that they will provide you with little breaks in other stitching.
If you’re following along with the project, but you’re still working on the inner rounds, stopping to work a few swirls in stem stitch here and there and then going back to the inner rounds will give you some variety in your stitching and entice you to keep going as you see other parts of the design developing.
Or, if you prefer to stitch in a definite order, you could just stitch the little swirls all at once! At this point, the order of stitching is totally up to you, because the rest of the design doesn’t depend on any particular order.
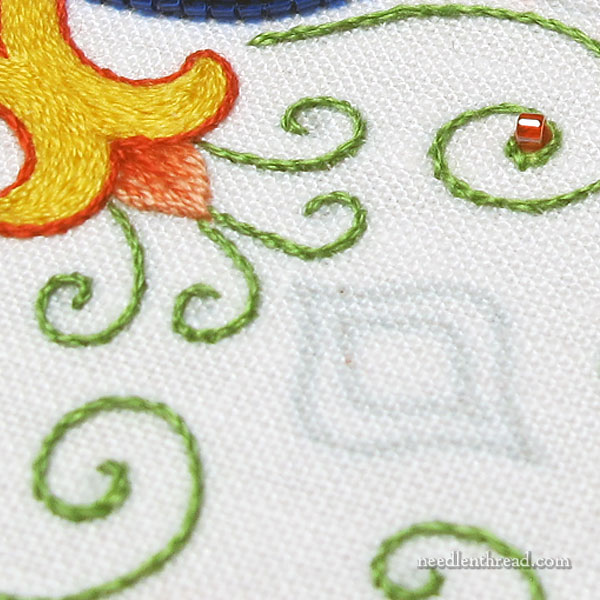
All the stem stitch swirls in Provence are worked with one strand of DMC cotton (from the six) in green.
By this point in the project, we’ve already worked quite a bit of stem stitch. If you hadn’t guessed, it’s one of my favorite stitches!
I’ve written a lot about stem stitch here on Needle ‘n Thread, with many tips to help you successfully master the stitch.
Stitching Tips
Here are the two instructional tips that will help you the most when working the swirls:
My stem stitch video
Working tight curves with stem stitch
The latter article uses the little swirls on Provence as the models. If you already know the stem stitch but have difficult with swirls, that’s the tutorial you want to reference while working the swirls on Provence.
Keep the Orientation of Needle to Thread
The one problem that many people run into with stem stitch on curves is that they tend to want to switch the orientation of the needle to the thread as they start around the curve.
If you turn your hoop or frame as you work around a curve, you’ll see that the needle and the thread always stay in the same position in relation to each other.
So, when you’re using DMC embroidery floss like we are in this project, if you are stitching left to right with the stem stitch (left handed stitchers can do this by stabbing the stitch rather than sewing or scooping it), then the working thread is always below the needle.
As you work your way around the curve, this orientation should stay the same. Imagine the curve turning to keep you stitching left to right, and you’ll know where the working thread should be (below the needle) as you work the stem stitch.
If you need to, you can “turn” the curve by turning your hoop or frame to keep you going in a left-to-right direction=.
Once you get the hang of stitching direction, needle and thread orientation, and the working method of stem stitch, you won’t need to turn your work – you’ll just instinctively work the stitch easily and correctly without thinking about it.
Next time, we’ll tackle some of the colorful outer elements – but you’ll have a while to catch up on the project. And even if you don’t quite catch up, you’ll be able access all the lessons whenever you need them, right here on Needle ‘n Thread.
The Project So Far
If you’re just joining in, or if you would like a re-cap of the project so far, here are the articles published for this project, in the order of development:
Let’s Get this Party Started! – Introduction, covering supplies, materials, set up
First Round & Order of Stitching
Big Petals and Little Flowers – the inside rounds of the kaleidoscope
You can find the design for Party in Provence in my e-book Favorite Kaleidoscopes: A Design Book for Hand Embroidery, available right here.
If you’re just joining in and you’re not sure where to start or what supplies we’re using, feel free to reference the articles listed above.
If you’re working along and you have any questions or you just want to chat about the project in general – or stitching in general – feel free to leave your comments below!
Hope your week’s off to a terrific start!
