So much for a weekend finish! Today, I was supposed to share a whole pair of mittens with you, but the embroidery on the second wool mitten is lagging behind a bit!
Still, I can show you the first mitten with the embroidery finished, for what it’s worth. Last time we visited the project, I was almost there, but not quite.
So this is a finished wool felted mitten, embroidered, with a few things I’ve learned along the way – just in case it’s a project you’d be interested in undertaking, too!
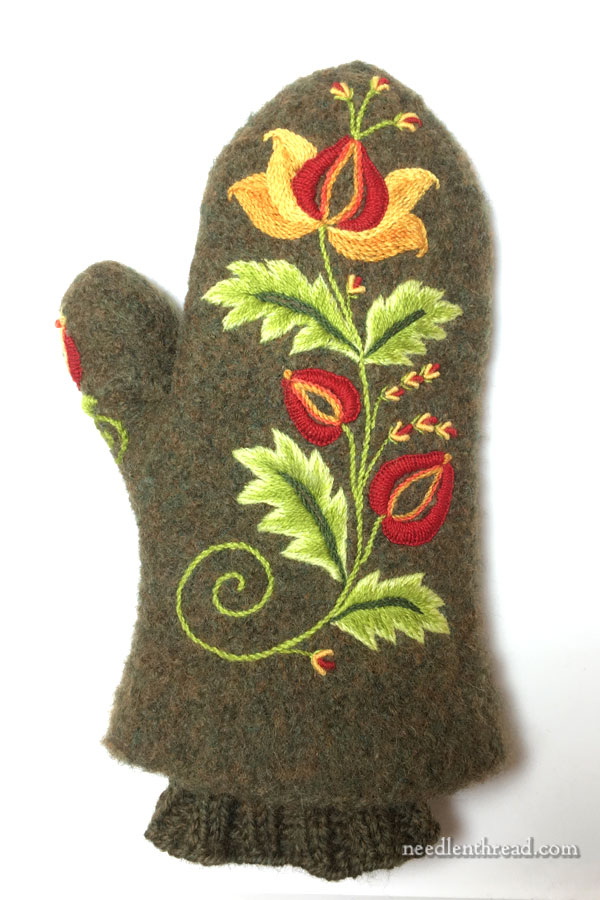
This is what the full finished mitten looks like, with the embroidery complete and the knitted cuff inserted inside the felted wool mitten. The knitted cuff really makes the things super-warm and cozy, very weather-resistant. But you definitely can’t tack the cuff into place before you embroider the mittens, or you’d never be able to get inside them to stitch!
When I initially drew up the design for the embroidery (you can see the original plan in this article), I had also intended a little embroidery around the felted cuff on the mitten.
As it worked out, there wasn’t really room for it, so I’ve skipped it. In the future, though (yes, I plan to try another pair!), the cuff will be a little longer, and when I design the embroidery for the second pair, I plan to focus on the cuff area, too.
Here are some things I’ve learned along the way:
1. My original approach to transferring the design (discussed here) wasn’t bad but it wasn’t great. It was a little time-consuming, but more to the point, working with the tissue paper wasn’t super-accurate, because the paper had a tendency to tear. I remedied that with the second mitten, using a different product.
2. Starting and ending threads is easy! You can start your threads with a knot – the knot just sinks into the felted wool. Ending threads is easy, too. Taking the last stitch with the thread I was using, I’d manipulate my needle away from the area and up into the felted wool, where I’d rock it back and forth in different directions to catch inside the felted wool, and then bring the needle and thread to the front of the mitten (anywhere), pulling on the thread to create some tension, and then snip the thread close to the wool felt. The thread disappears inside the wool felt.
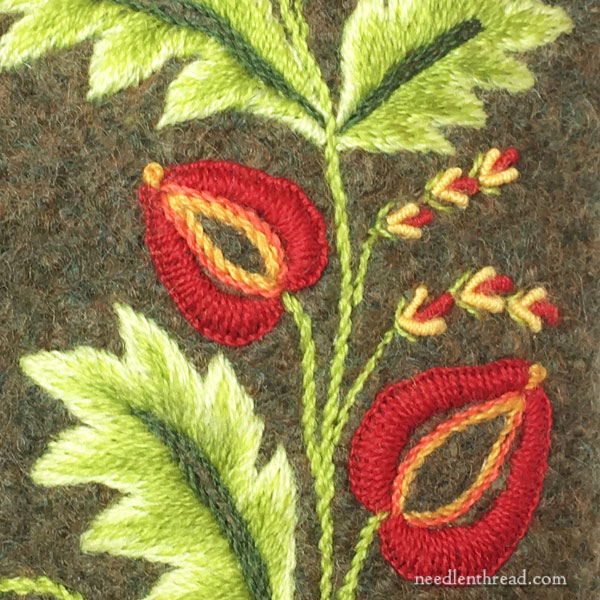
3. You have to “scoop” your stitches (using the “sewing method” rather than the “stab method” of stitching) whenever you’re working deep into the mitten. Along the cuff area, you can stab the stitches, because it’s easy to reach the needle, but towards the top of the mitten, you have scoop. You can read about sewing vs stabbing stitches here, if you’re unsure of what I’m talking about.
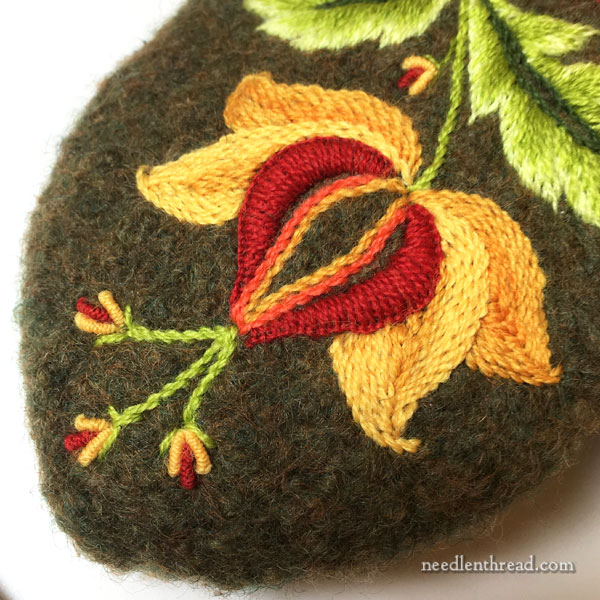
4. Bullion knots (if you’re already comfortable with them) are incredibly easy and low-frustration stitches, making them perfect for accents.
5. French knots – not so easy!
6. Long & short stitch (soft shading) is a little trickier to scoop. You really have to mind your tension on the stitches. It’s better, in fact, for them to be too tight than for them to be too loose. The looser the stitch, the messier it looks when scooping in the next row of shade on the long and short stitch.
And that’s my adventure so far with my embroidered wool felted mittens! (Or as my niece would say, middens.)
Once I finish the second mitten, I’ll share some more tips and I’ll share the pattern that I used for this particular pair.
If you’re looking for the knitting pattern for these mittens, you’ll find a source for it at the end of this article.
If you have any questions, comments, suggestions, inspirations, or whatnot, feel free to chat in the comments below! Anything that comes up, I’ll either answer below, or I’ll elaborate on when I share the pattern and the finished pair with you.
Hope you’re week’s off to a great start!
