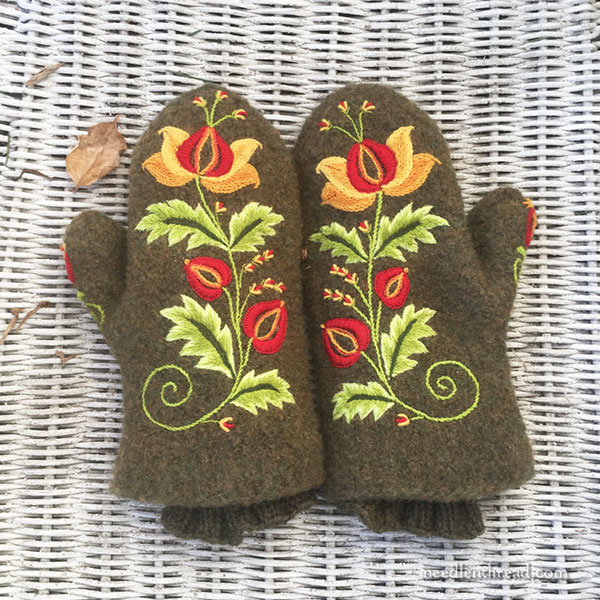
Well, I finished my wool felted mittens. They are duly embroidered!
It was a fun test project, and I’m looking forward to trying again on another pair, using different threads and techniques. All in the interest of experimenting, you know.
For those who want to try something similar, I’ve recapped a few points below, including how I transferred the design for the secon mitten. I’ve also listed all the articles in this short project series, so that you can easily find the whole project under Tips & Techniques in the main menu on Needle ‘n Thread.
My sister suggested I take a photo with them on. I’m not exactly sure how she wanted me to accomplish that.
I promise you, though, these felted wool mittens are perfectly wearable, nice and toasty, and rather rugged. There’s no reason why they can’t be worn. They were made, after all, to be worn, despite being embellished. So if you go forward with your own pair of embroidered mittens, don’t hesitate to wear them. That’s what they’re for!
Incidentally, you can scratch any fine motor skill activities off your list while wearing them. You can drive a car in them, ride a horse, pack a snowball. But don’t expect to be able to answer your smart phone with them or to manage a camera! Guess how I know?
Design Transfer for the Second Mitten
For the second mitten, instead of using the tracing or tissue type paper I used on the first mitten, I followed the same technique, but instead, I used a product called Swedish Pattern Tracing Paper, which is available here through Wooly Thread.
The stuff is much easier to use, when it comes to stitching an accurate transfer line on something like these mittens. It does not tear while you’re stitching through it, and that’s nice!
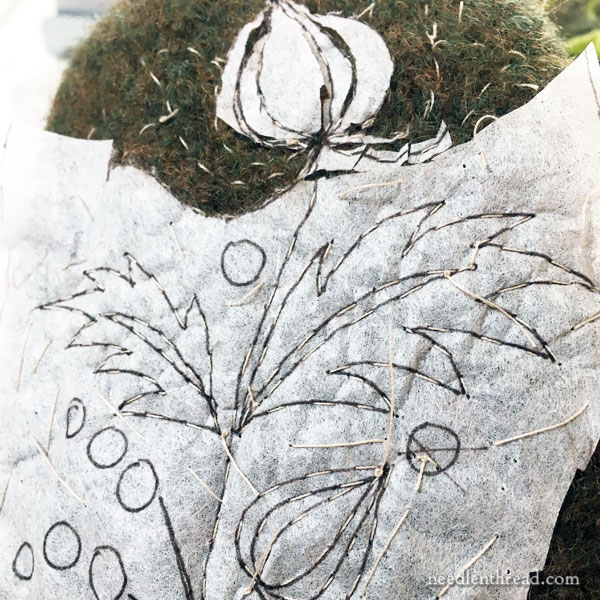
But it was much more difficult to remove, after stitching the line. I had to slice through every little line area with tiny scissors, being very (very) careful not to cut the running stitches, and then pick it out bit by bit with tweezers.
Still, the design transfer was much more accurate, it was a lot easier to work the tacking stitches without dealing with finicky tissue paper that tears when bending the mitten to scoop the stitches, and the transfer went a lot faster, initially. You lose a little time in picking the stuff out, though.
Project Recaps
You can find all the previous articles related to this project listed below, in chronological order:
Embroidery on Felted Wool Mittens – Introduction – design transfer, materials I used, and where to find the knitting pattern for the mittens
Embroidered Mitten Progress – including stitching tips
One Finished Mitten – including more stitching tips
Filed Under Tips & Techniques
You’ll find this project filed under Tips & Techniques in the main menu on Needle ‘n Thread, in case you want to refer to it later.
In fact, if you’re aching to explore project ideas, you can find lots of step-by-step embroidery projects (some very detailed!) available in Tips & Techniques on Needle ‘n Thread, under Hand Embroidery Lessons & Step-by-Step Projects. Feel free to check them out for your weekend reading!
Next week, thread talk (I love thread), Party in Provence, and a few other little tidbits to keep the creative juices flowing and to help you along on your embroidery journey!
Have a Wonderful Weekend!
