Have you ever completed an embroidery project and looked at it a year later – or maybe even just months or weeks later – and wondered, “What color number is that?” or “Gosh, how many strands of floss did I actually use?” or “Did I stitch that first or this first?”
This morning’s embroidery bit isn’t so much a how-to tip as far as stitching goes. Rather, it’s a kind of organizational tip.
If you’re a prolific embroiderer, especially if you plan to do something in the long run with your embroidery – maybe you want to be a designer, maybe you want to teach classes, maybe you want to start a blog to document your needlework journey, maybe you’ll want to reproduce the same project again down the road, or maybe you just want to be able to remember what you did when – this tip is for you!
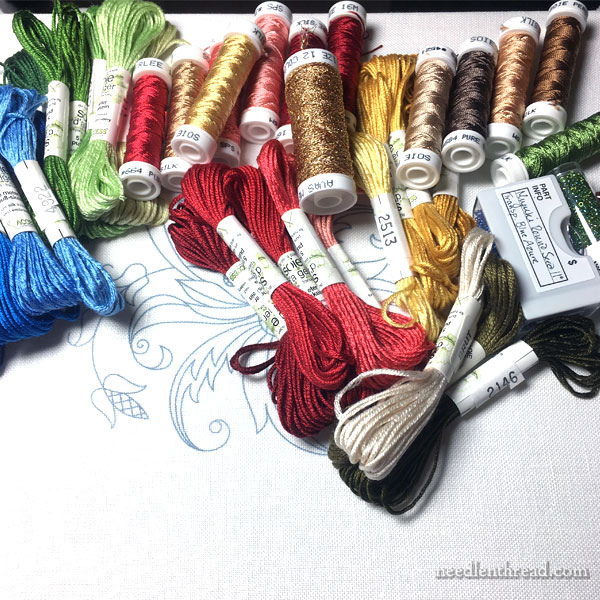
A couple weeks ago, I pulled a variety of silk threads for a new project. Since then, I’ve started stitching the design, using some – but not all – of the colors I pulled, and removing some of the original colors and replacing them with different colors of silk.
It often goes this way when I first start exploring a project. I have an idea for a color scheme, based on my original doodle when I started messing with the design, and I pull colors and shades that I think will work to bring the design to life in needle and thread.
But as I start to work through the project, I often change my mind. Maybe I mix in new colors, remove some of the originals, try different weights of thread, and experiment until I get the look I want. Maybe I use different stitches than originally planned on my doodle of the design. Whatever the case, it’s pretty certain that I’ll change my mind several times during the course of a developing project.
So, whenever I start a project like this, I begin with documentation.
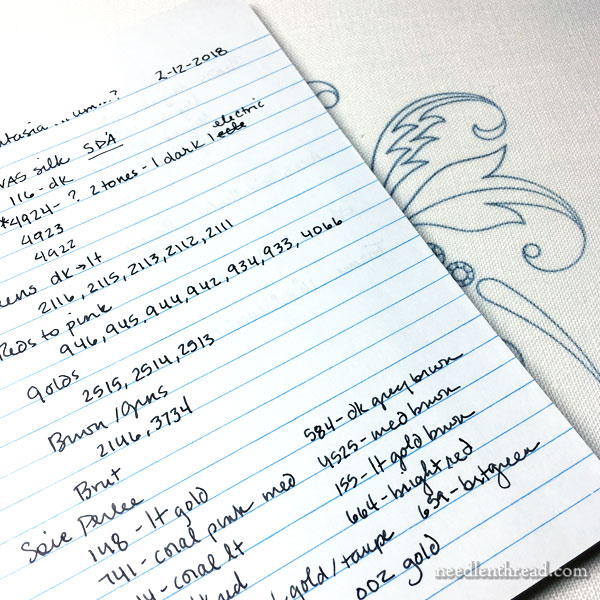
In a small notebook that I can easily tote around and tuck in with my project, I start a new page with the date and the name or description of the project. I fold up a copy of the pattern and tuck it into the pocket in the notebook.
Then I make a list of all the materials I originally pulled for the project, from the ground fabric I’m using to all the threads I might use.
As I change my mind – whether eliminating or adding new colors – I write it down. This is the only way I can keep track, with certainty, of the color numbers I actually end up using.
After all, when working with various shades or weights or types of threads, once stitches, different threads can look very similar!
I also note stitches or variations of stitches I use, because it’s easier to refer to the notebook than scrutinize the piece later, especially if I’m playing with a lot of stitch combinations.
The copy of the pattern I keep in the notebook is very handy for this. I draw lines to specific areas and jot the information down right on the pattern.
There are times, though, when I don’t jot down a color choice immediately. Maybe I’m stuck into the process of stitching and I don’t want to break my stride. Maybe my notebook is in the other room (and I’m too lazy to go fetch it!).
Still, I want to make sure I note the exact shades I used at any given point in the developing project. Otherwise, I might be in trouble when the project is finished.
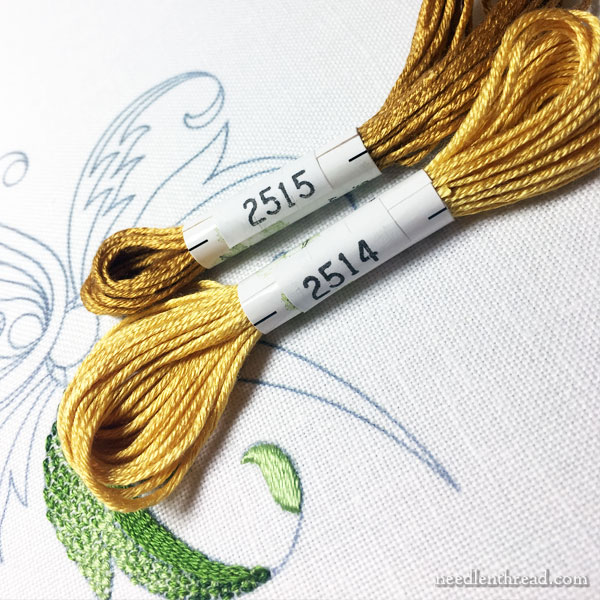
And that’s when the camera on my phone is super handy. I can snap photos of the threads I use, with the color numbers visible on the labels.
Then, when that stitching session is over, it’s just a matter of flipping through my photos and jotting down the required thread types and color numbers.
In a Nutshell
1. If you want to keep track of your thread and stitch choices on any embroidery project, keep a small notebook handy. Before you start stitching anything, jot down all the materials you’ve pulled for the project, from ground fabric to thread types and colors. As you stitch, make a note of colors, stitches and any changes you make.
While this may seem superfluous and tedious if you’re a hobby embroiderer, you’d be surprised how handy that notebook can be down the road. It’s a small investment in time that will pay off huge dividends later, if you want to remember with precision what materials, threads, colors, and stitches you used on any given project.
2. If your notebook isn’t handy or you don’t want to dig out paper and ink at the moment, and assuming you have a smart phone handy, at least snap a quick photo of the threads you decided to use during that stitching session, with a clear shot of the labels. Then you can add the information to your notebook at the end of the stitching session.
What About You?
I know there are stitchers out there who even keep swatches of threads and fabrics they use for each project – kind of like embroidery scrapbooking.
I tried that, once upon a time, but it took up more time than I was willing to commit to it, and it didn’t really add any extra benefit for my purposes. But if you like that kind of organization, it could be a fun exercise!
What about you? Do you keep any documentation of your project progress? Any questions, comments, or suggestions about documenting your projects? Feel free to chat it up below! I’d love to hear your input!
Facebook Group
If you’re on Facebook, why not join me and lots of other embroiderers over on my new Needle ‘n Thread Community Facebook page? It’s a great place for inspiration and information! Lots of good discussions already and a whole heap of lovely needlework!
