Here on Needle ‘n Thread, we’ve chatted quite a bit about hand embroidery needles. If you’re new to the website or the newsletter and you’ve missed those articles and you want to know more about needles used for hand embroidery, I’ll provide some links at the end of this article.
But today, I want to talk about needle sizes and stitching, about changing needle sizes for two different stitching scenarios.
I’m going to ask the wider Needle ‘n Thread community to pitch in their suggestions, too, at the end of the article, so make sure you revisit this article in the next day or so on Needle ‘n Thread to see what other stitchers have added to the topic!
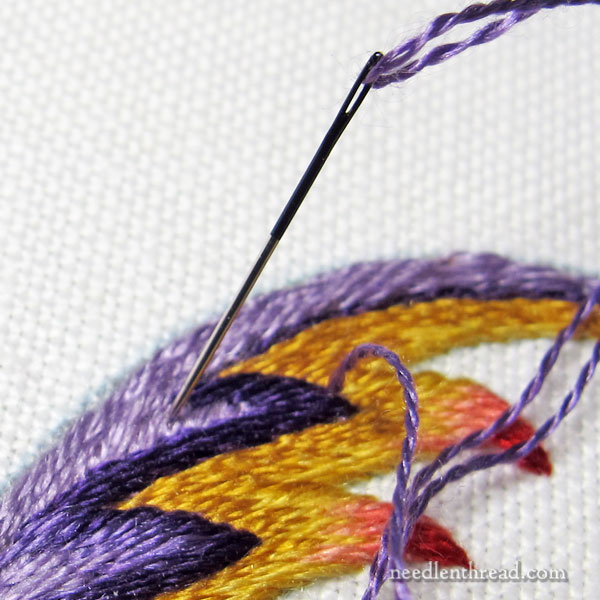
I’m working on a special project right now that involves a bit of long and short stitch shading, among other embroidery techniques.
On one area of the design, I’m padding the long and short stitch area, to give it a little lift. That is, I stitched a layer inside the split stitch outline around the area that I planned to shade with long and short stitch.
My Go-To Needle Size
Now, my go-to needle size is generally a size 7 or 8 embroidery (also called “crewel”) needle.
Even when I’m working with only one strand of floss, I’ll use a 7 or 8. Many stitchers, when working with one strand of floss, might use a 9 or a 10, which is fine – they work!
A 7 or 8 might seem like a large needle for only one strand of floss. Actually, it’s not so large that it opens up the fabric to leave noticeable holes, but it is large enough to open up the fabric and allow the thread to pass through without as much abrasion.
That said, in some circumstances, a 7 or 8 is too large, so I’ll switch to a 10.
When to Switch to a Smaller Needle
When working a dense area of stitching on ground fabric that’s stretched taut in a frame and backed with a layer of cotton fabric (you can read about backing ground fabric for embroidery here), pushing the needle through the fabric with stitch can be tough.
The combination of the density of the padding, the taut fabric, and the two layers of fabric can become a real torture-fest for your little fingers while you’re stitching!
And a larger needle in this case only exacerbates the problem.
So, when the going gets tough in this particular situation, I actually do what seems counter-intuitive. I switch my needle to the smallest needle that can handle the size of thread I’m using – in this case, a #10.
A finer needle slips into dense areas of stitching and fabric more easily. It’s not necessarily as easy to grasp as you’re working, but the fineness of the wire and the sharp point of the crewel needle allow the needle to slip through the padding, into the fabrics, and out again on the other side with greater ease.
The upshot: when you’re having a hard time getting your needle through your work, try switching down a size or two in your needle. As long as the needle is large enough to handle your thread size, the smaller size of the needle will probably slip through your work much more easily.
When to Switch to a Larger Needle
However, if the needle requires real effort to pull through when the fabric and the eye meet, if your fabric distorts as you try to wrestle the needle through, and it pops through with a loud noise after extreme effort, then your needle is most likely too small for the thread.
In this case, switch to a larger needle!
If you notice that your thread is wearing very quickly as you stitch – it’s getting fuzzy and losing detail in the twist, or it’s fraying at the eye of the needle very quickly – then try switching to a size larger. If you’re using a 9, for example, switch to an 8 or a 7.
You want your needle to create an opening that the thread can pass through with the least abrasion, without the opening so large that it leaves a noticeable hole around your thread.
Needle and Thread Size is Relative
Many folks hold strictly to the notion that your needle should be the same circumference as the thickness of the thread you’re using. They lay their thread down and then try to find a needle that matches the thickness of the thread.
While this will get you in the vicinity of a good sized needle to use, it isn’t necessarily always an accurate way to choose the best needle size.
For one thing, perceived thread thickness or circumference changes as soon as you pull on a piece of thread. It gets noticeably thinner.
For another, we double the thread at the eye of the needle, so you’ve got two pieces of thread passing through the fabric at once.
The real test of whether you’re using the right size needle is how the needle and thread handle as you’re stitching.
For example, it shouldn’t be difficult to pull the thread through after the point that the eye and fabric make contact. Sure, there may be a little resistance and sometimes a popping noise. But you shouldn’t have to wrestle the needle through.
And, as mentioned above, a quickly fraying thread can also be a sign of the wrong size needle.
Finally, the needle should be relatively comfortable for you to use. If your hands are feeling particularly stressed, if you feel like you’re fighting with every stitch, then the needle can be the culprit. Switch to a larger size or a smaller size, depending on what you’re trying to do.
For the Beginner
If you’re just getting into embroidery, your best bet is to purchase combination packets of embroidery (also called “crewel”) needles.
Most good embroidery needle brands (my favorite is Bohin, but John James needles are more common) market a size 3-9 combination pack. This should get you going for most stitching needs.
More Information on Hand Embroidery Needles
Not every needle is made for the same task. If you’re unsure of the types of needles available out there, or what needle you should be using for specific embroidery-related tasks, then you might enjoy the following articles:
Hand Embroidery Needles: How to Choose Them & Use Them
Why Switch Embroidery Needles – on needle burrs and flaws
All About Embroidery Needles: Types, Storage & Resources
The Needle you Need! (On Chenille Needles)
Keeping It Simple: On Hand Embroidery Needles
Gold Embroidery Needles: Are They Any Better?
5 Things You Need to Know About Embroidery Needles
Over to You
What’s your favorite needle tip for folks struggling to find the right-sized embroidery needle? Do you have any ideas, thoughts, questions, suggestions or comments you’d like to share about needles for hand embroidery? Any insights? Feel free to join in the conversation below!
