One of the questions that I’m asked frequently concerns embroidering on personal or household linens, where the back of the embroidery is not covered in any way when the piece is finished.
When embroidering kitchen towels or a table cloth or placemats, a guest towel, pillowcases, or handkerchief, the back of the embroidery is not normally covered in the finish work. It’s visible, and it is mostly likely going to be seen.
When the back of the embroidery is meant to be visible – even though it isn’t the primary side anyone looks at – we want the back to look as neat as possible. No, it doesn’t have to look just like the front. But it should at least be neat.
One place where you can really control the neatness on the back of embroidery is the beginning and end of any thread. If you pay attention to your starts and stops and make them as neat as possible, this goes a long way to a nice clean look on the back of the work.
Since two strands of floss are a frequently used weight of stranded cotton, I thought I’d show you how I like to start a thread when working on such pieces and stitching with two strands. It’s a super secure way to start threads and it will keep the starts of your threads extremely neat on the back of your work. I’ll also show you my favorite way to securely and neatly end a thread – but the focus here is really the start of the thread.
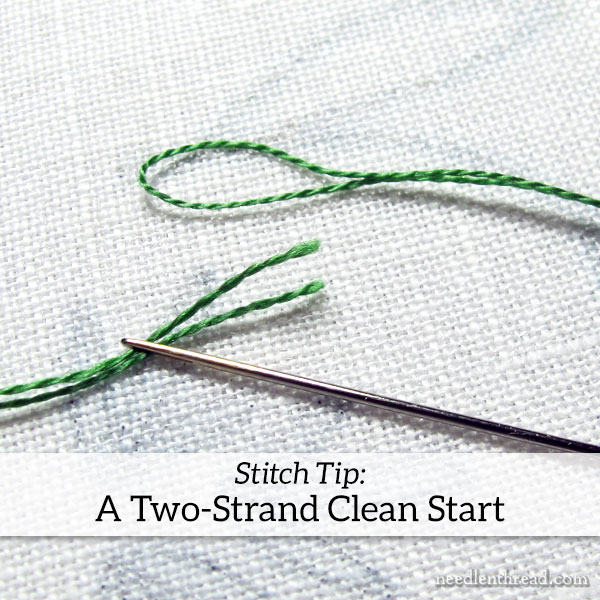
For beginners, the first thing to understand is that stranded cotton or “embroidery floss” – the typical 6-stranded DMC or Anchor (or other brands) of cotton – can be divided so that you can work stitches in various weights or thicknesses, using this one kind of floss.
If you want to see how 6-stranded floss stitches up in its various thicknesses, working with one, two, three, four, five, or all six strands, check out this article that illustrates the point.
Also, if you’re just starting out and learning about embroidery, you should know how to strip, or separate, embroidery floss. Normally, when stitching with less than 6 strands at a time, you individually remove one strand at a time from the bunch of six, and then put the number you want to use back together again before threading them into the needle. You can see how this is done in this tutorial on stripping embroidery floss.
To start your thread in this tidy way I’m explaining here, as long as you’re working with two (or any even number) strands of floss in the needle, the method is very simple!
Preparing the Thread for Stitching
Start by pulling out a length of floss from the skein that is double your normal stitching length.
Strip one strand of floss from the six.
Fold the thread in half and then thread the two cut ends into the needle.
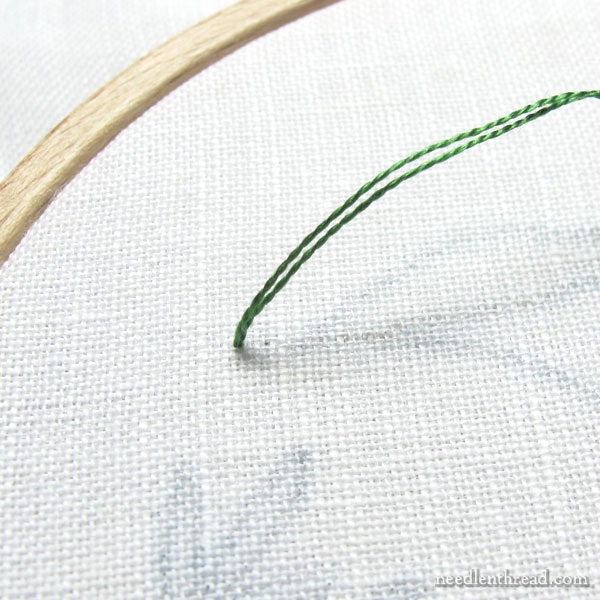
Bring your needle and thread up into the fabric where you want your first stitch to start.
Because there is no knot on the end of the thread, be careful not to pull through. Leave about half an inch of thread on the back of the fabric, as shown here:
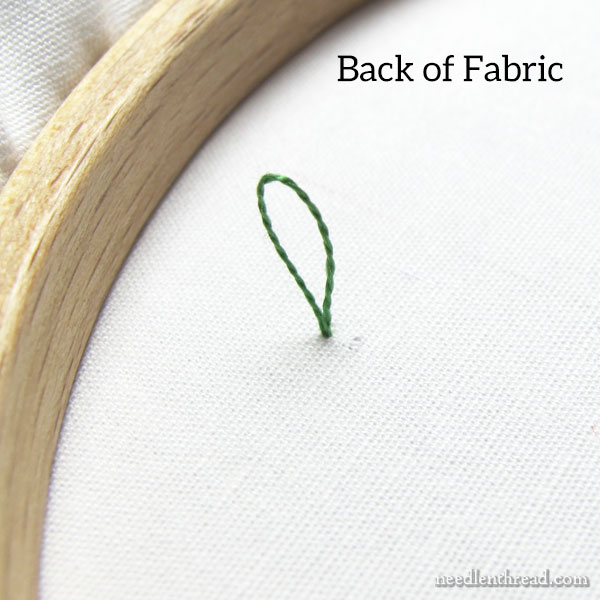
Because this is the folded end of the floss on the back of the fabric, the remaining thread will look like a little loop.
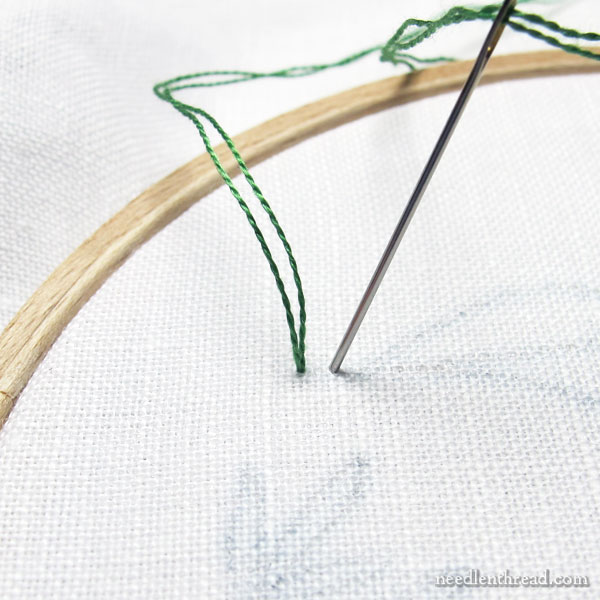
Take your first stitch forward along your design line, as shown above.
For this tutorial, I’m working a stem stitch line, but the principle holds true for any line stitch when working with an even number of strands of floss in the needle.
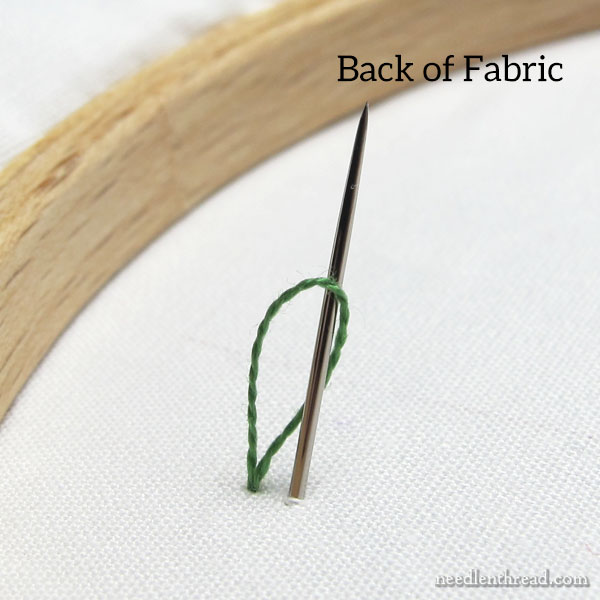
When you take your needle to the back of the fabric, pass the needle through the loop on the back of the fabric.
Then, gently pull on the stitch on the front of the fabric, so that the loop on the back tightens around the needle.
Pull the first stitch through from the front, through this tightened loop.
The thread is now secured around itself, and you’re ready to go forward, stitching the rest of the line.
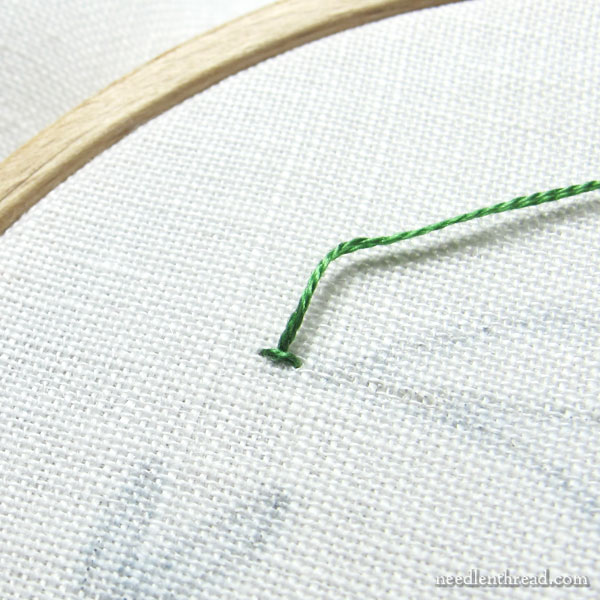
On the front of the fabric, everything will look just like a regular stem stitch line underway.
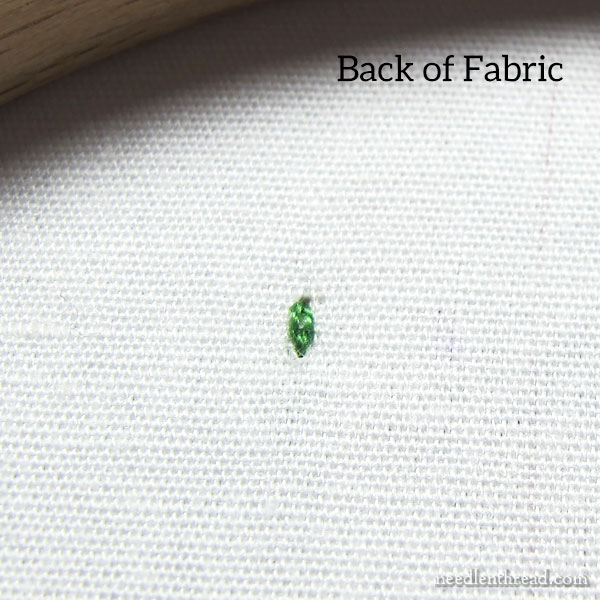
On the back of the fabric, the little starting hitch will look like a tiny chain stitch.
There are no loose ends and no tweakers sprouting forth from the back of the stitches. Hurray!
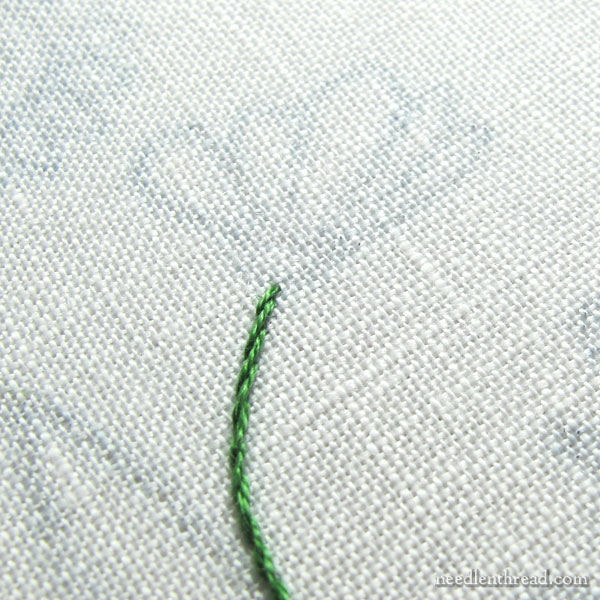
My favorite method of ending stitches on this type of work with exposed backs is to use tacking stitches in nearby area that will be covered with more embroidery.
So, as I come to the end of this line of stitches, you can see a little almost circular element at the top of the stem. This element, I plan to fill with other stitches, so I can use small anchor stitches worked inside that space to end the thread.
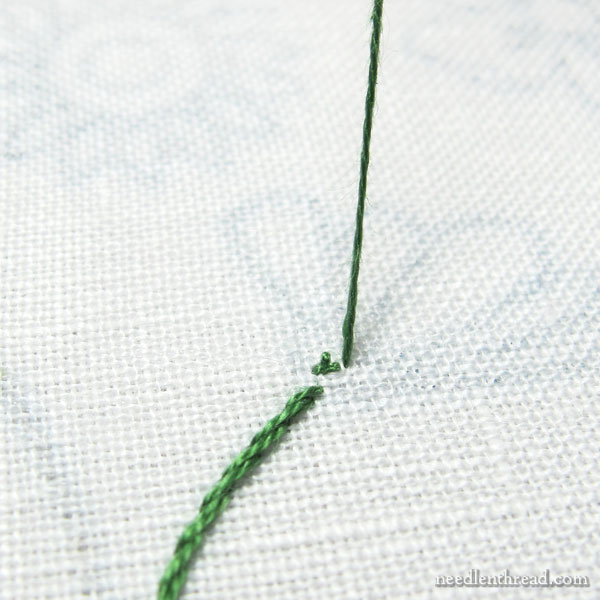
In the photo above, I’ve worked three tiny little stitches that converge at the same point, and I’ve brought the thread to the front of the fabric, close by those stitches.
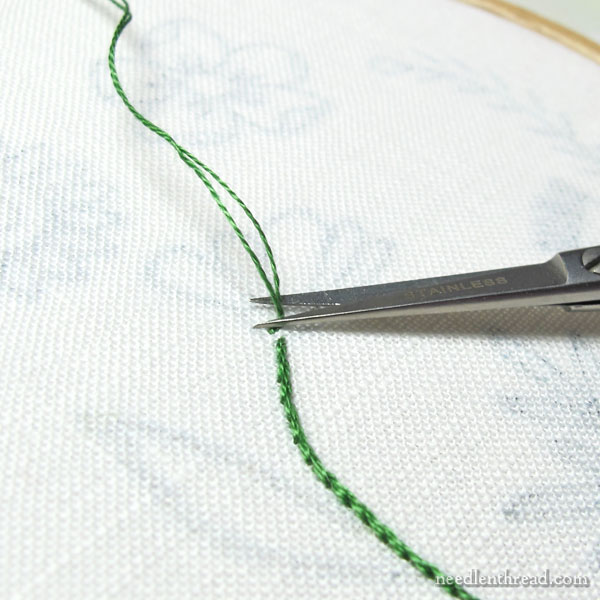
Pulling up on the working thread, I snip it off right next to the fabric, to end the thread.
Once I finish the embroidery, those little anchor stitches will be completely covered up.
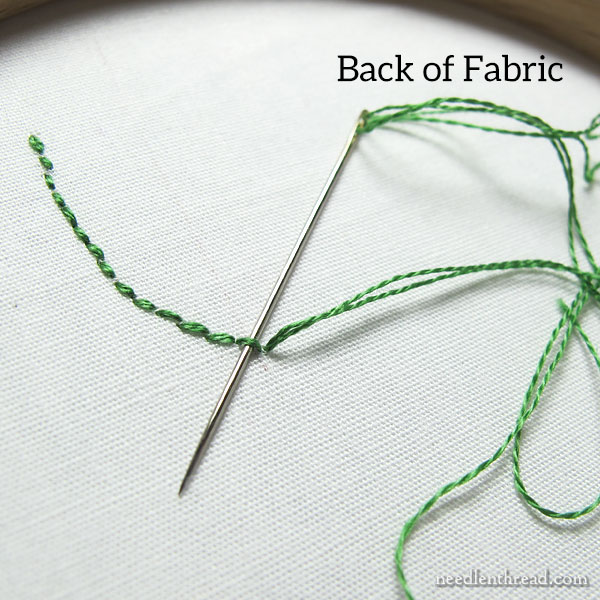
If, however, you don’t have a space to work some tiny anchor stitches, you can turn the work over and neatly whip the working thread around the backs of the stitches, passing the needle under about five or so stitches, always passing the needle under in the same direction.
This is a neat and adequate way to end a line as well, but tacking stitches are less visible, so use them when possible, and when not, whip the backs of the stitches.
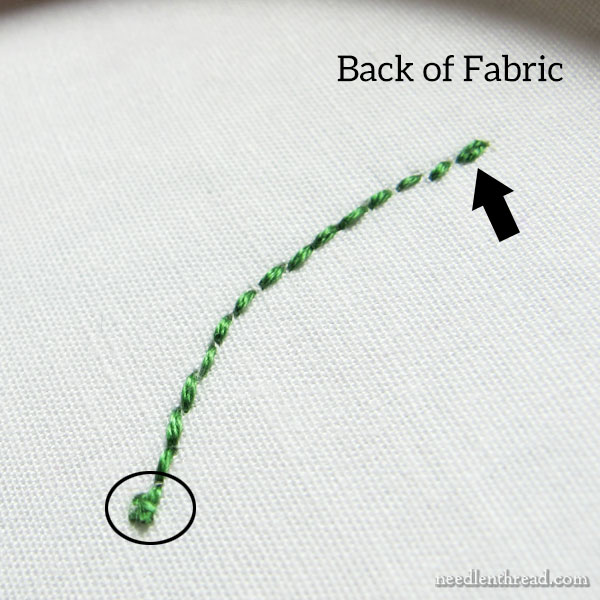
In the photo above, the arrow points to the start of the line, and the circle highlights the small area of anchor stitches, which will be covered with future embroidery.
And that, my friends, is a quick and easy way to create a neat, nearly invisible start when working with two strands (or any even number) of floss.
If you want to want to read more, you’ll find a list of tutorials for different ways start and end embroidery threads here, which is situated under Tips & Techniques, where you’ll find lots of other embroidery tips for beginners and beyond!
Hope your week’s off to a great start!