One of the questions I’m frequently asked is what I do with all my little embroidery samples that show up here on the website.
It’s a legitimate question! And it’s one I’ve pondered myself, too, innumerable times. What to do, what to do…
Now, I’m not talking about larger projects that I generally end up framing and giving as gifts, but the little projects I’ve stitched for the website – like all the letters for Stitch Sampler Alphabet. Or all the sample monograms for this series of embroidered monograms.
Or this little tambour bird or this little tambour flower. Or this shisha tree. Or this shisha thing. This spring tree? An autumn tree
? How about a pumpkin basket? Or a woven stitch sampler
?
All twelve trees for Twelve Trees for Christmas. Or this lettering sampler. Or this long and short stitch sampler. How about small doodle cloths?
The list could go on, and on, and on, and on. It seems that, in twelve years of blogging, I’ve done a lot of small stitching.
Over the years, I’ve stored my samples in binders to use for demos or to revisit when I need a photo, or I’ve stacked them in storage boxes, to pull out when I need them. Some, I haven’t looked at in years! Others, I’ve dug out for this reason or that.
One of the first things I contemplated when my dedicated studio space became a reality was how I could display little bits of stitching in a cheap, quick way – a way that wouldn’t require a lot of money for finishing and wouldn’t require a lot of time to accomplish. So today, I’m going to show you what I’m doing with small stitched samples from over the years. Maybe it will give you some ideas, too!
Before we get started, I want to make sure you understand that these are not fancy, work-involved, artistic, deeply meaningful pieces of embroidery. They are simply samples. I like them. I view them as a kind of record, but the important part of that record to me is kept on the website. I don’t classify these as “longevity” projects.
I would not do this with a piece of goldwork or silk work or something meaningful or time consuming.
But for what I have in mind, this method for displaying my little samples on my walls in my new studio is just the thing.

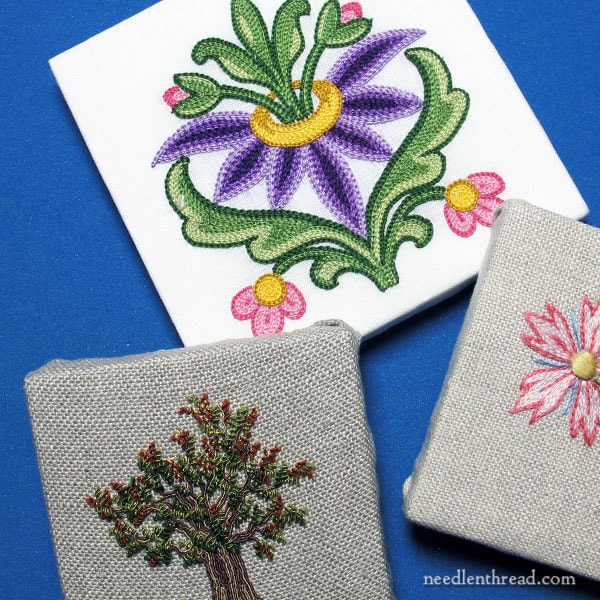
I’m calling these “tiles,” even though they aren’t tiles.
They’re actually canvas.

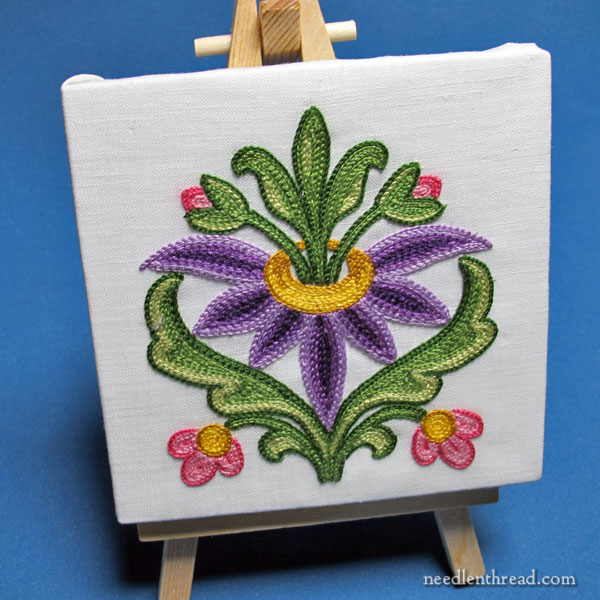
These are small canvases for acrylics, oils, and other painting. They are gessoed with acid-free gesso and the two kinds I’m using are glued onto the little stretcher bars. I’m using canvases that are 3″ square and 4″ square.
Depending on the size and the brand, I can buy 12 to 14 of these little things for anywhere from $10-$24, and whether they come with an easel or not. At $10 for a dozen for the less expensive, non-easel versions, that’s less than $1 per finish.
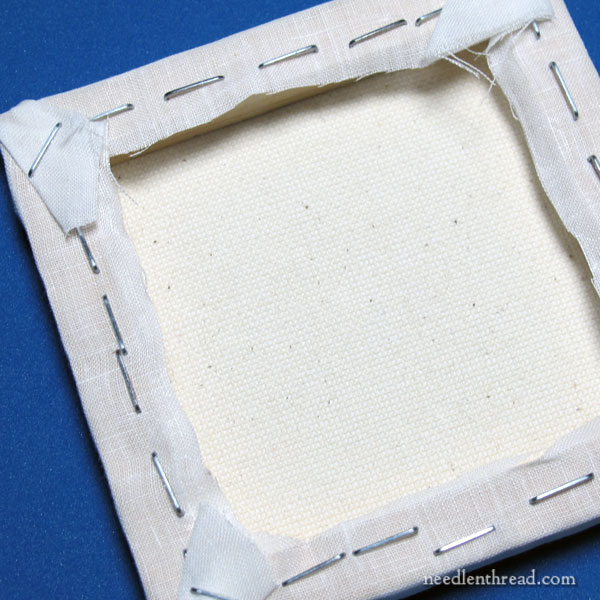
I’m using a staple gun to stretch and staple the little samples on top of the canvas.
I know many of you might be shaking your heads and collectively tsk-tsking, because this type of finishing is not exactly the best approach for long-term preservation of embroidery.
But I’m not really concerned about long-term preservation here. I just want to hang little samples up, in clusters, on my walls. And I need to do it as inexpensively, yet neatly, as possible.
Initially, I thought about tacking the samples to large bulletin boards somehow – pinning them up on framed cork in some kind of themed idea board. But having lived through dorm years with bulletin boards packed with all kinds of memorabilia, and then living through teaching, with classroom bulletin boards that constantly needed changing, and then living through college teaching with bulletin boards full of notices, I’ve had enough bulletin boards in my life. I see them as purely utilitarian now, and they rarely inspire me.
So, instead, I want tiles. And this is the easiest, least expensive and least time-consuming way to achieve tiles.
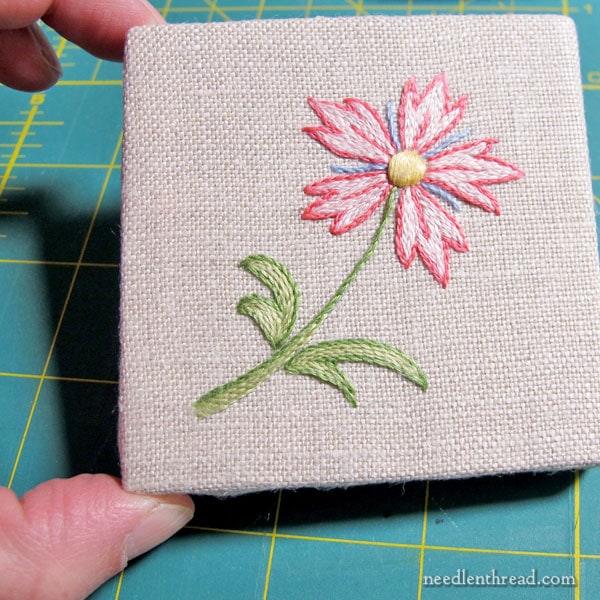
The 3″ square tiles are pretty cute! They’re a lot smaller than I imagined they would be. Imagine having to frame up a lot of tiny pieces that fit inside 3″ squares! That would take a lot of time!
With the canvases, it’s just stretch, staple, and trim.
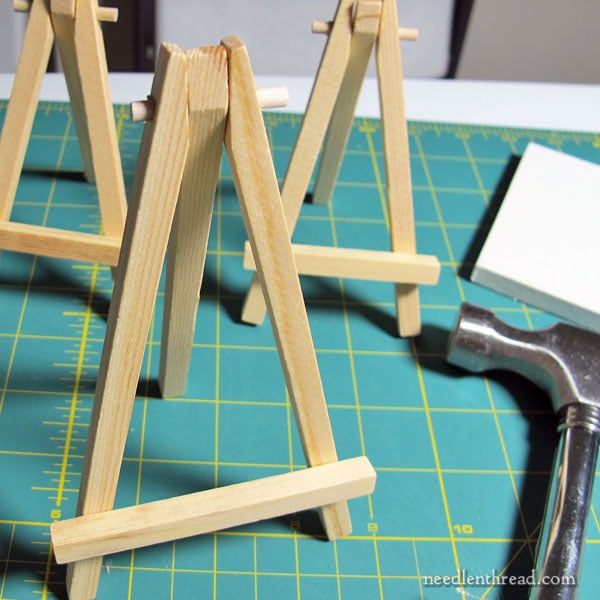
One of the fun things about the bulk Arteza mini canvases that I already had on hand is that each one comes with a tiny little easel. They’re just wee little cheap things, but they’re pretty cute!
And they’d also make a good method of display, if you had a tabletop display area that wouldn’t get jostled too much.
I don’t plan to use the little easels. Instead, I plan on doing small wall clusters. I may mount them to ribbon strips, to make it easier and more attractive to hang them and to minimize holes in the wall, but I haven’t gotten to that point yet.
The Details
If this is something you’re interested in for your own little samples, you can find an assortment of small canvases in bulk packs on Amazon. I’ve listed different kinds I’m using on my Amazon page here. I’m sure you can also find them through other art stores, if you’re lucky enough to have a good art store close by.
To mount the embroidery, which has already been blocked and damp stretched, I centered the embroidery on the canvas, over the canvas-up side and used a clip (like these) to secure the sides to keep the fabric in place and centered.
Next, I flipped it and stapled one side, starting in the center and stapling out towards the corner but not on the corner. Then, I stretched lightly and stapled the opposite side (in the same manner as tacking fabric on stretcher bar frames for embroidery, really!). And then I did the two remaining opposite sides, stretching slightly and always double checking that things were working out as they should on the front.
Then, I folded the corners in, in such a way to keep the fabric on the folds as minimal as possible and as much away from the edges as possible. I stapled the corners over the folded fabric.
Lastly, I took scissors and trimmed away all the excess fabric.
I haven’t decided yet if I will cover the backs or not with fabric or felt. I might, but only if I have enough felt or decorative fabric on hand and I can figure out an efficient and secure way to do it.
There you have it! That is how I’m making little embroidery tiles for display. Once I finish enough of them up and get them arranged, I’ll show you how they look. It’s not high on my priority list, but it’s fun to finish one or two up here and there between bigger jobs.
If you have any questions, feel free to ask below!
A Little Crewel News
Before signing off, if you aren’t aware of it, I thought I’d point out that Crewel Work Company is running a sale, and today’s the last day of it. If you’re looking for authentic crewel embroidery kits and the like, you might check it out here.
