Now that I’m working in my new space, one of the first embroidery projects I’m setting up is the salvage work on a piece of figure embroidery that I wrote about several months ago. You can read the backstory on this figure embroidery here, where I’ve arranged all the articles about it so far in chronological order.
Having more space to work is so wonderful! Now I can keep this project set up so that I can work on it more efficiently as time allows. As you can imagine, taking out and setting up something like this can be prohibitive to making much progress, since the set up and the take down for short work sessions eat up a good bit of time.
The salvaging of this piece is going to happen in two parts. I’ll explain my planned process below. There are still a few kinks I need to work out and a few ideas I want to explore before making Absolute Decisions on the process, but I’ll share those with you as I go along!
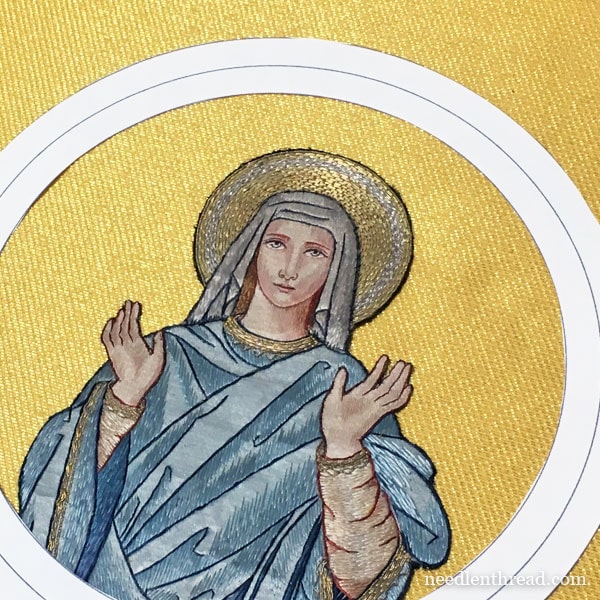
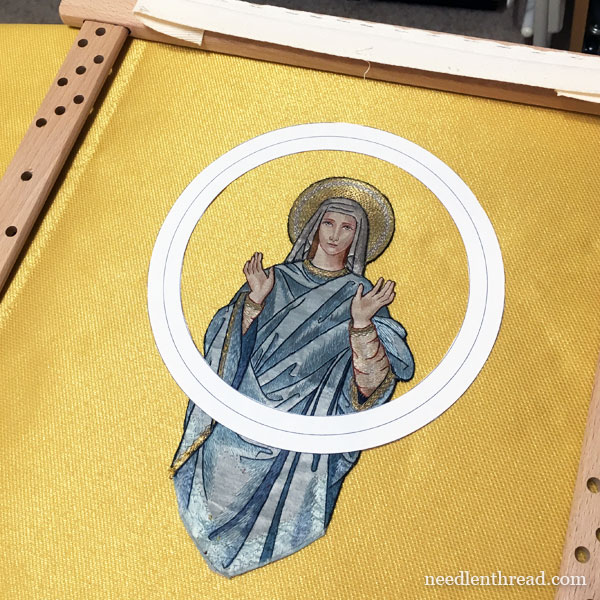
This is the figure that I’m relocating to a new piece of ground fabric and adding a new frame around. The white circle represents the new frame.
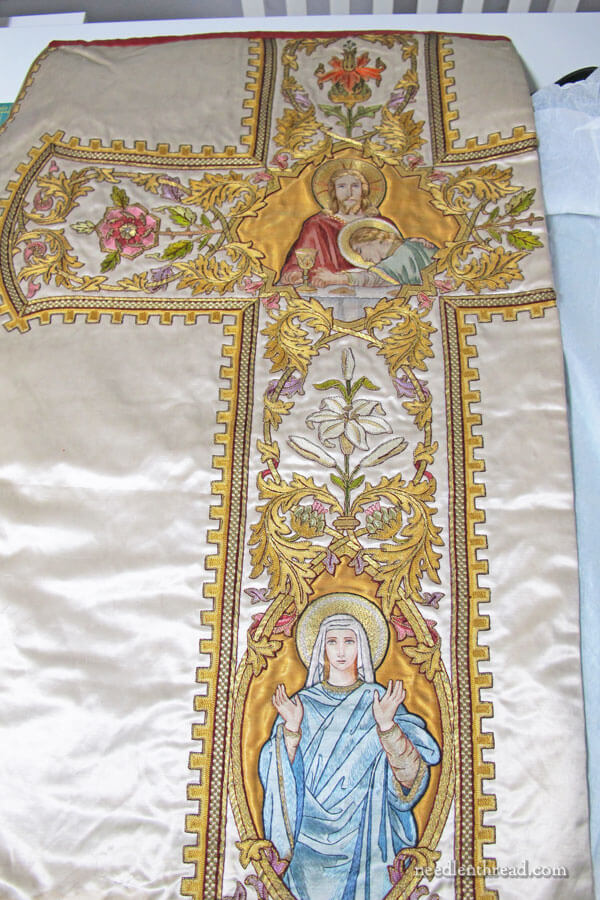
The original piece that I took the figure from is pictured above. The figure had a marquise-shaped frame around it, with embroidered foliage creeping over the original frame and intruding on the embroidered figure right around the base of it.
To salvage the figure, I’m going to stitch a smaller circular goldwork frame that cuts across the base of the figure, covering up the areas where the previous frame was worked over the embroidery. I can’t think of any other way to cover up the holes and other damage from the original outline and intruding foliage. And when it boils down to it, I prefer a round frame, anyway!
The ground fabric that I’ve chosen for this is the cloth of gold I mentioned at the end of this article. This is it, without the figure:
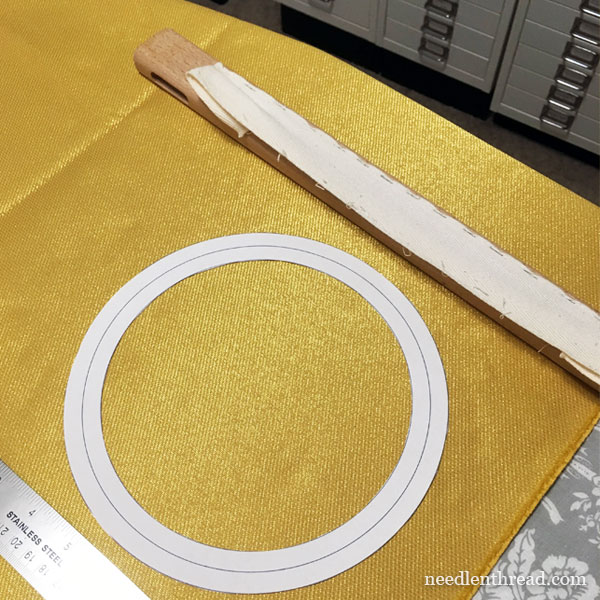
It’s a nice fabric! You can find it through Watts & Co out of London.
Old vs New: They Look Different
One thing that often troubles me when salvaging old pieces of embroidery like this is the noticeable difference between old and new. When placed on new fabric, old embroidery like this tends to look a little dingy.
And while I could scour the earth for old fabric that would provide a more coherent aged look for the whole piece, in most cases, once finished, the new and the old will somehow meld together and look fine.
Especially when you consider that a piece like this will be mounted on a larger vestment made from new fabric with new trim, it doesn’t really make sense to use antique fabrics and already-oxidized gold in order to recreate a totally vintage look. Then the whole piece would look noticeably dingy on the brand new vestment.
That’s one of the funny things about creating new pieces of ecclesiastical embroidery. I often find that folks who are looking for hand embroidered ecclesiastical needlework tend to compare new pieces with old embroidery. They think the new looks garish, compared to the old.
But if you consider that the old is just that – old! – and you realize what it would have looked like, created new, then you can imagine that these old pieces were actually quite lively with color and sparkly with gold. They weren’t the muted antiques we see today! It’s sometimes hard to explain that to people.
Working in Pieces
I’ll be working this salvage job on two slate frames.
If you’re not familiar with what a slate frame is, I’ve written about them here, with a an article here on setting up, or dressing, a slate frame.
On the first slate frame, I’ll work the circular frame for the piece. I’ll be stitching goldwork threads over wool felt tacked on a linen ground fabric. When the circular frame is finished, I’ll cut it out and move the work to the other slate frame.
On the other slate frame, where the whole piece will come together, I’ll start with a linen base, onto which I will tack the new cloth of gold. Then, the figure will be tacked in place, I’ll couch an outline of silk around the figure, and then I’ll apply the new circular goldwork frame around the figure.
Then, the whole piece will be cut from the second slate frame and treated as an appliqué, to be applied to a new vestment.
It’s not a small job and it will take some time. But once I get it completely set up, it’s just a matter of working carefully through the steps.
I foresee a few areas where extra care needs to be taken. And I’m still troubleshooting ideas for how to manage cutting off the excess on the figure embroidery. Either wheat paste or rice glue will most likely come into the picture.
I’m also a little troubled by the creases that just won’t release from the original figure, which come, most likely, from bad storage solutions. I’m going to experiment a bit on how to resolve that issue (if it can be resolved without damaging the figure).
So, a fun adventure! I’ll share it with you in little bits as I go. I won’t be working on the piece full time, though. Too many other things to tackle, now that I have plenty of room and no interruptions!
What’s in My Hoop?
What’s in my hoop at the moment? I’m working on the embroidered samples for the upcoming youth classes I’ll be teaching in July. I’ll share those with you soon! And I’m re-working this tree, with a few alterations. I’m also figuring out the logistics of my new camera set-up, and practicing some video.
You’ll see the fruits of all of that labor here soon!
What’s in your hoop at the moment? Whatever it is, I hope it’s providing you with abundant stitching joy!
