It’s hard to pin down a favorite embroidery stitch, isn’t it?
But I’m pretty sure most of us must have favorites – those stitches we return to, time and time again, and that always perform well for us. The stitches that are comfortable and easy to be with, like good friends.
While I like many embroidery stitches, there are really only a handful that I’d call “Absolute Favorite Stitches,” and the fishbone stitch is right up around the top of that list.
Perhaps I like it so much because I stitch a lot of petals and leaves and similar shapes, and it just works so darned well in those circumstances! In fact, I’m willing to stick my neck out and say that, when it comes to petal and leaf shapes, the fishbone stitch is The Best. It’s where it’s at, if you want a nice looking leaf!
But there are other reasons I like it, too.
If you haven’t familiarized yourself with the fishbone stitch, here’s a little encouragement for you to try it and use it.
In the photo above, which is a close-up on this voided monogram hat I showed you the other day and since finished, the green two-leaf cluster in the middle of the photo features fishbone stitch.
Whether you’re working tiny leaves or petal shapes, or even larger shapes (you’ll find an example below), fishbone stitch fills a shape so that a small overlap forms down the middle of the shape, naturally creating a vein or line where the overlap happens. This is what makes it just perfect for leaves and petals.
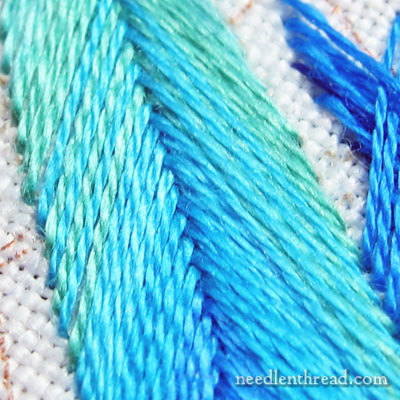
The fishbone stitch works well for filling larger but narrow shapes, too. Think: feathers! The photo above is a feather in fishbone stitch, from my project Secret Garden Hummingbirds, which you can find detailed step-by-step here.
In the article that focuses on the fishbone stitch feathers, I discuss how to shade fishbone stitch using multiple colors of threads as you fill the shape.
So, fishbone stitch not only works well for a filling, but it can also be shaded with a realistic, gradual shading. And that’s a nice little bonus for a nice little stitch!
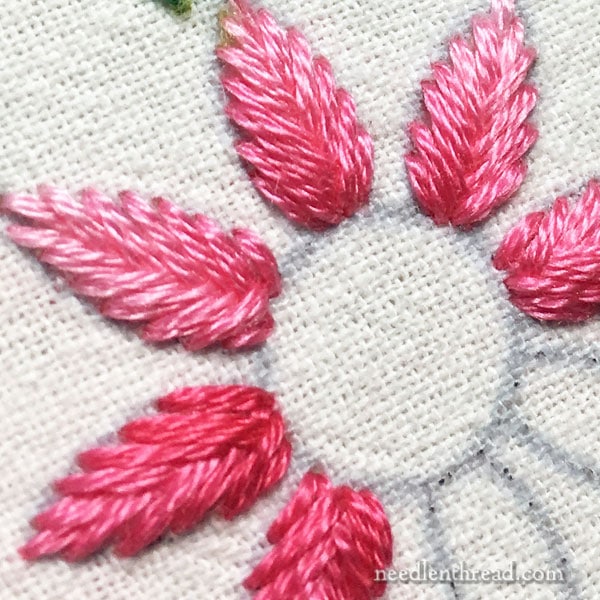
In the shading tutorial with the feather, the color changes were accomplished by switching out thread colors gradually. And that works, but, for small filled elements – like the little flower petals in the photo above – switching to new threads might be a bit tedious.
And this is where variegated threads come in handy. If you want a shaded effect with fishbone stitch, but you’re filling relatively small shapes and don’t want to deal with switching out to new thread colors while you’re stitching, try using variegated threads instead!
If you cut the variegated thread so that the cut includes a short section of light turning to dark in the variegation, as you fill the shape, you’ll see a gradual changing of shade from tip to base. This is why the pink petals above are not one solid color, but rather lighter on the tips and darker at the base.
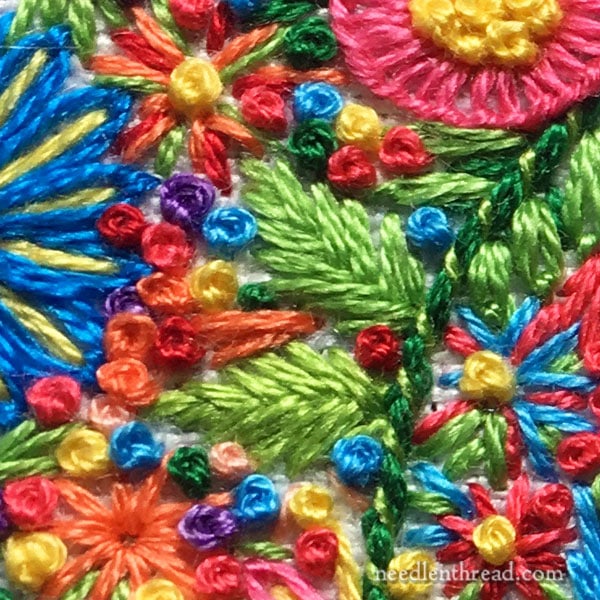
The tiny leaves in this photo are also fishbone stitch.
We talked about these particular leaves (and traveling threads from leaf to leaf) in this article, here.
The shading on the leaves from Octoberfest! is accomplished by using overdyed threads and mixing the colors in the needle.
So that’s another way you can shade fishbone stitch – working with two colors in the needle at once, especially with overdyed or variegated threads that will give you color change as you stitch.
It’s a Quick Filling!
Perhaps one of the main reasons I love fishbone stitch so much is that it is a really quick filling that gives very satisfactory results.
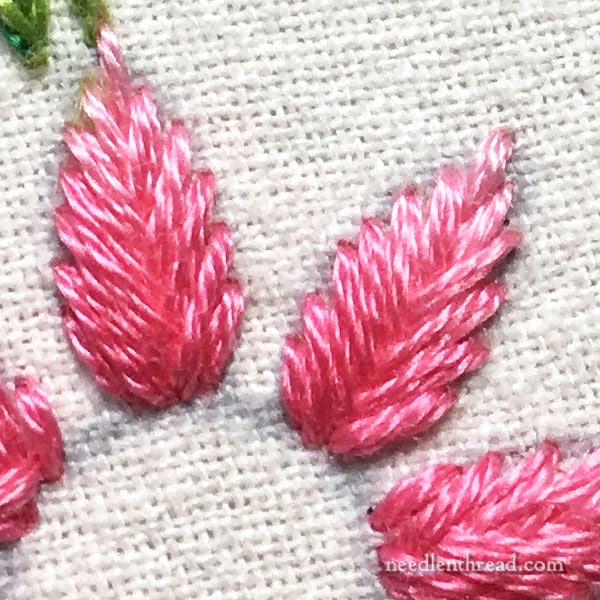
Take the pink petals as an example. If I had filled those with padded stem stitch or long and short stitch shading, each petal would have taken quite a while to stitch.
But with fishbone stitch, and using three strands of floss in the needle, each petal shape took only about 13-14 straight stitches to fill the shape.
Fishbone stitch works up quickly, so that, in no time flat, you’ve got a satisfactorily filled little shape emerging on your cloth.
Gosh, I love this stitch!
Learn the Fishbone Stitch
You can learn the fishbone stitch by watching my fishbone stitch video tutorial here.
And you can find a video for a variation called the raised fishbone stitch here. This variation will give you a fuller shape that sits up a bit more off the fabric, in case you want some extra dimension to your leaf. It uses up slightly more thread, but it’s a fun variation!
You can also find fishbone stitch in pretty much any good stitch dictionary. If you don’t have a stitch dictionary yet, I encourage you to get one! It’s always handy to have a real book you can pick up or tote with you, to use as a reference when you’re learning new stitches.
I’ve got a slew of stitch dictionaries reviewed here on Needle ‘n Thread and listed on my Book Index page.
And you can find some of the best ones listed right at the top of my Amazon page here.
Over to You
So, what about you? Would you list fishbone stitch among your Absolute Favorite Stitches? Do you have another stitch for leaf or petal fillings that you turn to repeatedly? I’d love to hear your input, and your questions and comments can help other stitchers learn more about embroidery, too.
Feel free to chime in below!
This post contains an affiliate link to my Amazon page, which means Needle ‘n Thread receives a small kickback for any Amazon purchase made through that link, without any extra cost to you.
