I had a terrific time tackling my Needlework To-Do List this weekend!
Let’s see… there were twelve things on it. I managed two.
On the bright side, one of the Managed Things was the set-up for a project that’s been simmering on the back burner for a while – namely, the frame for this salvaged piece of figure embroidery.
I’ll be working this salvage job in two major steps. The first step will be the goldwork frame. And to get to the point of actually doing the goldwork, I had to set up a slate frame with a piece of fine linen as the ground fabric.
I went about setting up the ground fabric and frame a little differently, but that’s the nice thing about embroidery. There’s no set rule that says you must do This or That (in this case, setting up the slate frame) one way or another. As long as the system works, then you’re good!
For those just getting into embroidery, if you’re not familiar with what a slate frame is, I’ve written about them several times here on Needle ‘n Thread. This is a list of articles about slate frames, in case you want to pursue the topic further.
There are different versions of slate frames, but the most common version is this type shown in this article. There’s also this type of slate frame, that handles the connection of the fabric on the rollers (the top and bottom parts of the frame) differently.
I’ve also written about how to dress a slate frame, but over the years, my process has changed to suit my project and the tools and materials I have on hand. The concept is still the same – you attach the fabric to the top rollers of the frame and you lace the sides of the fabric onto the side slats, so that you can tension the fabric from the sides.
Not Just Any String
If you’ve used a slate frame or considered using one and done a bit of research on them, you’ve probably seen frames set up with heavy string or twine as the lacing thread, laced through strips of heavy fabric attached to the edge of ground fabric by way of large upholstery needles.
And that’s all well and fine – it works! But it’s not the only way to go about setting up a slate frame.
One day, I was watching a French program on Luneville embroidery (tambour embroidery) filmed at a professional atelier in France, and I noticed three things about the side lacing on the frames:
1. The string was not heavy string at all. It was, in fact, a relatively light thread.
2. There was no reinforcing fabric on the sides of the ground fabric.
3. The lacing string didn’t pass through the fabric. Instead, it wrapped around sets of T-pins running down the sides of the ground fabric.
And that’s when it occurred to me that it doesn’t really matter how you set up a slate frame, as long as the set up does what it’s supposed to do: perfectly tension the fabric top to bottom and side to side.
Since then, I’ve slapped together slate frames in all kinds of ways.
But one thing I’ve done consistently is switch from heavy string to linen thread for lacing the sides of the frames.
Why? Two reasons:
1. Linen thread is extraordinarily strong and it doesn’t stretch.
2. Linen thread can be handled with a regular crewel needle and it passes easily in and out of the fabric that’s being laced onto the frame. It’s finer and a lot less bulky compared to string, and it’s very easy to handle.
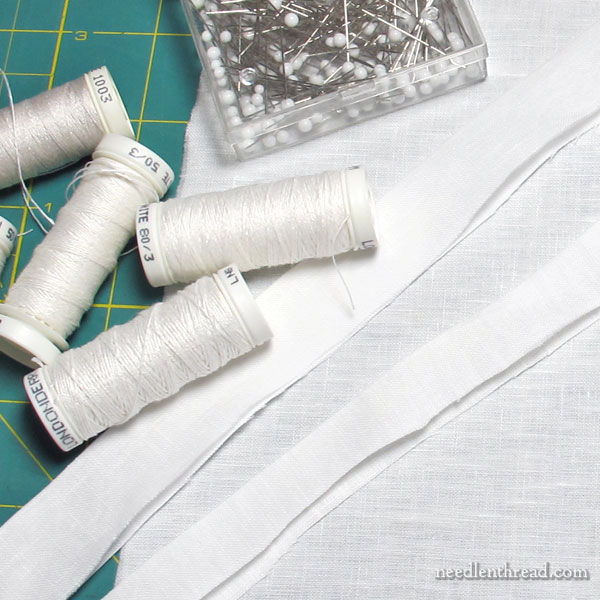
For the project I’m setting up right now, I’m using size 30/3 Londonderry linen thread for the lacing. I used a size 50/3 for other sewing involved, including attaching the fabric to the top and bottom rollers and sewing some reinforcing strips of fabric to the sides.
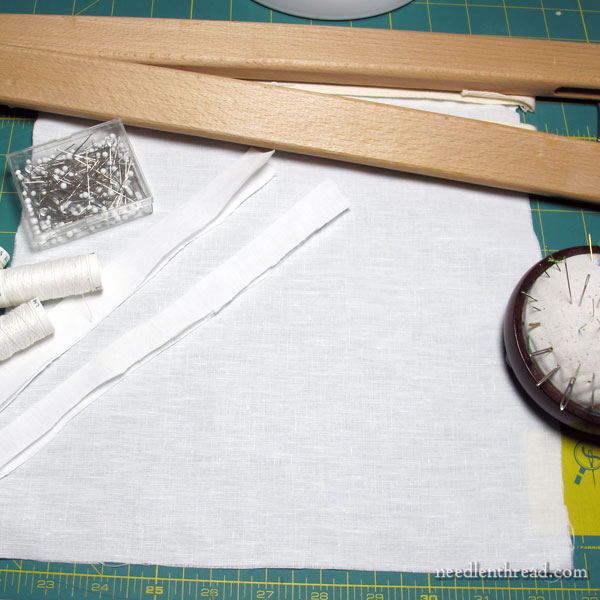
To set up this particular project, then, I used the following supplies:
- A slate frame
- Pins
- My ground fabric (in this case, a somewhat fine linen)
- Two leftover strips from the sides of my ground fabric, folded in half
- Linen thread sizes 50/3 and 30/3 (I use Londonderry linen because it’s consistently good linen thread available in a variety of weights)
- Crewel needles, #3 and #5
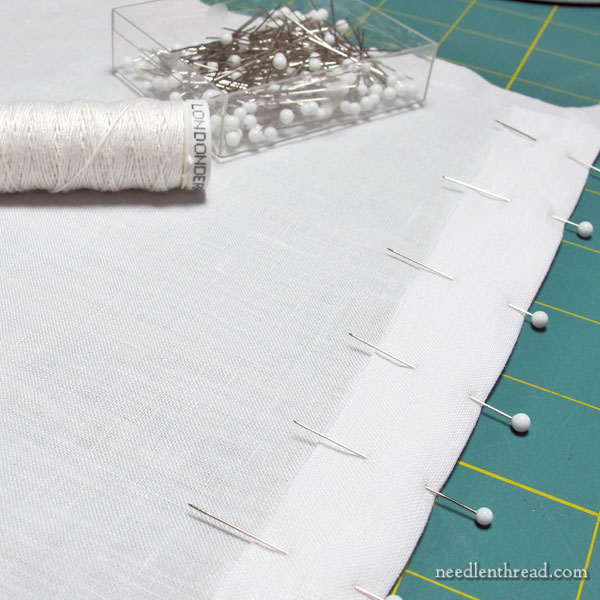
Because I’m using a very fine linen as the ground fabric for this piece (I’ll explain why later, when I start the goldwork), I reinforced the sides of the linen.
To do this, I just used two leftover strips of the same linen. I folded them in half and fit them over the sides of the ground fabric and pinned them in place.
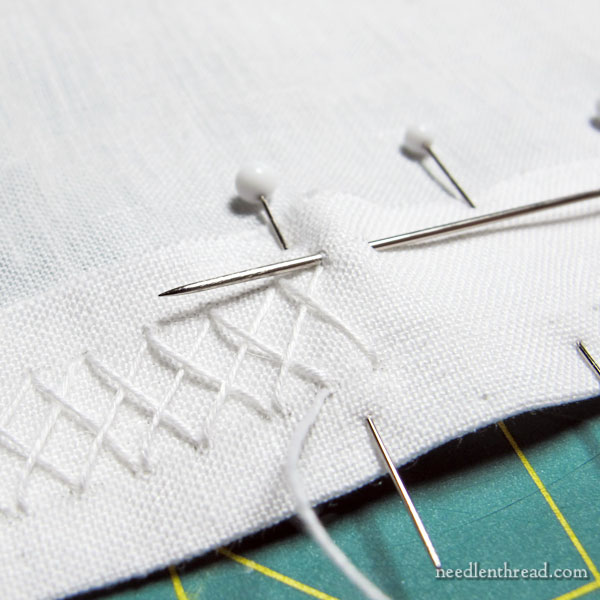
Then, using the 50/3 Londonderry linen thread, I worked a herringbone stitch over the folded extra strip that encased the side of the ground fabric.
I like this part of the process. And I probably overdo it a bit. The herringbone doesn’t necessarily need to be that close together, but hey – it’s not going to hurt it!
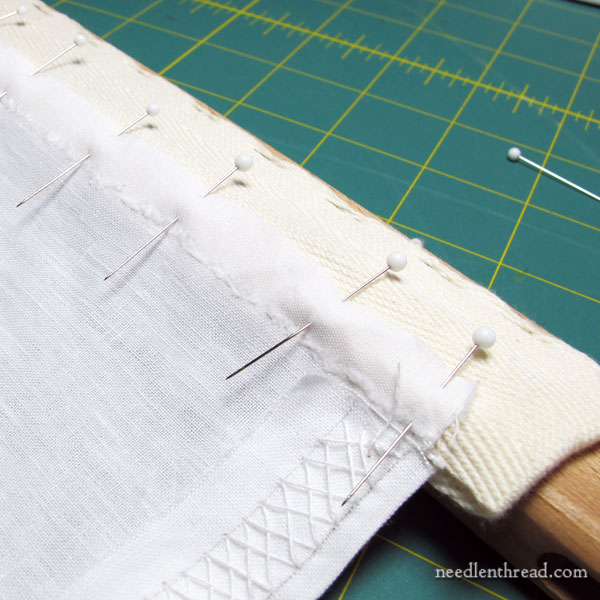
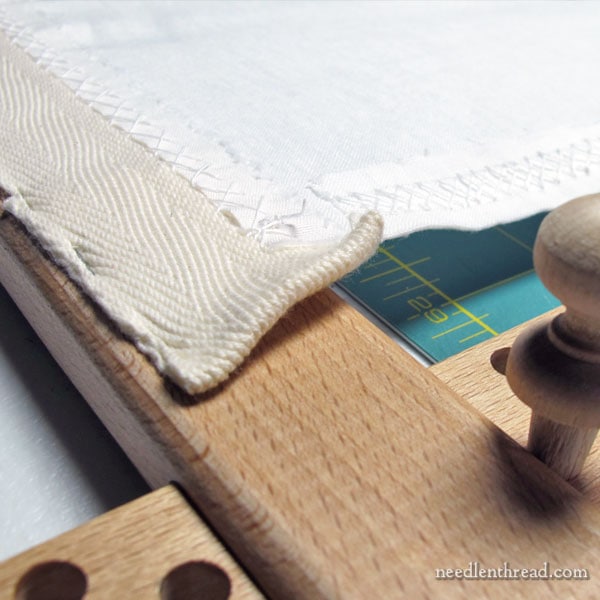
With the reinforcing strips sewn to the side, I pinned the top and bottom of the fabric to the rollers and herringbone-stitched them onto the twill strips using the same linen thread.
This might all sound like tedious work, but I find it engrossing and kind of meditative, once I get into it.
I always view the set up of a project as a Huge Hurdle to overcome, until I actually get into the whole process of setting up. And then I really enjoy it! The trick, I suppose, is just to get myself to start!
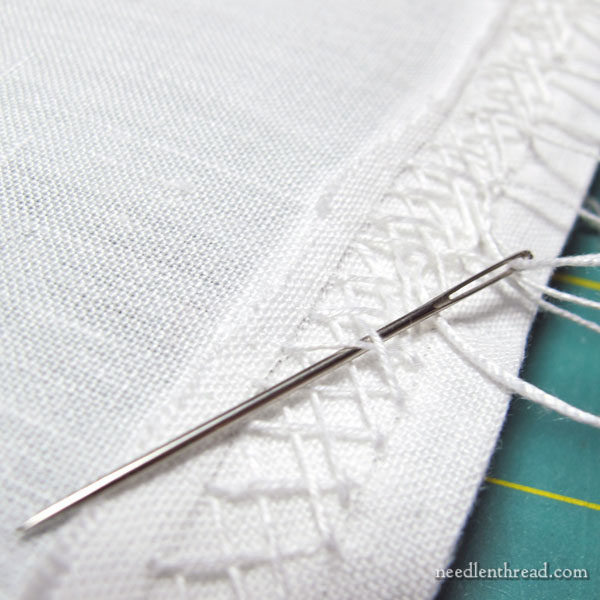
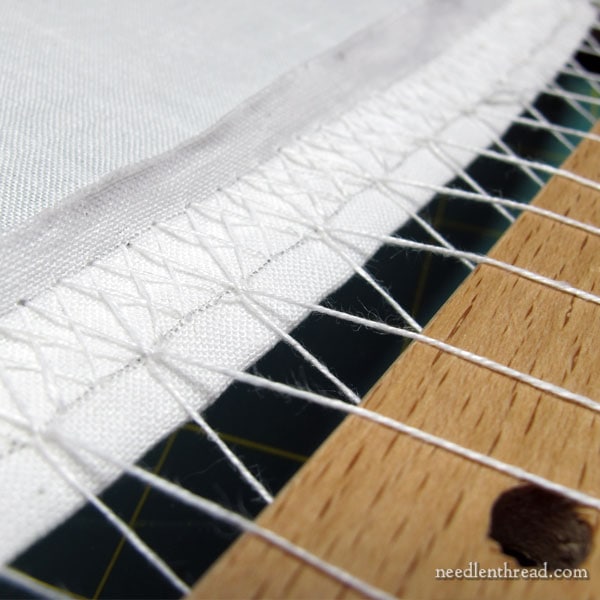
Instead of lacing through the reinforcing fabric strips on the sides, I just laced through the herringbone stitching.
I recently saw pictures of a huge frame set up with the lacing thread passing not through the fabric, but rather through herringbone stitching on the side of the fabric. It was a much neater job than this, and the method was slightly different. It worked magnificently on the huge frame!
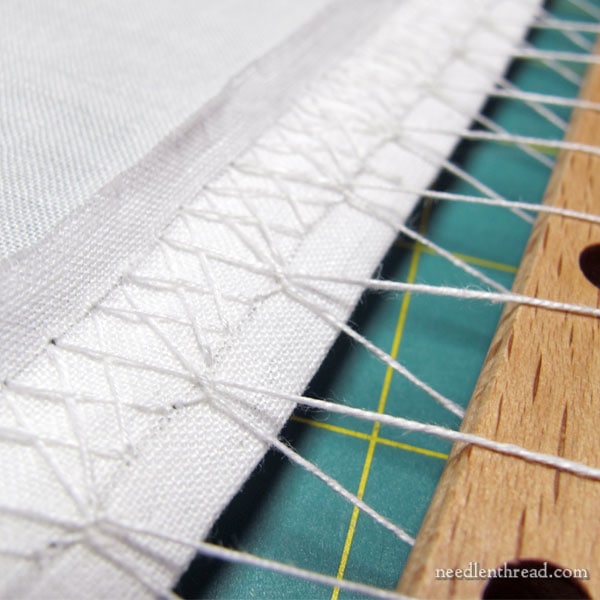
So, when I started lacing the sides of this, I figured why not? No need to pass through the fabric – just lace under the herringbone.
And it worked great.
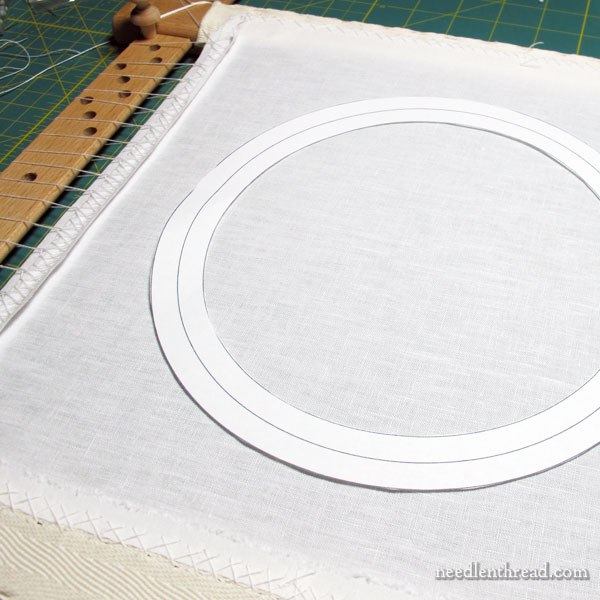
So, the slate frame is all ready to go!
The circle of paper you see in the middle represents the size of the goldwork frame I’ll be working. It’s just a simple, round 8″ frame.
Today, I’ll be tacking the wool felt onto the linen, and then I can start stitching the gold!
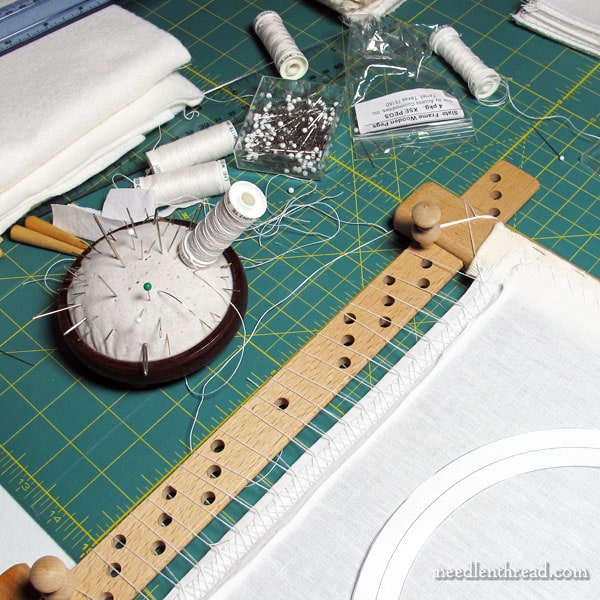
Of course, what started out as a rather neat, methodical-looking workspace ended up being a jolly mess at the end, clearly betraying me and my methods as anything but neat and methodical…
I’ll keep you posted on the progress!
