Good morning, my friends! It has been a long while – the longest blogging break I’ve ever taken! – since writing something for Needle ‘n Thread. Hopefully, this streak is well and truly over!
I’m on the mend, and I can finally sit at a desk. I’ve summarized a small personal update at the end of this article, for those who want to read it. Thank you ever-so-much for the influx of well-wishes! When I returned from the hospital, there were over 1,200 emails in my inbox. I’ve read them all, and they cheered me considerably. I’m sorry I can’t respond to each individually!
While convalescing, I managed to do only a tiny bit of stitching this whole time.
I thought I’d share that with you, along with a couple tips on how to embroider your own hollyhocks.
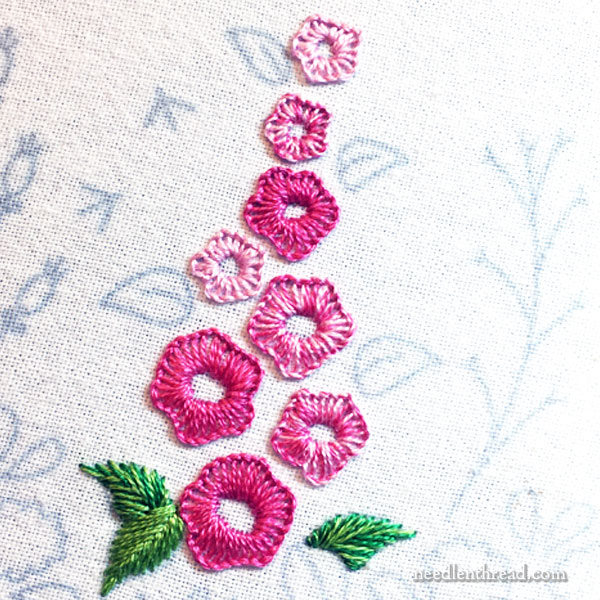
This little hollyhock floral element is part of a larger embroidery pattern that I doodled up for the kids’ classes this summer, but that we decided not to use. It’s a nice garden border and it has some fun elements in it, but we thought it too detailed for the younger kids.
Hollyhocks are pretty simple to represent in embroidery. A few misshapen blobs stacked, from larger at the base to smaller at the top, with a few leaves interspersed, and you’ve pretty much got the basic layout of a nice stem of hollyhocks.
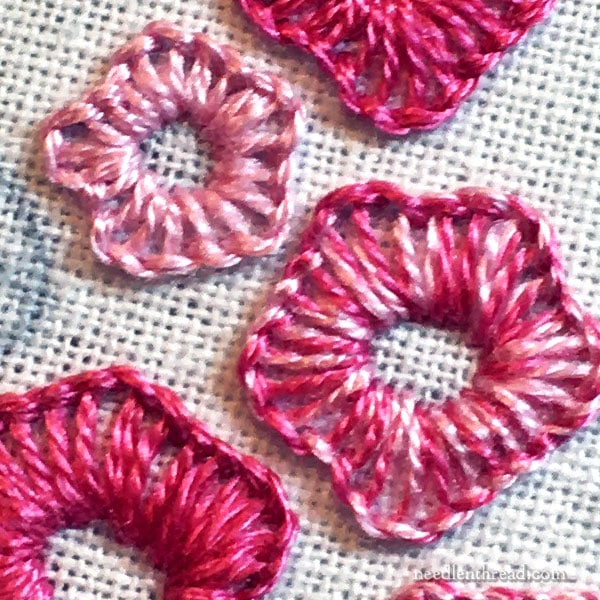
To stitch the flowers on the hollyhock stem, I used the buttonhole wheel approach, conforming the inside and outside of the “wheel” to the irregular shape of the flower. You can find a video for buttonhole wheels here, with tips on how to make them work for you.
How to Keep Your Buttonhole Wheel from Collapsing
Often, the most difficult part of a buttonhole wheel is keeping the outside border from collapsing into the wheel area.
If this is happening to you, it can be for a couple reasons:
1. When ending an individual stitch, you’re tensioning the thread by pulling the working thread into the inside area of the wheel or shape, instead of outside it and in the direction you’re filling the shape; or
2. you’re not keeping enough tension on each individual stitch, so it’s collapsing inside as you progress, due to loose stitches.
If you really struggle with getting your wheel to maintain its shape along the outer edge, here are two things worth trying:
1. Change the direction you’re stitching around the shape. You may find it much easier to tension the thread if you’re working in the other direction.
2. Try the “sewing method” for making the stitch, instead of the “stabbing method.” That is, scoop up the fabric from the front of your embroidery, without passing the needle and thread completely to the back and then bringing it back to the front. Some folks find it easier to maintain a buttonhole filling by “sewing” the stitch (or scooping) rather than stabbing.
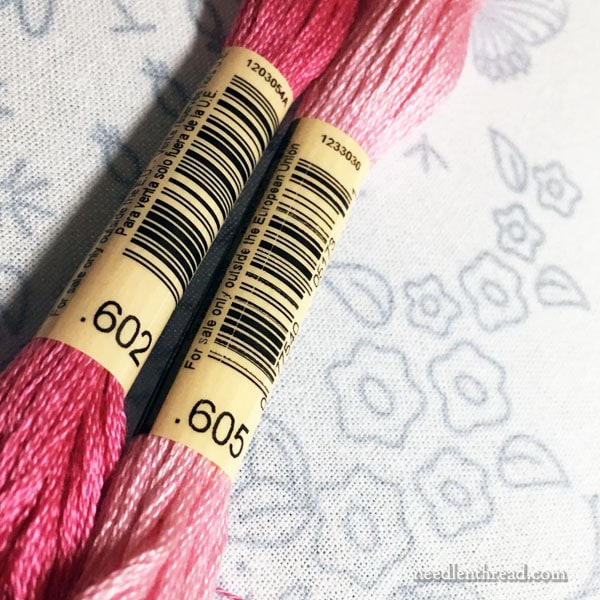
I only used two colors on my hollyhock stalk – a darker pink and a lighter pink of DMC stranded cotton.
To achieve the middle, more mottled pink, I combined one light thread and one dark thread in the needle at once.
All the flowers are stitched with two strands of floss, starting from the base with two strands of dark pink for the dark flowers, then one strand of each dark and light for the middle flowers, and two strands of light for the light flowers.
Other Supplies
I used a #7 crewel needle, and I’m stitching on one of these flower sack towels that I reviewed here and that are listed in the top spot here on my Amazon page. I really like them, and I’ve gotten heaps of positive feedback from others who have since tried them and love them, too.
The Personal Stuff
For those interested, here’s a little letter explaining my 2.5 week hiatus from Needle ‘n Thread.
I don’t normally write about these things directly on the blog, linking to a PDF letter instead. That way, you’re not obliged to rake through all the personal stuff! But for those who are concerned and who have followed along with my personal updates these last few years (since I was diagnosed with cancer), I wanted to share the current goings-on with you, to allay your concern and let you know I’m hanging in there!
I’ll be around on Friday with some tidbits for you, and then, hopefully, it’ll be smooth sailing on a regular basis and we can move forward with lots of fun embroidery projects, instruction, and inspiration!
This article contains an affiliate link to my Amazon page, which means Needle ‘n Thread receives a small kickback for any purchases made through that link on Amazon, without any extra cost to you. Every little bit helps keep Needle ‘n Thread going! Thank you!
