Oh, let’s have some Stitch Fun today, shall we?!
Several years ago, I wrote an article about why it’s important to play with your embroidery stitches now and then. My views on that haven’t changed, not a jot or a tittle.
Playing is necessary with any craft, hobby, or art. When you play around – when you loosen up a bit and try new things – that’s when the juices flow and the Muses sing. Playing is a creative catalyst.
Plus, it makes you better at what you do. The more you play with embroidery stitches, the better you get at stitching in general. Think of it as practice – not the drudging practice of the kid who never wanted to take piano lessons in the first place. Think of it as practice for the adult, who desires, enjoys, and embraces the lessons!
So, there’s your excuse to play with your embroidery stitches! It’s good for you.
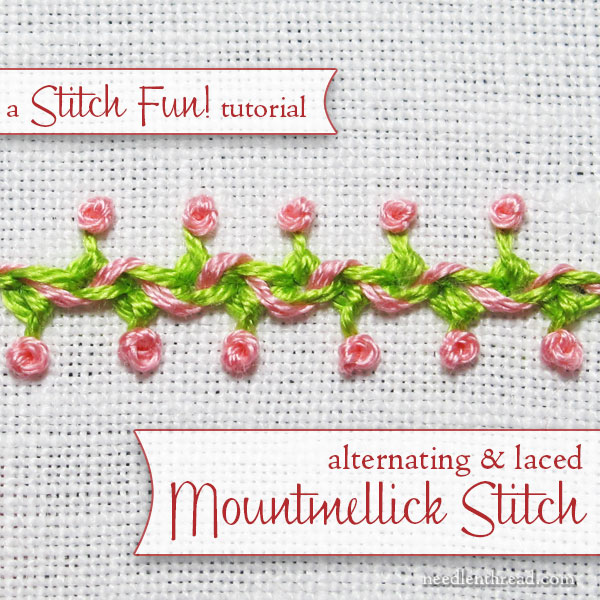
Today’s Stitch Fun starts with Mountmellick stitch as the foundation, worked on alternating sides of the design line. If you’re not familiar with Mountmellick stitch, this how-to video will help you out!
This alternated and laced Mountmellick stitch would make a great addition to crazy quilt seams – and really, anywhere you want a slightly spiked, festooned stitch.
For this Stitch Fun tutorial, I’m using Alba Maxima linen and regular DMC floss (three strands from the six) in a #7 crewel needle.
I’ll be working from the top of the line down, vertically. The stitch can also be worked horizontally, but I find it easier to work it vertically.
And don’t forget – you can click on any of the photos to see larger images.
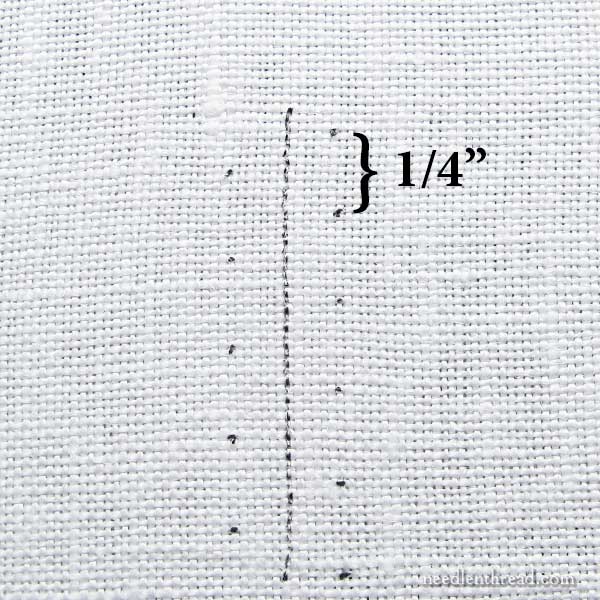
I’ve marked out the path here on the fabric, so you can get an idea of how the stitch moves down the line. Each dot on each side of the center line is 1/4″ apart, and the whole line itself (from the dots on the left to the dots on the right) is about 1/4″ wide.
Feel free to mark out dots when you practice the stitch – it does make it easier to get the spacing right – but once you get used to the stitch, you’ll find you can eyeball the spacing without the dots for guides.
You can experiment with different thread weights and adjust the width of the line, the length of the spikes formed, the depth of the stitches. With finer threads, you might want smaller, more compact stitches; with heavier threads, you’ll want a little more room for the whole decorative band.
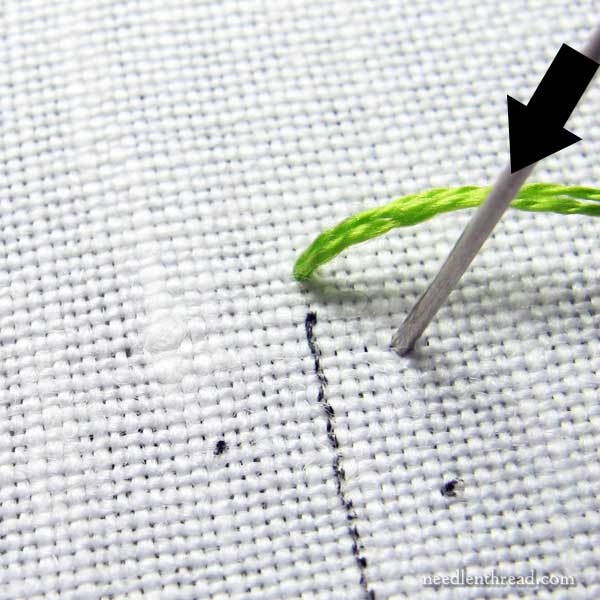
We’ll just start with a regular Mountmellick stitch. Bring your needle and thread to the front of the fabric at the top of the line.
Make a diagonal stitch by taking the needle and thread to the back of the fabric a little way off the design line, which spot, in this case, is marked with a dot.
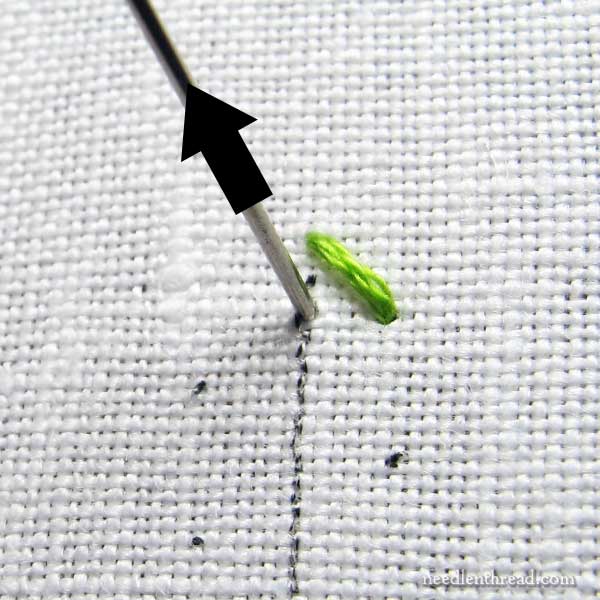
Bring the needle and thread back to the front of the fabric on the design line, directly across from the end of the diagonal stitch.
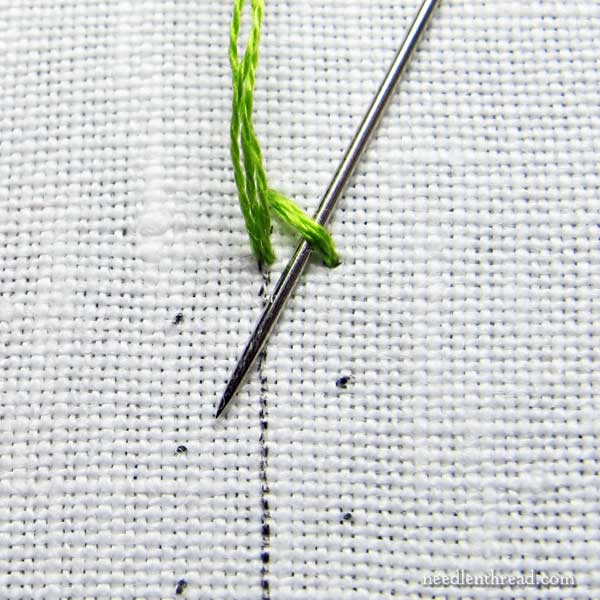
Now, pass the needle underneath the diagonal stitch, from the top down, without picking up any fabric.
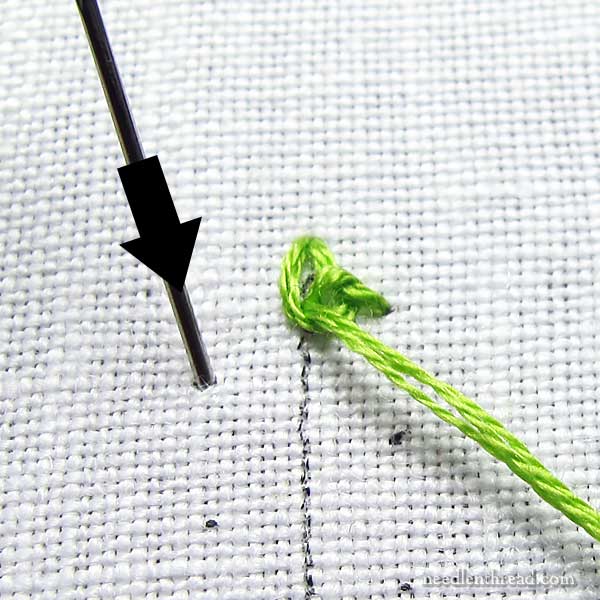
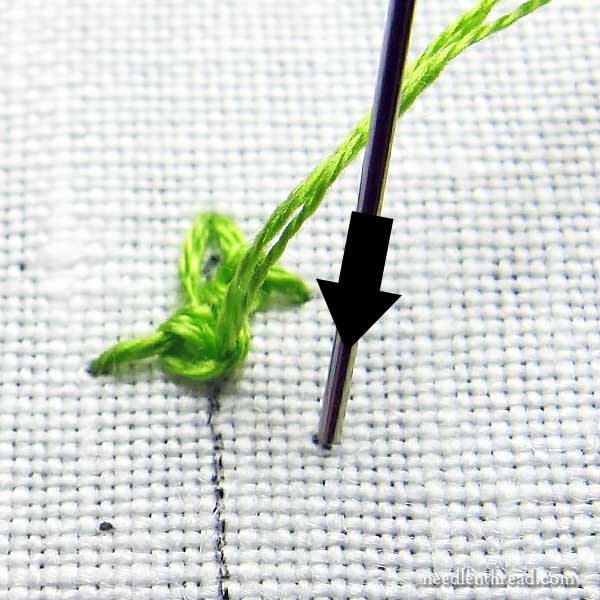
Pull the thread through, underneath the diagonal stitch, and then take the needle down into the fabric at the top of the diagonal stitch, right where you came up in the first place.
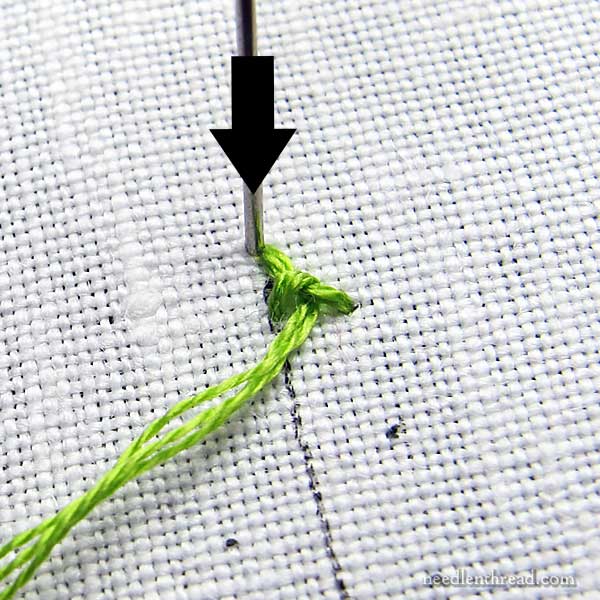
Pull the needle through to the back of the fabric, but leave a small loop on the front, and then bring the needle up into the fabric, inside that small loop, on the design line where you came up immediately after making the first diagonal stitch.
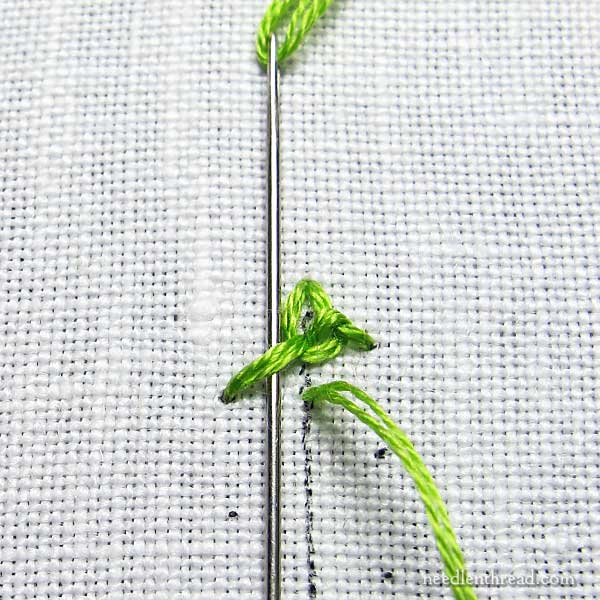
You’re going to make a chain stitch at this point – that’s why you’re coming up inside the loop.
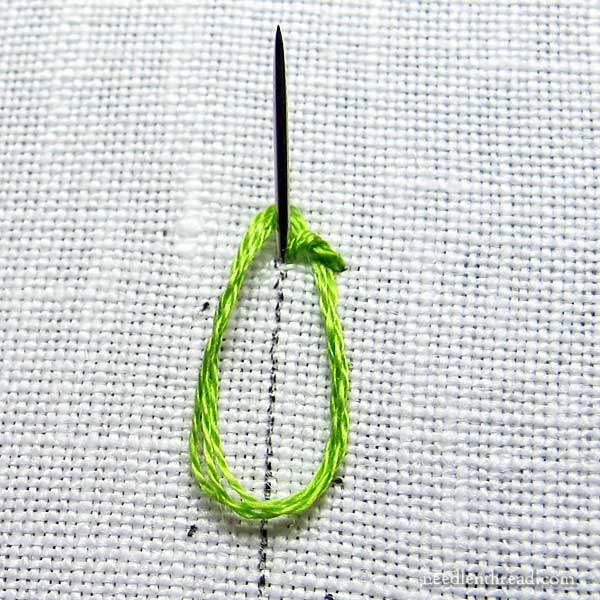
Pull your thread through to tighten the loop around the working thread, to make the chain stitch.
Now, normally, with Mountmellick stitch, you’d just continue this process down the same side of the line, so your little spikes would all end up on the same side.
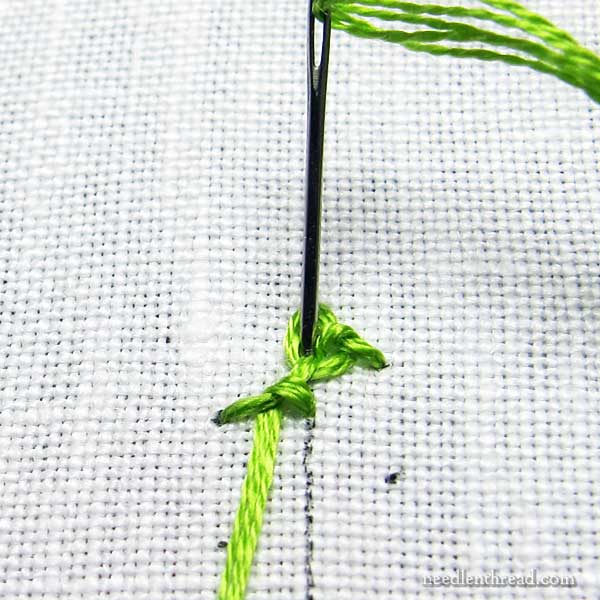
But with this version, we’re alternating the placement of the spikes from side to side. So, the next step is to make your diagonal stitch again, this time going down into the fabric to the left of the design line.
Bring the needle and thread up to the front of the fabric again, right on the design line, directly across from the end of the diagonal stitch, and then pass the needle from the top down, under the diagonal stitch.
Don’t pass over the working thread, and don’t pick up any fabric.
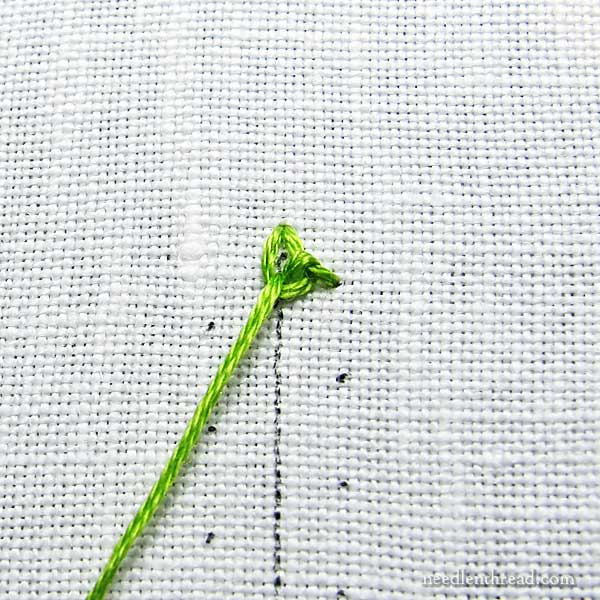
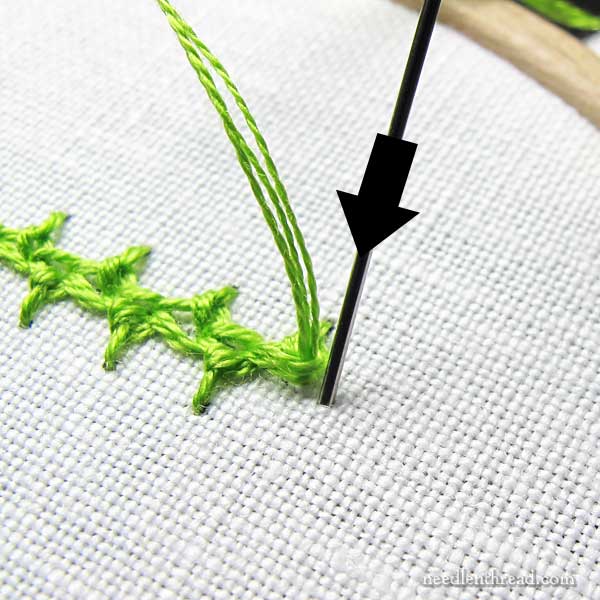
And now you head to the back of the fabric again, this time inside the previous chain stitch, at the top of this last diagonal stitch you just made.
Don’t pull all the way through – leave a small loop of the working thread on the front, so you can come up inside it for the chain stitch.
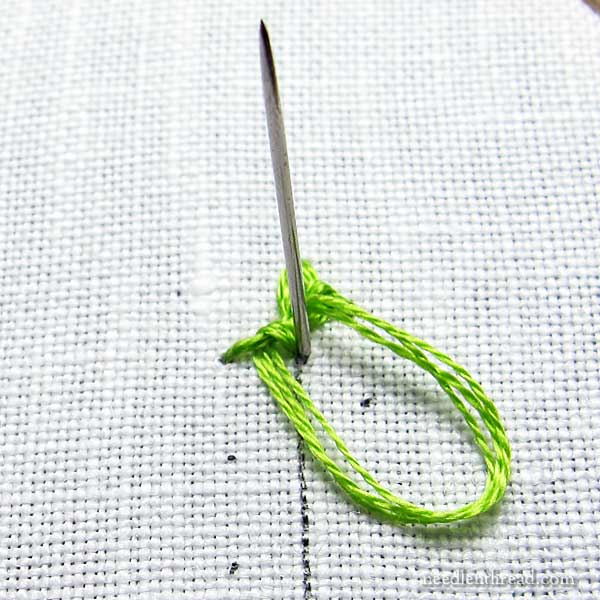
Come up inside the chain stitch loop, on the design line at the base of the stitch as before.
And now, step to the right of the design line out onto the dot, and take your needle and thread down into the fabric for the next diagonal stitch.
Lather, rinse, repeat.
Just continue this order of work all the way down the design line.
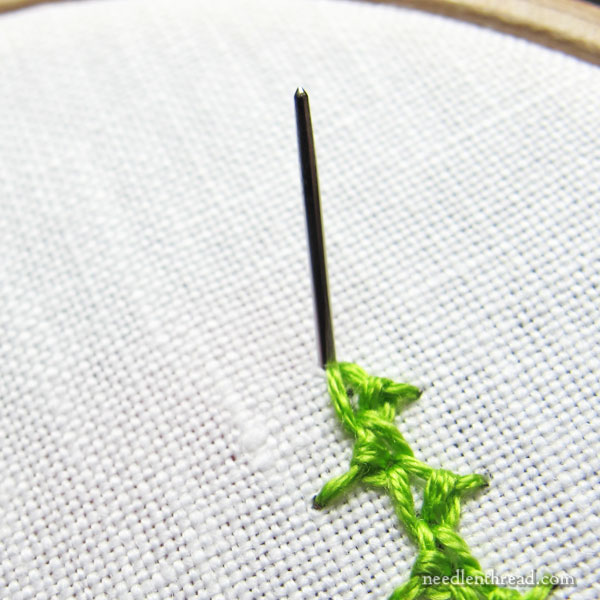
When you get to the end of your line, finish your final stitch with the chain stitch part of it, and then take the needle and thread to the back of the fabric just over the chain stitch, to anchor it.
Time for the fun, fun part!
Switch to a tapestry needle and a contrasting color of thread, and bring the needle up at the top of the line you just stitched.
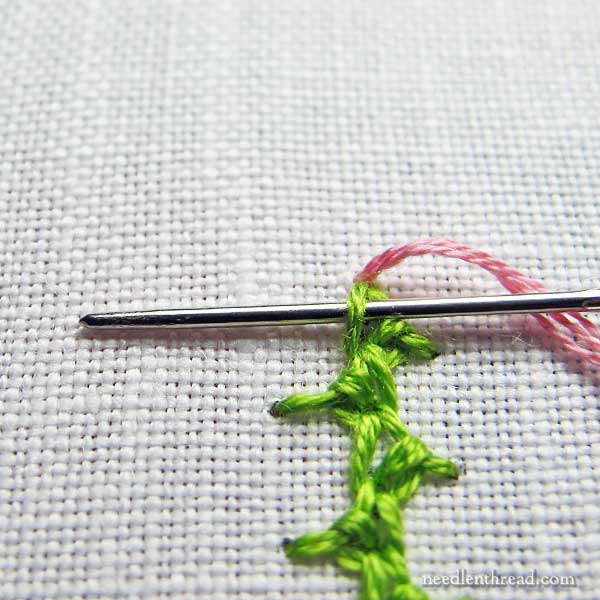
Pass the needle from right to left, under the left side of the first chain stitch on the stitch line. This will be directly across from the first “spike” on the right.
Remember to pass under only the left half of the chain stitch. Take the needle into the center of the chain stitch and pass out under the left side. Don’t pick up any fabric.
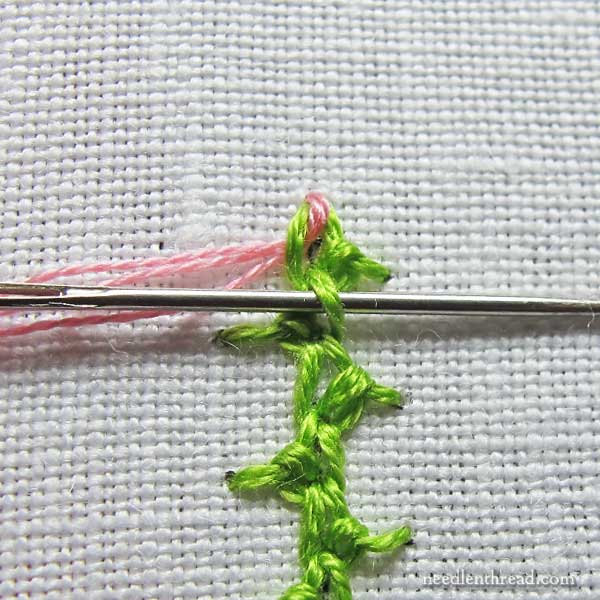
Then, pass the needle under the right side of the next chain stitch down. Again, pass into the center of the chain stitch and out under the right side, without picking up any fabric.
Continue down the line, lacing the chain stitches this way, alternating from side to side.
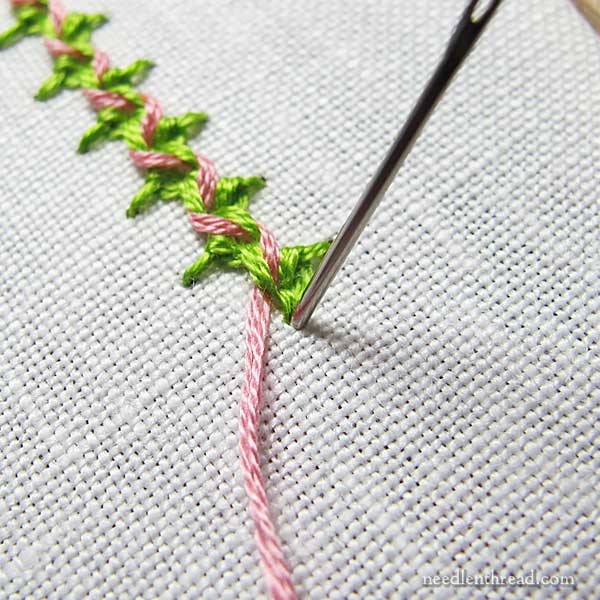
When you reach the end of the line, take the needle and thread to the back of the fabric at the end of the last Mountmellick stitch.
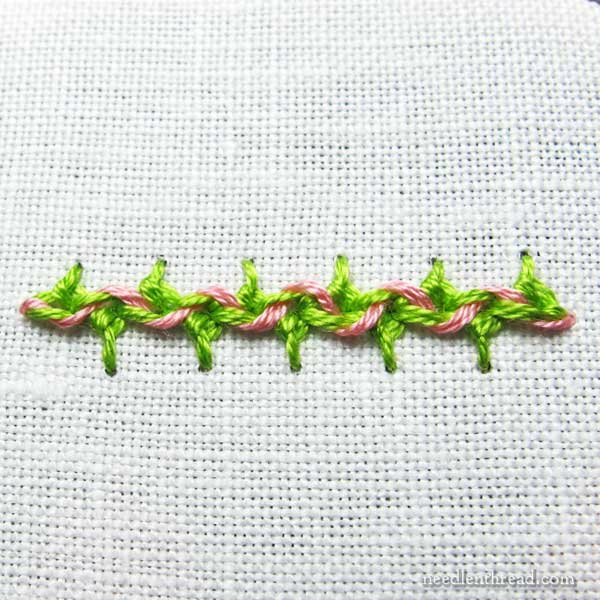
Here’s the completed line of alternating Mountmellick stitch, laced.
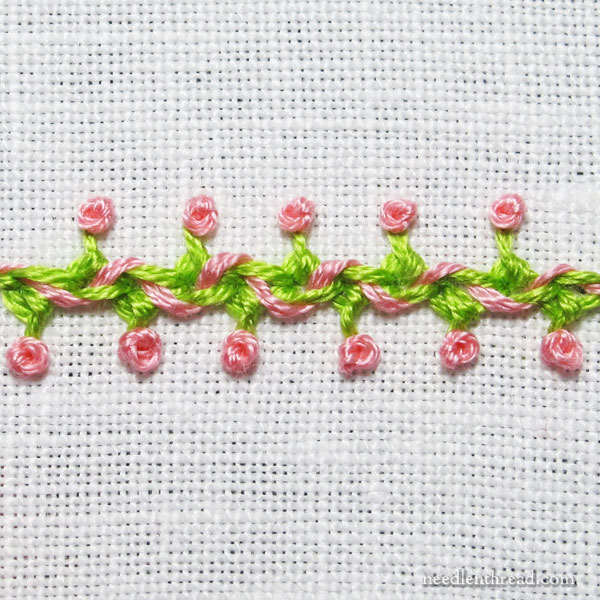
And of course, those little spikes just beg for French knots!
So that’s it – alternating, laced Mountmellick stitch, with a few French knots thrown in for good luck!
Enjoy playing with it – it’s a fun stitch!
If you want to play around with some embroidery stitches and you’re looking for instructions, you can find many more Stitch Fun Tutorials right here on Needle ‘n Thread, along with over 75 how-to stitch videos, and an alphabetical index of embroidery stitches here.

